You might be thinking of using reference photos to help you draw. And one of the most common questions you may have when starting to draw is, “is drawing with a reference photo cheating?”.
Using reference photos for drawing is not cheating. It’s actually one of the best tools you can use when learning how to draw. After all, you can’t draw something you can’t see. Only by observing and studying your subject can you properly learn and know how to draw it.
This article will talk about references in more detail, along with a helpful exercise, so you know how to use references to improve your art.

Table Of Contents
Is Using References Cheating Or Frowned Upon?
For a long time, references have been a hot topic. Some artists, or worse, mentors and art teachers, felt that using references was a form of cheating in art.
Luckily, in more recent years, the art world, as a group, started to speak up more freely about references and their importance.
Not only as a learning tool but as an available tool you should use whenever drawing something.
You can’t learn how to draw something without first looking at it. Observing and truly analyzing your subject will help you understand it better.
Without knowing the subject or looking at it, you cannot know if your representation of it is correct.
Throughout history, most artists would work only with the use of reference! When painting a portrait, they needed the person to be present so they knew their features.
When painting a specific place, they must first know what it looks like.
Even drawing from your imagination, there must be a reference from which to take inspiration.
You wouldn’t be able to draw a person without ever seeing someone. You’d draw your interpretation of a person, but that doesn’t mean it reflects reality.
Of course, you don’t need to be completely realistic with your drawing subjects.
However, it’s essential for you to first get familiar with them before starting to deconstruct them and make your own thing.
Nowadays, there are even people who’ll upload or sell their photos so artists can use them as references!
Take the example of AdorkaStock, for instance, or even JookpubStock. Both models focus on taking beautiful photos of themselves, acting out different situations, so artists worldwide can use them for their drawings.
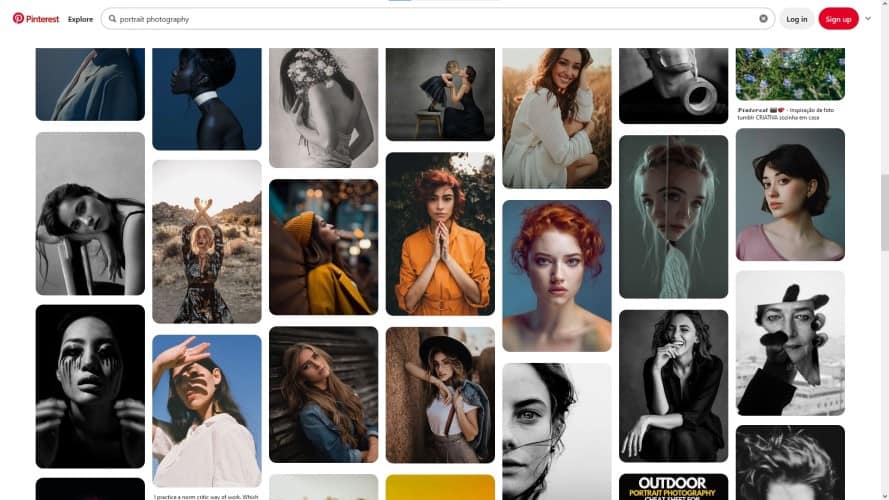
There are other places where you can find so many helpful references: Pinterest, for example, is a great place to keep inspirational images.
I especially like to come here when I need to create a mood board for a new character or illustration I’m making.
If you can’t find a specific pose, object, mood, or scene, you can make your own references!
Take photos of yourself, places you’ve been, and objects you like. Keep those photos somewhere on your computer. You can even print some of them, if you prefer!
Finally, another good way to use references is just to go outside.

If you want to draw trees and flowers, go to a nearby park. If you’re looking for people, go to a coffee place and sketch out the people that come and go.
There are many ways to use reference, either from your house or exploring the outside.
References are in no way cheating. It’s a necessary tool to improve your art, so use it!
Is It OK To Draw From A Photo?
As I said before, there are many ways that you can use references. In real-time, you can go outside and look at the subject you want to study.
Although it makes for a pleasant outing, sometimes it might not be the most helpful. For example, if you’re sketching people on the street, they’re always moving around.
If you’re not used to quick sketching, this might make things a bit hard for you, and chances are you’ll feel more overwhelmed with the whole task than learning something.
Not only that, but some people do not enjoy drawing in public spaces.

So you have another option. Use what you have at home. But even then, you might not have the exact subject you need to draw.
And that’s when we resort to photos. You can take photographs of yourself, for example!
If you want to draw a specific pose or even expression, you can take photos of yourself doing just that.
This is helpful when you want to draw something very specific but can’t find the proper reference.
Then, you have the internet! Here you can find so many photo references to use on your drawings.
And it’s absolutely fine to do that. I, and many other artists, highly recommend using photo references whenever drawing something.
Yes, you might think you already know how to draw a specific object or subject. But our memories are actually quite faulty and will hardly maintain every single detail right.
So, to ensure you’re not missing anything, it’s good to have a reference by your side.
You might be worried about using a reference without the original author’s approval.
If so, then that’s very easy to overcome: credit the artist!
Just like you’d like some credit if someone shares your art, so do photographers that upload their photos for the world to see and use.
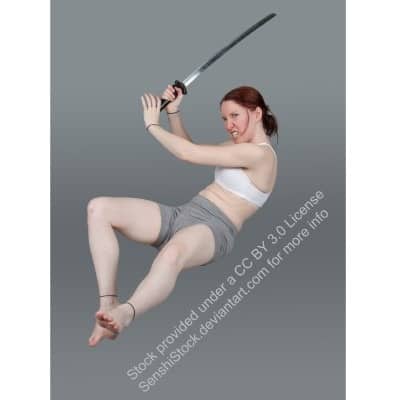
Photo stock models like the ones mentioned above are pretty active on social media, and they’ll:
- Love to see your artwork;
- Be thankful for the credit you’ve given;
- Will share your work for others to see!
If the image you used as a reference has no apparent author, you can always share that image along with your artwork.
Many artists love to draw certain outfits, aesthetics, or objects they randomly found online, and there is nothing wrong with that!
You’re not picking a photo and saying it’s yours. You’re letting it inspire you and make your own representation of it.
Differences Between Copying And Referencing
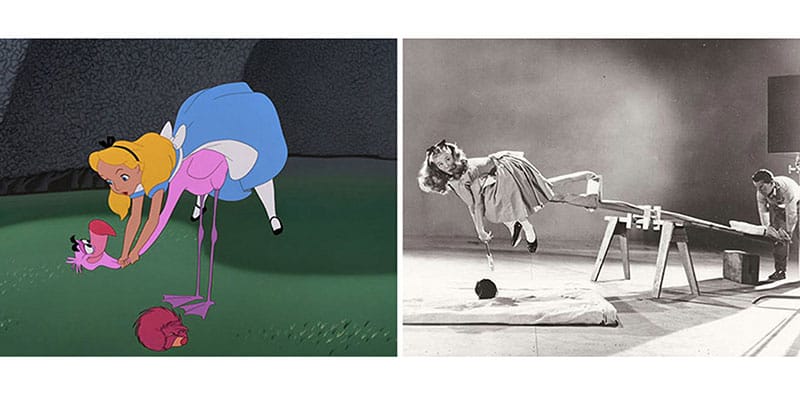
When referencing something, you’ll mostly use it to inspire yourself or ensure you’re being faithful with a subject’s overall proportions, sizes, and shape.
For example, if you’re drawing someone dancing, it’s helpful to have a similar photo of the pose you want so you know how to draw it.
Otherwise, chances are you’re going to make some mistakes.
For example, you might draw an arm in the wrong place or get the proportions wrong.
In short, you’re making your own interpretation of the reference. It’s still your style.
With copying, however, you’re replicating, line by line, the image/photo you’re looking at.
There are no differences between both. You are not giving the drawing your own voice.
Now, is it wrong to copy? Not really, as long as you’re learning something from it.
You can grab a picture you took or found online and copy exactly what you see in it. It’s actually a great learning tool.
I always recommend my students draw shapes on top of reference images, so it’s easier to know and learn how to draw the body!

If you’re having difficulty with a reference and just can’t get it right, getting into the image and drawing on top of it will help you understand what you’re doing wrong.
When you do, you can go onto your drawing or sketchbook again and repeat the same motions you just learned!
Even when exploring your own style, it’s ok to experiment with other people’s art. You can better understand their reasoning and figure out what you want for your own art.
You shouldn’t share these copies with others or your social media accounts. Nor should you claim it as your own, for it isn’t!
These are studies and are best kept for yourself.
If you are indeed drawing from someone else’s reference photo, always remember to give them credit.
The key to both referencing and copying is learning. These are tools you use to improve as an artist.
As a beginner, it’s only natural to copy mainly from a photo reference. Trying to draw precisely what you see.
But as you improve and learn, you’ll see that you’ll mostly need a reference as a guide, so you don’t forget anything significant!
How To Use References To Improve At Drawing
Using references is more complex than it first meets the eye. It can be tough to find what you’re looking for.
Not only that, but sometimes it’s hard to find high-quality photos of the subject/object you want to draw.
Finally, how do you even use a reference? There are different ways to tackle it, and each artist has their own process, so I’ll tell you about mine:
1- Find Your References
It’s essential to find good references when drawing. This is especially true when you’re drawing something you’re not yet too familiar with yet.
So, when looking for a reference, try to be as specific as possible with what you’re looking for.
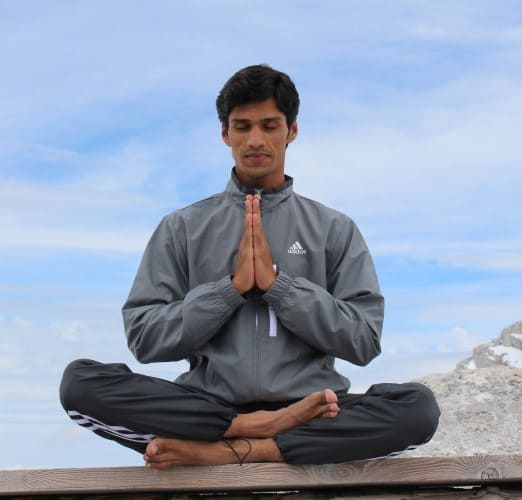
For example, if you want to draw someone sitting on the floor, with their legs crossed, search for ‘sitting cross-legged.
If you want to draw a lake in the middle of a forest, search for that precisely.
When choosing your references, find something that clearly shows the pose or subject.
If it’s people, it’s better if they’re wearing fitted clothing, so you can see the whole body and how it behaves.
Look for high-quality photos so they’re sharp and you can see all the details you might need.
If you find something low-quality, it might be too grainy, and you can miss important information.
You can find almost anything through google images. However, using photo stock websites is always your best bet.
Suppose you’re unsure where to look up good reference photos. In that case, we have a list of 7 websites filled with beautiful photo references for free!
When looking for references, it doesn’t matter what, be sure to look for more than one. This way, you have more options, maybe even from different perspectives, that you can use for practice.
Finally, if you’re looking for something specific and can’t find suitable enough references, take your own photos!
Many artists prefer to always make their own references, when possible, so they have precisely what they need.
When it comes to poses, they can even test out slightly different options to later decide what works better in the artwork.
By making your references, you also don’t need to worry if you’re using a reference you shouldn’t.
You also don’t need to worry if you’re copying someone’s work, nor need to credit anyone else.
You’re using your own references and can do with them whatever you want!
If you choose to take your own photos, take lots of them, so you have several options.
Keep them in a folder on your computer, so you can use them in the future.
2- Create a Moodboard
This step is optional. However, I think it’s beneficial to better understand the mood you’re going for in your artwork.
When you create an illustration, you’ll be drawing more than one element.
Even if you’re drawing a character with no background, chances are you’ll be choosing several elements for them:
- Pose;
- Outfit;
- Colors;
- Accessories;
- Hairstyle.
These are just a few things you’ll draw for a single character.
After finding my references, I like to put them all together, so I can look at everything at once!
By creating this mood board, I can also understand better if all the elements I chose work well together or not.
By going through this extra step, I might realize that some references aren’t as good as I thought they were or that I need to go in a different direction with them.
Even if you’re practicing a single element, it’s good to have several options.
Let’s go with the sitting crossed-legged example again. Having more than one reference with slight differences can help you better understand the pose.
Not only that, but there are different ways you can draw this pose. It could be from the side, front, or back.
The person could be sitting on a chair, bench, hard floor, cushion, or in the dirt. There are many factors to take into account.
Is the person relaxed or taking on a more tense pose?
Find different versions of the same pose and put them all together. Now you can look at all of them and practice them.
As you look at all these photos together, you can more easily understand or decide what mood you’re going for when drawing that pose.
All in all, mood boards are very helpful in setting the whole scene for your artwork. It helps you make important decisions before jumping into drawing!
3- Find Shapes
Now that our references are ready, it’s time to use them. When tackling a new subject, I like to go onto my references before trying to draw them.
Again, let’s go with the sitting cross-legged example. This isn’t an easy pose to draw. Since most of the lower body is folded, you can’t clearly see each element.
Even if you already know how to draw the human body, drawing it in more complex poses can be challenging.
So here’s what I like to do:
- Lower the opacity of your references. If you want to do this with pencil and paper, reduce the image’s opacity first and then print them. If you’re drawing digitally, lower the layer’s opacity.
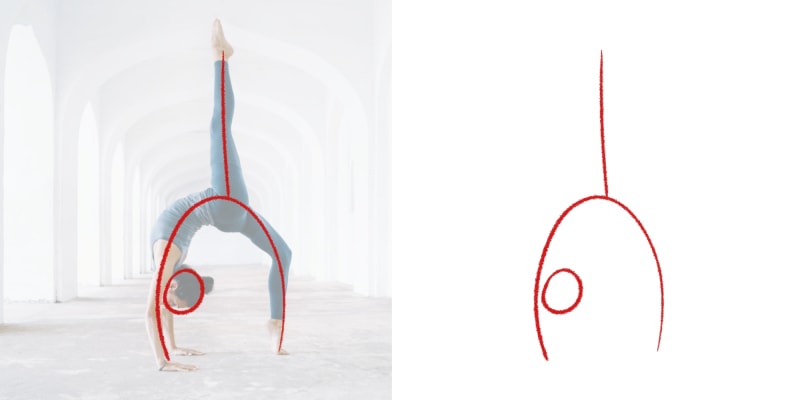
- Pick up a pencil or brush you like. You can use any color. However, I like to use red since it’s a color that stands out. This way, you can see what you’re drawing.
- Now go onto your references and look for shapes. We’re not going to trace the images. We’ll break the pose and body into smaller, simple shapes!
From head to feet, go through the whole photo and use simple shapes for each body part.
These shapes can be irregular but also squares, rectangles, circles, and triangles. What matters is that they make sense to you.

This is an exercise I always go through in our Drawing Courses because it helps us better understand the subject and makes it much less scary!
The human body is very complex, and trying to draw it just as we see it right away can be overwhelming.
In fact, this is true with any new subject you’re learning to draw!
However, everything feels much easier when we already break it down into the most basic shapes we are familiar with.
So, before drawing anything, go into your references and find shapes! You can go to the next step when you have your shapes figured out.
4- Practice On Your Sketchbook
Alright, we have our references, drew and found the basic shapes on top of them. So now it’s time for some practice.
Go onto your sketchbook or drawing software of your choice and start drawing.
Keep your references by your side, so you can look at them while drawing them. If it’s helpful for you, create a few guidelines so everything is in the right place.
You’ll now replicate the shapes you found on your reference! This time, you don’t have the photo right underneath your pencil.
However, the practice you’ve gone through will already be enough to create muscle memory.
Go through each shape slowly. It’s normal for the first drawings to not be perfect. You’ll still have to deal with proportions and placing.
Just take your time and use any tool you think might help.
Again, some guidelines might help in keeping the right proportions! If they match the guidelines on your reference, you’ll draw everything in its rightful place.
You can practice these shapes as much as you want.
Once you feel confident enough about them, you can start refining them and adding more details until it looks like an actual human body.
Just be patient and have fun with the whole process.
5- Keep Your Moodboard Nearby And Create Your Own Artwork
Once you’re done practicing and feel confident in what you just learned, it’s time to create a final artwork!
Go into your canvas and apply everything you have learned so far.
Be sure to keep your mood board nearby, so you can look at your references whenever you’re unsure of something in your drawing.
You can always go back and change things.

At first, this whole process might seem too long; however, as you improve and gain more confidence, you can skip a few steps.
For example, if you’re drawing a subject you’re already too familiar with, you don’t need to go through the process of finding shapes and drawing on top of your references.
If you already know how to draw it, you can just keep the photos beside you as a visual helper and continue your work.
I recommend using references even if you’ve already mastered a specific subject.
Again, our memory can be faulty; we might forget or miss something by accident and realize it too late.
Not only that, but references serve as inspiration as well. They’re not just learning tools you use when you need to learn a new subject.
They exist to help us find inspiration for our next project. It can be colors, a specific object, a particular mood, or scenery.
Whatever you’re doing, have some references by your side!
Do “Real” Artists Use Reference Photos?
As an artist grows, you’ll realize that the most popular and experienced artists always use references.
When learning to draw, we tend to start randomly, trying to replicate things we once saw.
We rely on our memories because we think that’s enough.
However, as you grow, you’ll understand that to be able to draw something, you first need to actually see it.
And seeing it once and then trying to draw from that memory isn’t enough. We have to see it and study it as we draw it!
That’s the only way that you can draw and keep on improving.
Even veteran artists don’t know everything and are always learning. That’s why they use reference photos.
These artists already know they can’t solely rely on their memories. They need something real.
Any professional artist you meet or follow on social media will share their experience and show how references have helped.
Many of these artists even share studies they make from references they found or took!
Sometimes they use references to study and improve their artwork. Others will use it as inspiration for the characters and the stories they’re telling.
It doesn’t matter if you’re a beginner or a veteran artist; references are the best tool for creating art and are your best friends.
Use them to develop new ideas, learn a new subject, and help guide you throughout your artworks!
Drawing From Reference VS Drawing From Imagination (Differences)
Understandably, some things you want to draw live in your head only.
You might want to draw different creatures, spaceships, animals that don’t exist, and so on.
However, all these things will still be based on something that exists in real life.
Even though dragons come from our imagination, they’re based on animals that live or used to live on our planet.
Aliens can be based on human beings or other animals.

Everything that comes into our imagination is based on examples from real life.
So even though you can draw from imagination, it’s essential to first learn the basics.
What you’re learning depends on what you want to draw. If it’s characters, learning how to draw the human body will be important.
Even if you are drawing fantasy characters, most of them might will have similar anatomy.
Some fantasy characters and creatures also have features found in animals. So, learning how to draw certain animals will also be helpful.
Whenever you’re drawing from imagination, it’s good to find references that recall the subject you’re drawing.
This way, you can better plan how the creature or environment you’re creating.
Again, as you become more familiar with the subject, you’ll notice that muscle memory and imagination are enough.
However, having a reference or two by hand will never hurt.
I’ve drawn my character Gin a hundred times already and know by heart how to draw her.
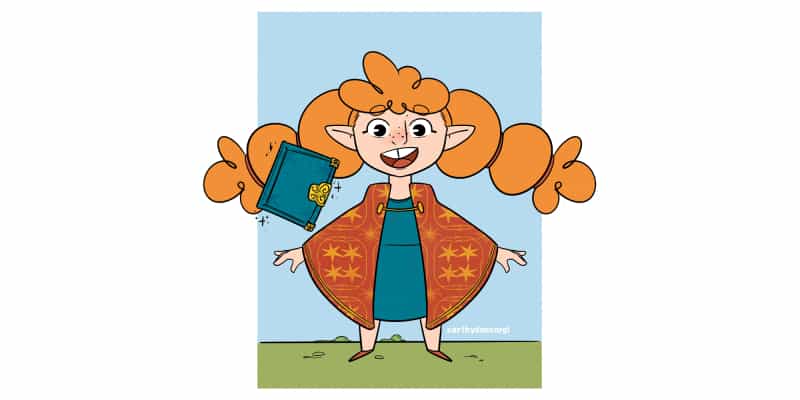
But I always like to open a drawing of her as a reference, so I never forget anything.
Drawing from imagination or reference can co-exist, so make use of both!
And now, if you’re ready to start drawing some new poses, here are 9 Amazing Pose Ideas To Draw Today! (With Photos)
Here are a few more articles that might be of interest to you:
- 21 Best Sitting Drawing Reference Poses (Male And Female)
- 7 Best Hand Reference Photos For Drawing (With Resources!)
- 11 Best Portrait Reference Photo Websites For Artists
Patricia Caldeira is the main writer here at Don Corgi. She's an art teacher with over 20.000 happy students across many platforms and courses!
Enjoy your stay and as always:
Keep on drawing!

")

