When it comes to figure drawing, arms can be quite simple to draw.
But due to the way they move and how long they are, it can become a bit confusing at times.
The secret is finding a good process to figure out and memorize the arm proportions and break everything into simple and basic shapes!
In this drawing tutorial, we’ll show you how to draw the arms easily, step-by-step.
Table Of Contents
Proportions Of The Arm
When drawing the arms, it’s important to consider their proportions concerning the rest of the body.
More commonly than not, beginner artists struggle with these proportions the most.
As they draw the arms, they often end up too long compared to the rest of the body.
This is normal, but there’s a simple way to always draw the arms with the right size and proportions!
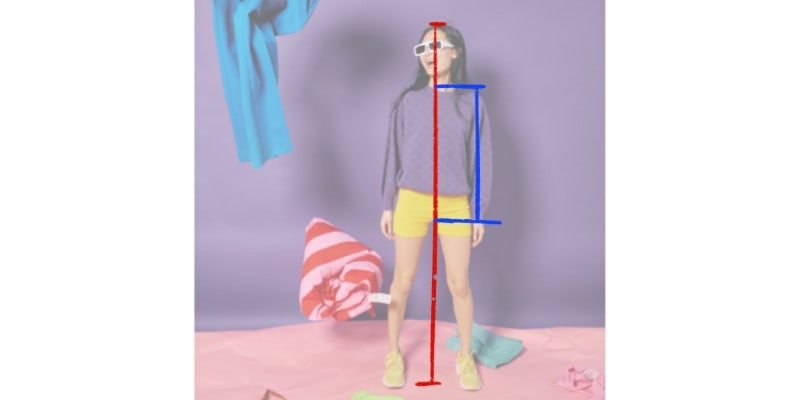
Using the head to measure the body’s proportions, you can easily measure any body part with it.
So, if you grab a reference image of a person standing, you can circle the head to use as a measurement.
Then, use that circle along the whole body. Generally, the body can be divided between 6 to 8 heads, depending on how tall you want the person or character to be.

If you notice, you can use the head measurement to learn how long the arm should be.
According to our example here, the arm is roughly 3 heads long. One for the upper arm and the other for the forearm.

The arm can appear shorter or longer, depending on how tall the person you’re drawing is.
Using the head as a measurement can be useful since you can draw your characters with any height or size, but keep the proportions always right!
Another way you can memorize how long the arm should be is by using guidelines and remembering where each body part goes.
In this case, the arm starts in the shoulder area right below the neck and will end where the legs start!
This can be a bit harder to remember, but it also works.
If it’s easier for you, use as many guidelines as you need to know where everything goes.
Breaking Down The Shapes Of The Arm
With any drawing subject, dividing everything into simple and basic shapes is always a good practice.
This way, you’ll focus on one section at a time instead of the whole arm, making the process much easier to understand.
1) Start With The Shoulder
Let’s start from top to bottom. In this case, it means we start with the shoulder.
Think of the most basic shape that you could use for the shoulder. A circle or oval shape will work very well, for example!

You can use a more complex shape, such as a quarter of a circle or even something similar to a lemon wedge.

It doesn’t matter what shape you’re using. What matters is that it makes sense to you.
Simplify the shapes as much as possible, making it easier to memorize and draw!
2) Upper Arm Anatomy
For the upper arm, you can use simple forms, such as a rectangle or even an upside-down trapezium, to make it more interesting.
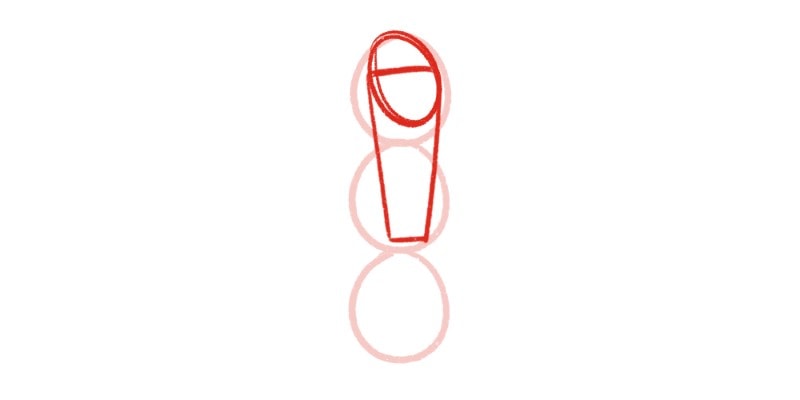
This shape intersects with the shoulder shape and is as long as the bottom of our first circle that we are using as a guideline.
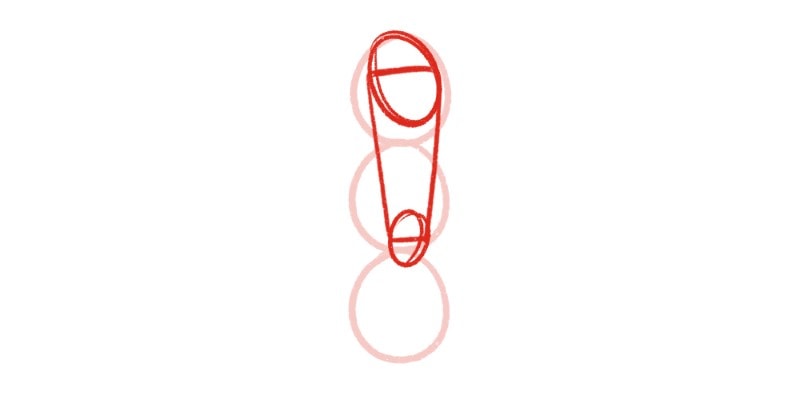
3) Drawing The Elbow
The elbow connects the upper arm with the lower arm. It’s a small area that allows us to bend and move our arms around more freely.
Therefore, we can use a round shape, such as an ellipse. Similar to what we did for the shoulder!
Depending on the arm’s position, you can adapt the elbow shape as needed. But we’ll go through it further in this article.
4) Drawing The Forearm Anatomy
This is going to be our last shape when drawing an arm. It will be slightly different than the one for the upper arm.
The upper and lower arms are quite similar, but generally, the forearm appears thinner and can be drawn with an accentuated curve.
Therefore, I like to use a shape similar to a lemon wedge.

The curve is drawn on the outer side of the arm, while the inner side can be done using a straight line!
Depending on the type of body you’re drawing, these shapes might vary in proportion. However, the shapes are almost always the same.
You need to adapt them to fit the desired body type!
5) Clean The Shapes And Finish The Drawing
We successfully divided the arm into simpler shapes, and it’s good to practice drawing these forms a lot so you get familiar with them.
Again, there are no right or wrong shapes here, so you can try different shapes and see what makes the most sense.
Once you’re done practicing the sketches, it’s time to finish your arms drawing!
For this step, all you have to do is outline the sketch. Go around each shape and outline the overall form of the arm.

You can add color, shading, or other details to the arm!
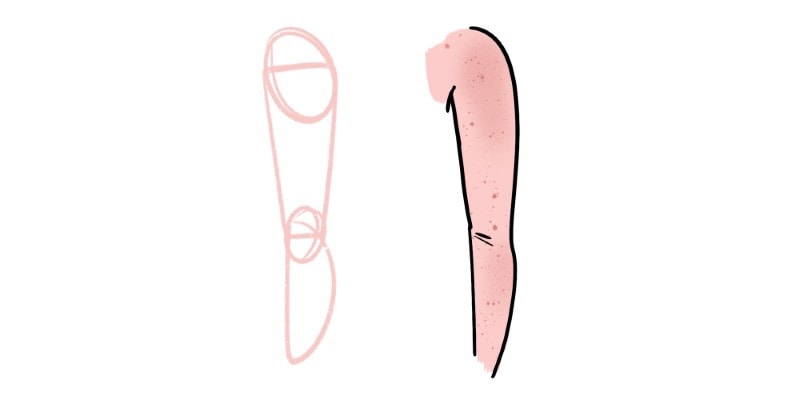
As you can see, drawing arms with simplified anatomy can be very easy.
Just remember that the arm can be divided into 4 main shapes: shoulder, upper arm, elbow, and forearm, which ends on the wrist.
Go through each part of the arm using simple shapes, as we did here, and you can never go wrong with drawing the arm!
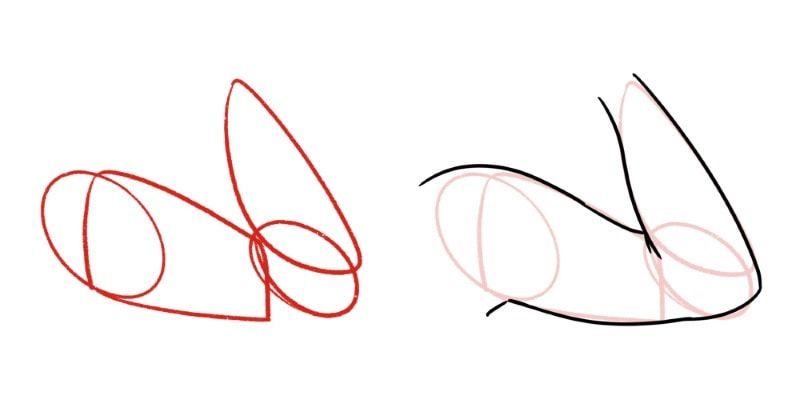
Bending The Arms
Arms are very flexible when it comes to movement. You’ll want to pose your characters in different angles and situations when drawing.
Chances are, you’re going to draw the arms bending in some way or another, many times, depending on the action you’re drawing.
Although it can appear more difficult to draw, the shapes you use here will be the same as we did before.
However, these shapes might need to be adapted when the arm bends.
For example, the upper arm will appear bigger when drawing someone showing off their muscles!
Also, when bending the arm, the muscles contract, so they’ll appear shorter but thicker.
Try to take that into account when drawing your character’s arms!
These movements and changes can be more or less obvious depending on their body type.
Other than that, when bending the arms, the shape that will move the most will be the forearm.
So, you can move it according to the angle you’re going for!
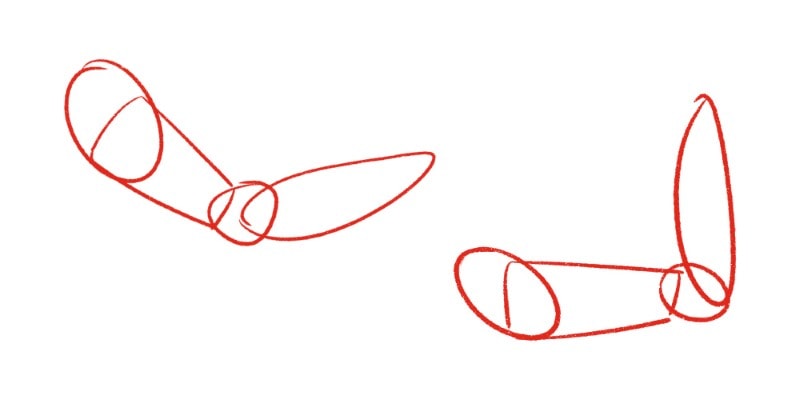
Experiment with shape, proportion, and angles and see what works best, depending on the situation.
Once you get the main shapes down and know how to draw them, it’s all a matter of experimentation and practice when drawing arms or any other body part.
Related Questions
So what other questions might you have about drawing the arms?
Let’s cover those!
Do I need to memorize muscle names to draw the arm?
No, you don’t need to memorize muscle names to draw the arm. You can learn about the triceps, biceps, ridge muscles, brachialis muscle and much more!
And if that helps you to draw them, great for you.
But in general, you don’t nee to memorize the arm muscle names to draw them correctly.
Instead, memorize the shapes and practice a lot!
Are you ready to dive into drawing hands now?
Or do you want to draw the full figure using this Step-By-Step Figure Drawing Guide?
Have fun!
Patricia Caldeira is the main writer here at Don Corgi. She's an art teacher with over 20.000 happy students across many platforms and courses!
Enjoy your stay and as always:
Keep on drawing!


")