Starting to draw is very simple; all you need is a pencil and some paper. But once you start taking things more seriously, you’ll notice you need more drawing materials than that.
Even as a beginner, having the best and essential drawing materials will help your art journey.
So it’s only natural that when starting to draw, you wonder: what do I need?
It all depends on the medium you want to learn and use. A set of graphite pencils, a sketchbook, an eraser, and a pencil sharpener can be enough. However, other mediums require other supplies and even different types of canvas.
To make things easier for you, here’s a list of all the materials you might need to start your journey in whatever medium you want:
- Drawing Pencils;
- Colored Pencils;
- Eraser;
- Pencil Sharpener;
- Sketchbook;
- Paper Pad;
- Inking Pens;
- Markers;
- Acrylic/Gouache Paint;
- Watercolor Paint;
- Art Canvas;
- Paint Brushes;
- Palette;
- Pencil Case/Pouch;
- Drawing Glove.
Of course, you don’t need to get all these immediately. Focus on what medium you want to learn and buy the necessary supplies to start!
We will review the materials listed, along with some recommendations to make your life easier.
Table Of Contents
- 1 1) Quality Drawing Pencils
- 2 2) Colored Pencils
- 3 3) Eraser
- 4 4) Pencil Sharpener
- 5 5) Sketchbook
- 6 6) Paper Pad
- 7 7) Inking Pens
- 8 8) Markers
- 9 9) Acrylic And Gouache Paint
- 10 10) Watercolor Paint
- 11 11) Art Canvas
- 12 12) Paint Brushes
- 13 13) Palette
- 14 14) Pencil Case To Keep Your Supplies
- 15 15) Drawing Glove
1) Quality Drawing Pencils
Whether sketching or polished, finished drawings, graphite pencils are a must. There are many options for you to choose from.
Depending on the kind of drawing you’re doing, using a harder or softer pencil will make a big difference.
For example, a harder pencil works best with more technical drawings such as blueprints or something with very fine details.
However, a softer pencil is your best choice if you’re drawing a portrait, scenery, or anything that requires shading.
As a beginner, the best recommendation we have for you is to buy a pack first. I’m a big fan of the Staedtler 12 Pack, which comes with 12 graphite pencils, ranging from 6B to 4H.
The first is the softest pencil and the latter the hardest one!
Alternatively, another excellent option is the Derwent Drawing Pencils; also a 12-pack, but the pencils are all on the softer side.
Both packs come with a metal case, so your pencils are organized and kept secure.
Once you get more experienced, you’ll notice some pencils feel better than others. When that happens, you can start buying those specific graphite pencils whenever you run out of them!
For example, something between HB and 2B works well for general drawing. With these, you can draw clear and fine lines and add some shading to your drawings.
On Amazon, you can find both the HB and 2B sold in boxes of 12 pencils. But of course, each artist has their preference.
Try several graphite pencils by getting a set first. Once you know what you like to work with, you can buy a specific grade of a pencil!
2) Colored Pencils
Colored pencils are a must at home if you’re an artist or are interested in art and drawing.
These are great because you can use them for several things:
- Create beautiful and colorful artworks;
- Use them to fill a coloring book;
- Sketching or doodling;
- Mix a bit of water, and now you have a watercolor painting!
There are many packs around with a different number of colored pencils. It’s good to go with a big case since you can’t easily mix colors when it comes to colored pencils.
Something like the Faber-Castell Classic is a good choice. It comes with 48 pencils, all with different colors, giving you a perfect variety of colors.
A disadvantage of colored pencils is that they’re not easy to erase. You might be able to erase a small amount of pigment, but you might ruin your paper before that.
A very popular brand among many traditional artists and animators is the Prismacolor Col-Erase. You can easily find these on Amazon or art stores; they’re specifically made, so it’s possible to erase them easily.
This is very useful if you want to make an illustration by using ink pens and markers but first want to draw a sketch.
If you want to test them first, you can get a box of 24 Prismacolor Col-Erase pencils. You can test them out and use them for coloring in general.
On the other hand, if you want a colored pencil for sketching only, you can just get a specific color.
I enjoy sketching with a red pencil, and on Amazon, you can find a box of 12 Col-Erase red pencils!
There are more colors to choose from, so you can choose whatever feels best.
This brand tends to be more on the expensive side. However, the pencils last a long time, and their erasable feature is quite handy.
Finally, as mentioned above, some colored pencils are water-soluble.
This means that you can use them to color any drawing of yours. Then, with a brush and some water, turn that drawing into a watercolor painting!
Suppose you’re a beginner artist and are curious about watercolor. In that case, this is a great way to start, especially if you’re not too used to mixing colors and using a brush.
First, you have the familiar feel of a pencil, and then you can test your painting skills with a brush and a bit of water!
I love the Caran d’Ache Color Pencils, for I’ve been using them for years! This set comes with 40 pencils, but there are also smaller sets.
Those are good if you just want to give watercolor pencils a try. However, the more colors, the more variety, and options!
3) Eraser
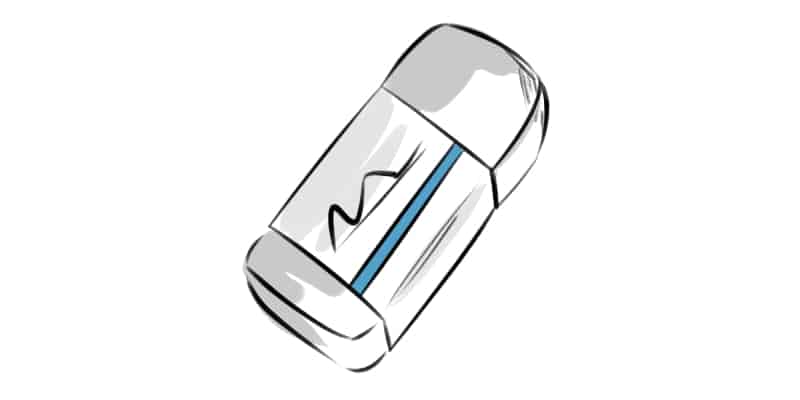
Although I feel that we should let our mistakes in our drawings and fix those in another illustration, erasers can still be necessary depending on your work.
If you’re just sketching or doodling for some fun, I’d say not to bring the eraser with you and just let yourself make as many mistakes as needed.
This is an excellent way to remember your mistakes, so you can learn and do them differently next time.
Having an eraser nearby will also make you feel obligated to make perfect drawings with no line out of place. It’s ok to be messy, so let that happen more often!
However, certain works do require an eraser. You can use the standard white eraser for very simple drawings and make minor modifications.
If you don’t have anything else at home, it’s always a good alternative. But a word of warning: these are pretty hard and known to actually ruin the paper when used to erase extensive areas.
When you want to erase or soften a pencil sketch to draw on top of it later, I can’t recommend the MILAN Crumble Eraser enough.
So, I highly recommend that any artist who works with traditional mediums get a kneaded eraser. You can get a 3 Pack Prismacolor kneaded eraser on Amazon, and they’ll last you for many years!
These erasers are made of a pliable material allowing you to mold them into whatever shape you want.
Since they absorb the pigment, they won’t leave any rubbish behind or smudge your paper.
We have an article about kneaded erasers, including how to make your own if needed, so take a look if you want to learn more about them!
Having at least a regular and a kneaded eraser at home will be very useful if you want to work with graphite, colored pencils, markers, and inking pens.
They’re also very affordable and will last a long time, so really, there’s no loss here.
4) Pencil Sharpener
If you want to use pencils, you’ll need a pencil sharpener sooner or later. Even if you use them lightly, the graphite is constantly used and consumed.
Depending on your work, you might want the tip of the pencil to be pointy and sharp.
For example, you’ll notice that softer pencils will need sharpening more often than harder ones.
A regular sharpener does the job, although I prefer metal pencil sharpeners. They tend to be more durable, and I feel they sharpen better.
However, those sharpeners require a few trips to the bin. For that reason, I recommend buying a sharpener with a case!
This Staedtler Pencil Sharpener is a great example! It has two holes, one for regular and another for large pencils.
Not only that, but it has a big case to keep all the garbage. Once full, you can empty out into a bin.
Due to its size, it’s the kind of sharpener you keep at home on your work desk. A regular one should be enough if you want to draw on the go and prefer to travel light.
Pencil sharpeners are generally inexpensive and durable, so having both versions is a good idea!
5) Sketchbook
A sketchbook is a must for any artist. Not only to draw on it but also to write down ideas and other important notes.
You don’t need to draw on it every single day. It also doesn’t need to be a clean and organized place.
Personally, I think of most sketchbooks as a place to draw but also as a journal.
Thoughts, ideas, things you learned, etc. These can be art related or not. Entirely up to you!
For that reason, I think it’s good to have more than one sketchbook: a small one you can take with you and a bigger one to keep at home.
I like to have something between A6 and A5 sizes for the small sketchbook. These can easily fit in your bag and maybe even in big pockets.
This ALIMITOPIA Spiral Notebook is great for quick sketches and notes. The pages aren’t too thick, so pencils and pens work better.
These small notebooks are spiral-bound, but this A5 Blank Notebook is another good option if you don’t like it.
Slightly bigger than the previous one and has no spiral. Other than that, the paper is very similar!
Now, for more detailed studies and maybe even illustration and color tests, something bigger and with thicker paper works best.
For that, the Arteza Mixed Media Sketchbook is a good option. Again, spiral-bound, and the pack comes with two sketchbooks. The pages are a bit thicker, 180gsm.
You can test some paint or markers on it. However, the ink might bleed into the other side of the page.
For that reason, these are better for sketching and general studies than for creating actual paintings.
Again, this Arteza Art Sketchbook is another good option if you don’t like spiral-bound sketchbooks. It has a squared format, making it a different and fun canvas to draw in!
These are not so easy to carry around unless you have a bigger bag or backpack.
Generally, I like to keep these sketchbooks at home and bring with me a smaller one for any quick doodle or idea I might have!
6) Paper Pad
Sketchbooks are for new experiences, learning, and warm-ups. You can also use them to thumbnail different compositions and ideas for a new illustration.
However, when you want to draw the final version, you’ll want a quality canvas made from proper paper.
Depending on your medium, you’ll want your paper to hold different weight and thickness.
This Canson Artist Series Mix Media Paper Pad, for example, is a good option if you want to use pencils, charcoal, ink pens, and even markers.
The paper is thick enough that it won’t let the ink bleed to the other side.
For wet mediums such as acrylic paint and watercolor, the Strathmore Paper 300 Series is a better choice.
Its thickness allows you to use paint without creasing the paper or destroying it due to the liquid.
Using the thickest paper possible is also a good idea if you’re planning on framing, gifting, or even selling your art.
This way, it’s harder to accidentally fold or bend the paper. Not only that, but it’s more presentable and durable!
Some pads even offer different textures to their paper. Some textures work better with some mediums than others.
However, it’s good to try different types of paper to get a better feeling and which one looks better in your artwork.
Generally, paper suitable for wet mediums tends to be more textured to absorb the paint better. But even then, there’s some variety of paper for you to choose from.
Some stores even sell individual sheets of paper, so you can always pick different styles, try them out and see what you prefer.
Once you know what works for you, buy the respective pad!
7) Inking Pens
If you like working with line art, you’ll probably like using ink pens. There are many different tip sizes and shapes: from fine tips for precise lines to brush tips to create a more versatile line.
Using pen and markers is an excellent way to experiment with less forgiving mediums like pencils. Here you can’t erase your mistakes as easily, although you might be able to mask them.
However, your movements are similar to the ones you use when using a pencil!
Since there’s much to choose from and you won’t know what you like to use the best at first, I recommend the Sakura Pigma Micron 6 Set or the STAEDTLER Pigment Set of 6.
The first pack comes with a wide variety of fine liners, from 005 to 08. This way, you can try 6 different point sizes.
The Staedtler pack focus on fine liners with a different variety of size as well, just like Sakura’s.
They feel somewhat different to handle though, and I personally prefer Sakura Pigmas.
With that said, if you have the option, be sure to try both brands.
Both are good for beginners and great for figuring out what you like best.
For example, I love working with the Sakura Micron 03 and 08 and always have spares at home.
So, once you figure out what you like to use, you can then buy a specific number instead of a whole pack again.
It’s also worth mentioning that Sakura Pigma offers a wide range of fine liners and brushes, not only in black but in different colors as well!
Finally, as a little extra, a handy tool to use when working with ink pens is the white gel pen.
These are great for creating highlights in your drawings but better than that, you can use them to mask any mistake you might make.
Accidents happen, and you might draw a line too long or in the wrong direction. Although imperfect, you can use a white gel pen to disguise that mistake.
The Sakura Classic Gelly Roll White Pen is great for that. This is a 6-pack with 3 different point sizes, so it will take a while until you run out of them.
Another thing you can experiment with white gel pens is to draw on dark paper! It always makes for an exciting effect.
Use some inking pens to practice with and get better lines.
8) Markers
You can create beautiful drawings using only ink pens. However, a good addition is the use of markers.
You can color your line art with them or use markers to create a vibrant illustration.
Each medium has different ways of use, and you can mix them together!
There are many different types of markers, so I’ll give you two different recommendations here:
- Ohuhu Honolulu Markers – this is a pack of 48 colored markers, along with 1 Blender and a Case. Each marker has two tips: brush and chisel. You can use one side or the other depending on your needs.
These Ohuhu Markers are alcohol-based, meaning they are easier to blend with each other. However, it’s tough to dilute colors, mix them, or use a brush for a more painterly style.
Ohuhu offers a wide variety of packs and markers. Different color schemes, tips, and bases (alcohol or water).
- Ecoline Brush Pen – this is a 10-pack with various colors. The Ecoline Brush pens are water-based. You can mix them with water and create more painterly artworks if you want!
Since they are water-based, these markers don’t blend as well and might even destroy your paper if you mix them too much.
Depending on your goal, you’ll choose water or alcohol-based markers.
Alcohol-based markers are the best choice if you want to draw more vibrant drawings and blend different colors together.
On the other hand, water-based is the safest option if you prefer a softer look, the freedom to dilute your colors, and a more painterly style.
Both of these are great and fun to use. You can try one now and the other later on.
I have both water and alcohol-based markers at home. I use them depending on my mood and what I want for my drawings.
Both have their kinks and techniques. Although easy to start with, there’s a lot you can learn with them!
You can also get an Ohuhu Markers Gift Box Set which comes with other helpful drawing supplies.
9) Acrylic And Gouache Paint
Regarding painting, acrylic and gouache are the best to start with. Generally, they’re both water-based, so it’s easy to dilute and mix together.
Since water is enough, you don’t need any other specific products to mix or clean them. Not only that, but if for some reason you get some paint on you or your clothes, it’s easy to clean!
You can start with either of them. Gouache paint tends to be cheaper; however, the tubes are smaller. Even when diluted with water, you’ll run out of paint faster.
Not only that, but Gouache paint will work its best on surfaces like paper or canvas.
When starting, I think the best to do is to get an extensive set such as this ARTEZA Gouache Paint. It comes with 60 colors ready to use.
There are sets with fewer colors if you prefer, but generally, it’s good to have a nice variety, so you don’t have to mix the colors you need.
It’s something you should learn at some point, but knowing how the paint works and practicing with a brush is already a challenge.
Get familiar with the medium first, and then learn more about it, including mixing. Also, having a nice variety of colors gives you a lot of freedom to paint whatever you want.
Once you know your favorite colors and run out of them, you can start buying individual tubes.
As for acrylic paint, it tends to be sold in bigger containers, so the paint lasts you for a longer time.
You can even buy jugs of them if needed!
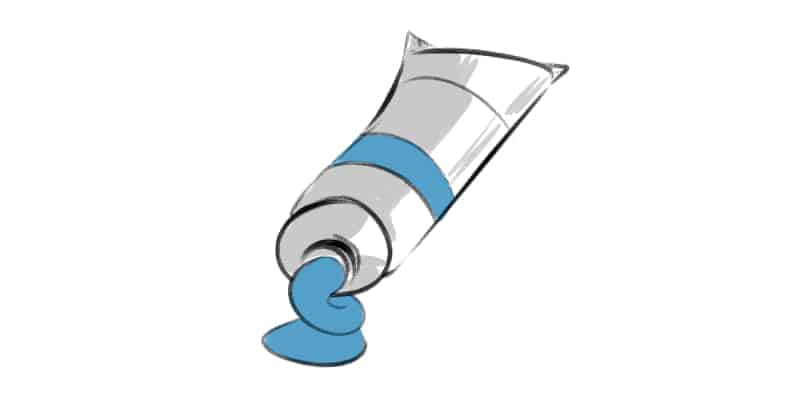
I think acrylic paint is worth mentioning because you can use it on several surfaces: paper, canvas, wood, and even some ceramics.
Again, to start, I’d say to first buy a set of acrylics, such as the WEISBRANDT Ultra Color Arts & Crafts Acrylic Paint Set. It comes with 18 containers.
These are enough for you to get familiar with acrylics, and the paint will last for some time.
Like with the gouache paint, you can find these in bigger or smaller sets. Start with a few of them, try them out, and once you know what you like, you can just buy the colors you want!
You can do a lot with paint, so have some fun experimenting with different techniques.
10) Watercolor Paint
Watercolor is a trendy medium. Again, the paint is diluted in water, so you don’t need any other specific product to mix or clean.
The paint is very watery, making the paintings look very soft and peaceful.
Although an enjoyable medium, it’s not as easy as it looks. It does require some trial and error, maybe a few tutorials, and lots of practice.
Keeping the amount of color balanced is more complex than it looks.
So, when starting something new that you’re not sure you’ll continue with, it’s alright to get cheaper materials first.
Watercolor tends to be a bit more expensive than other mediums we’ve mentioned.
To start, you can go with this 48 Set Watercolor Paint. It even comes with 3 brushes and a palette, so all you need is the paper, and you’re ready to start.
Of course, the quality won’t be the best you can find. However, it’s enough for you to get a feeling of the medium and decide if you want to put more effort and practice into it.
Once you have more experience with watercolor, you can get something more professional and higher quality, such as this Winsor & Newton Cotman Watercolor Paint.
It’s a box set of 24 paints, it also comes with a small brush, and you can mix your colors inside the box. I’m a big fan of this brand, and the great thing about it is that this set is very portable.
You can bring a small watercolor sketchbook, this set, and a small container with water and just start painting anywhere!
Alternatively, another way to experiment with watercolor before jumping into actual paint is to play with water-soluble colored pencils like the Caran d’Ache pencils mentioned above.
11) Art Canvas
You can draw and paint on many different surfaces. Paper is the easiest to get and to start with since it’s possible to create something beautiful using simple printer paper. It’s not the best, but it’s doable!
However, if you want to paint, it might be interesting to try and use an art canvas at some point. This is a more textured canvas to work with and tends to last longer.
Since it’s made of a different material, you don’t need to be afraid of ruining it by mistake due to wet materials such as acrylics.
However, using canvas can seem a bit scarier since it feels very differently, and not as easy to fix mistakes if they happen.
So, I’d say to go with a smaller canvas. Start small, with simple drawings, and grow from there. You’ll find many different sizes and can even buy sets of them.
For example, this GOTIDEAL Stretched Canvas has several canvases of different sizes. I’d say to store the bigger ones and start with the smaller ones.
Once you feel more confident to try a bigger surface, you already have the canvas you need!
Furthermore, there is more than one type of canvas. The example shown above is the most used, but since it has some volume, it might be a weird transition from paper to canvas.
That format also requires an easel such as this easel on Amazon or any other support.
If that feels too overwhelming, you can start with a canvas board! In fact, these are my favorite to use since I’m not as experienced with painting, and they’re easier to deal with.
Again, you can buy sets of them like these Artlicious Canvases for Painting, where you can choose a size it feels comfortable and buy a pack of them.
I like working with small, squared canvas boards, but try different sizes, experiment, and see what you prefer!
12) Paint Brushes
If you want to paint, be it with watercolor, acrylics, or any other paint, you’ll need some brushes!
These are very easy to come by, and nowadays, you can find brushes of good quality for an excellent price.
The kind of brush you’re using depends on the work you’re doing. Still, in the beginning, I recommend buying a set of several brushes.
This way, you’ll have several brush sizes and tips to try out and see their differences.
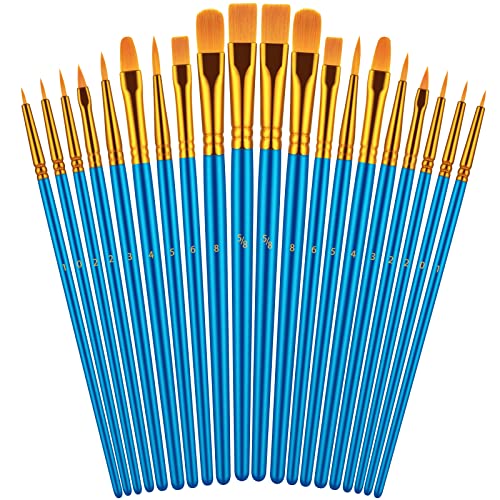
This Paint Brushes Set is an excellent option since it comes with several different brushes with different styles of tips: round, flat, and pointy.
The smaller, pointy ones are great for small details, for example.
Of course, as you learn what you like to use, you probably won’t need much variety of brushes, but it’s still good to have them if needed.
When you feel a specific brush has been overused and needs to be replaced, you can just find the same number and tip and buy a replacement.
Now, even though you can use regular brushes for watercolor, I recommend you try a water brush like the Pentel Water Brush.
These brushes have an empty container to fill with water. Then by pressing the container, the water will soak the tip of the brush.
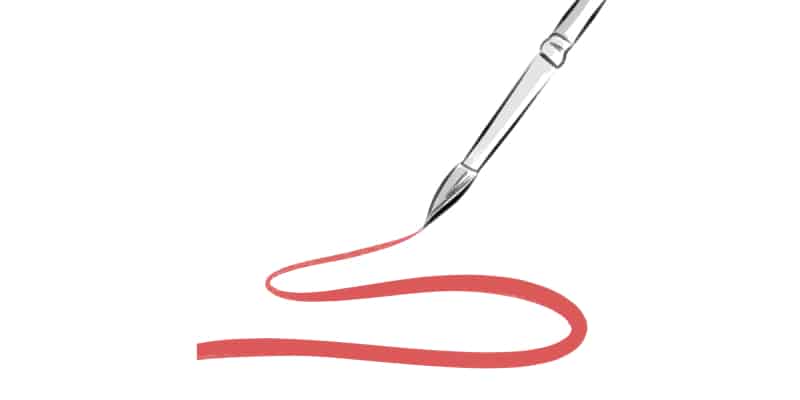
Depending on how long you press the container, you’ll add more or less water. This way, you have more control over the amount of water you’re using!
This is also helpful if you want to draw on the go. Instead of having to bring a water container and set everything up, you just need this brush and are ready to paint.
13) Palette
Even if you’re not planning on mixing your colors at the beginning, you’ll still need someplace to put the paint you’re using.
Both acrylics and gouache can be diluted with water, making it easier to spread through the canvas.
For that, a palette will be instrumental. There are many sizes and styles that you can get. The simplest one is this Hulameda Paint Tray, with round divisions for each color.
If treated well, they’re very durable. But with time, a palette might become too dirty or smudged to wash. This pack comes with 12 pieces, so you can easily replace them.
It can be pretty handy to own more than one palette if you want to use one for each medium or even if you’re using many colors.
Now, if you prefer a flatter and bigger surface, so it’s easier to mix your colors, then this 3pcs Acrylic Paint Palette might work better for you.
It comes with 3 different palettes of different sizes and even formats, so you can find what’s more comfortable for you!
In a bind, or if you’re not planning on painting that often or are just testing the waters, a plastic plate like those used in parties will do the trick!
They have a nice, big surface to mix the paint and are washable. Once the plate gets too dirty, throw it out and use another.
14) Pencil Case To Keep Your Supplies
Now that you have everything you need to start drawing and painting, a place to keep all your tools and materials will come in handy.
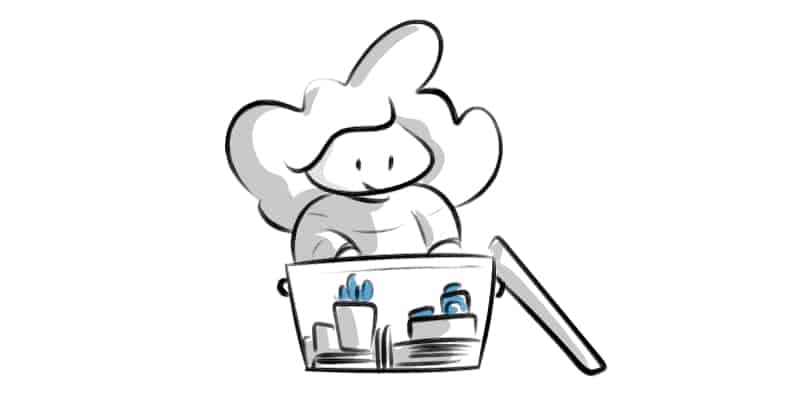
I have all my supplies at home divided into boxes, cases, and pouches. Some things are bigger than others and need more space or different storage conditions.
A simple small case is enough for smaller things such as pencils, erasers, pencil sharpeners, and even some pens and other smaller crafting tools.
The ANGOOBABY Small Pencil Case is a good example! Big enough to keep all these assorted supplies, and there are even several colors to choose from.
Now, most marker sets do come with a pouch or case. However, sooner or later, you’ll buy different colors or markers and notice you’ll run out of place.
That, or you just have too many supplies by now, and a small pouch isn’t enough. Then something like the HVOMO Pencil Case might be a good bet.
This is a very big pouch, perfect for markers. It also comes with an extra compartment if you want to keep your most used pens, markers or pencils!
Finally, even though you can just keep your paintbrushes in a cup or box, they can easily be damaged by accident. Not only that, but they’re not very portable that way.
If you want a safer and more portable place for your brushes, then this Paint Brush Holder is perfect! It’s very compact and has an individual pocket for each brush.
There are bigger or smaller holders around, depending on how much space you need, but this one can already fit 22 brushes, which is more than enough.
This kind of holder is also suitable for keeping some markers or ink pens if you want to bring a specific assortment with you or to keep your most used supplies in a different place!
15) Drawing Glove
Drawing gloves are most often used with a drawing tablet. Nowadays, most drawing tablets even come with a glove to avoid smudges while drawing.
However, I found that these can be pretty useful when painting or drawing traditionally. While drawing, your hand will move around your canvas.
Sooner or later, that same hand will come into contact with graphite, paint, charcoal, or whatever medium you’re using.
When that happens, you might smudge your paper with your hand. It’s normal to happen, even when you’re already experienced.
Sometimes we’re so focused on what we’re doing we forget where our hands are.
A drawing glove will avoid some of those smudges. Especially when it comes to dry mediums like graphite and charcoal.
Another great advantage is you won’t get your hand dirty!
These drawing gloves are pretty affordable and will last a long time. One of my favorites is the Huion Cura CR-01. It’s very comfortable and soft to use.
Many brands even offer drawing gloves of different styles and colors, so you can be as stylish as you want and find the perfect fit!
Here are our top 5 Best Artist Gloves if you want to learn more about these gloves.
With all these drawing materials, you’re ready to start drawing! And even if you have just a pencil and a piece of paper, that’s good enough.
Here are 23 Easy Drawing Ideas For Beginner Artists so that you can start drawing immediately. Have fun!
Patricia Caldeira is the main writer here at Don Corgi. She's an art teacher with over 20.000 happy students across many platforms and courses!
Enjoy your stay and as always:
Keep on drawing!


