One of the most common issues when drawing the human body is connecting each body part.
Drawing them individually is one thing, but drawing everything together is more complicated than it looks.
Even then, you can practice one area at a time, for example, connecting the shoulders with the neck!
Start by practicing quick gestures of that area with the help of a reference. Then, draw simple shapes to complete the structure.
In this tutorial, we’ll show how to draw a neck and the shoulders following a very easy and step-by-step process.
Table Of Contents
- 1 Drawing The Neck And Shoulders
- 1.1 Step 1 – Find a Good Reference and Draw a Quick Gesture
- 1.2 Step 2 – Draw a Cylindric Shape for The Neck
- 1.3 Step 3 – Add an Upside-Down Triangle for the Collar Bones
- 1.4 Step 4 – Draw Two Lemon Wedges for the Shoulders/Deltoid Muscles
- 1.5 Step 5 – Add Two More Oval Shapes to Each Side of the Neck
- 1.6 Step 6 – Clean the Sketch with New Line Art
- 2 Drawing The Neck And Shoulders From Different Angles
- 3 Muscular VS Regular Neck And Shoulders
Drawing The Neck And Shoulders
As with any other figure drawing area, observing the right references is a good way to learn how to draw the neck and shoulders and their connection.
Along with those references, you can practice several quick gestures until you find a good structure of lines and shapes.
These can then be used to draw both the neck and the shoulders.
That’s the process we’ll show in the next steps!
Step 1 – Find a Good Reference and Draw a Quick Gesture
To start as simple as possible, find a good reference photo showing the model in a standing pose from the front view.
A good way to easily figure out the human body is to draw a quick gesture on top of the image!
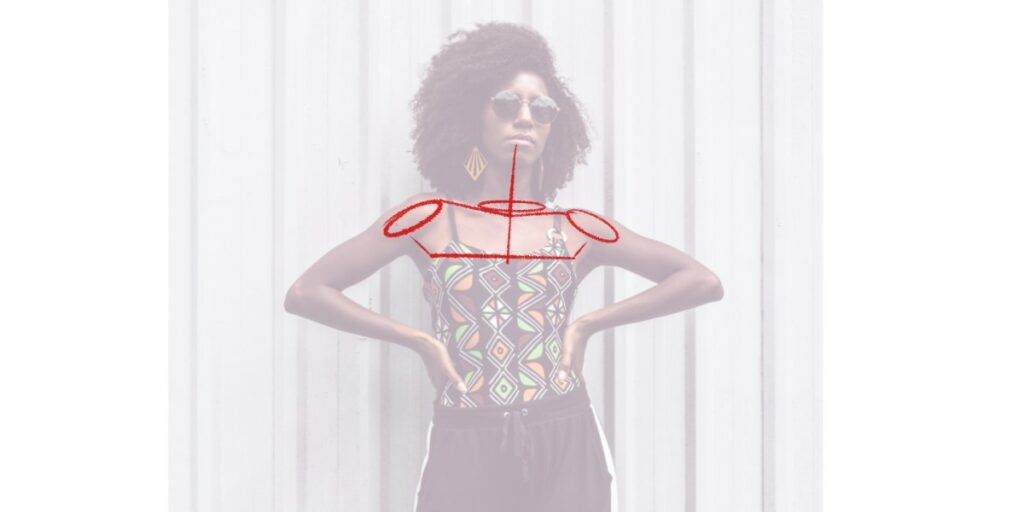
This way, you can more easily find the lines and shapes that make the most sense.
Then, practice that gesture as much as possible, with the reference at your side!
This way, you’ll be able to memorize the base structure of the neck and shoulder quickly.
It’s also a good opportunity to experiment with different combos of lines and shapes until you find a comfortable structure.
Step 2 – Draw a Cylindric Shape for The Neck
Now that we have a few guidelines, it’s time to draw some shapes to our sketch!
Start by drawing a cylindric shape for the neck.
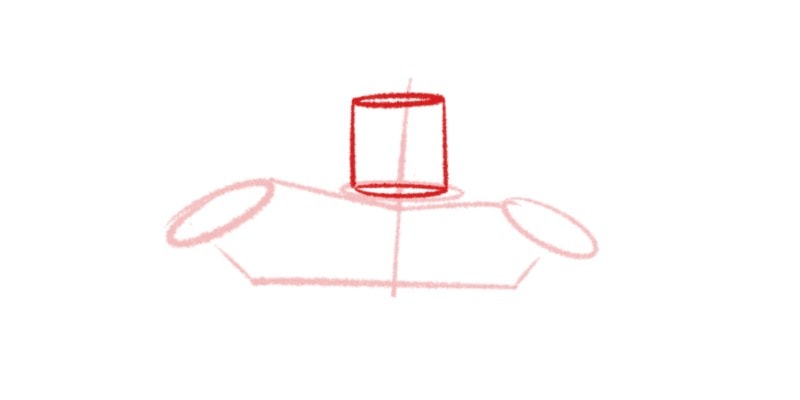
Since we’re seeing it from the front, this shape is almost flat. But it’s good to have a cylinder in mind when drawing the neck from other perspectives.
Step 3 – Add an Upside-Down Triangle for the Collar Bones
The collarbones are a very important area to draw when connecting the neck to the chest and even shoulders.
Even if, in your final drawing, you choose not to draw them in detail, it’s a good shape to add to your sketch!
You can use an upside-down triangle for the collarbone.
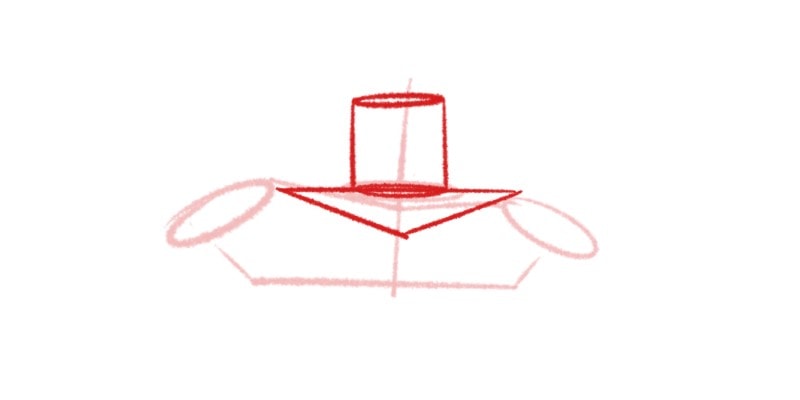
This shape is centered with the neck and slightly intersects with it.
Step 4 – Draw Two Lemon Wedges for the Shoulders/Deltoid Muscles
It’s time to draw the shoulder shapes, specifically the deltoid muscles.
On each side of the triangle we just drew, add two shapes resembling a lemon wedge.

Instead of a lemon wedge, you can also use an ellipse.
There is no right shape to use when drawing the human body as long as it’s functional and practical for you!
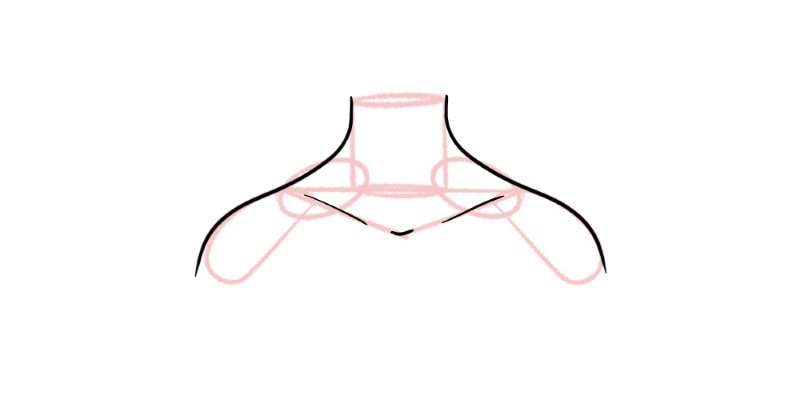
Step 5 – Add Two More Oval Shapes to Each Side of the Neck
We’re just missing two shapes, and these will help us properly connect the shoulders to the neck.
The trapezius muscle runs through the back of the neck into the upper back and shoulders.
But we can roughly see it appear on each side of the neck. So, let’s draw two oval shapes on each side of it!
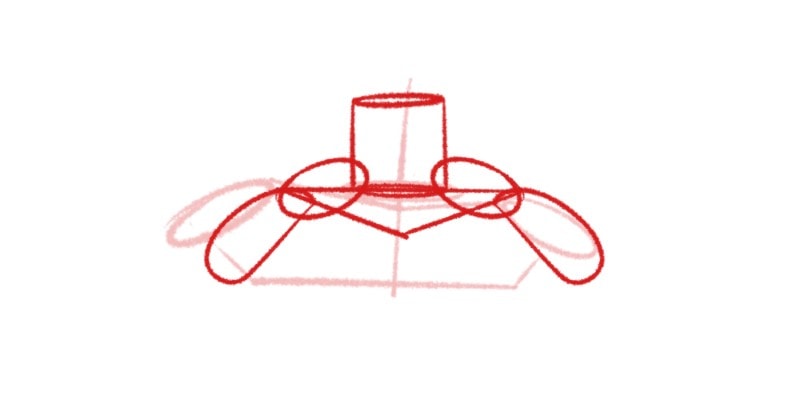
Depending on how muscular the person or character you’re drawing, these muscles can be drawn quite big or almost invisible.
However, it’s a good shape to add to your sketch, so you can easily draw the connection between the neck and shoulders.
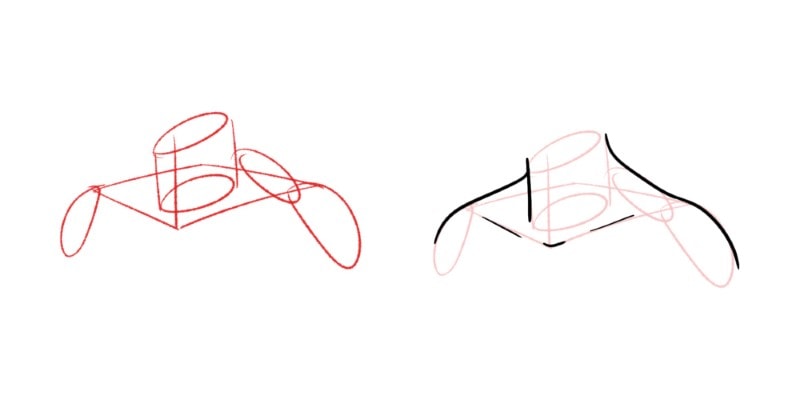
Step 6 – Clean the Sketch with New Line Art
Now that we have all the needed shapes, it’s time to finish the drawing with clean lines.
Outline the shapes you just drew to create a single drawing.
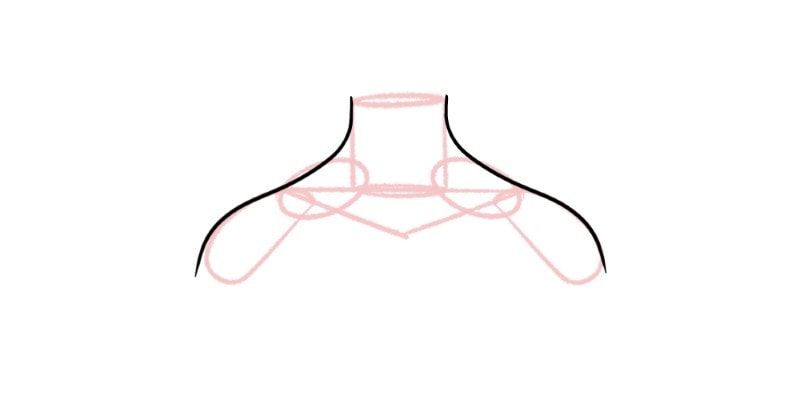
As you can see, it ends up very simple, and you only used basic shapes to draw both the shoulders and the neck!
You can also add details such as small, simple lines for the collarbones.
Finally, add some color and shading to make the drawing more interesting.

Now, all you have to do is practice the structure and forms to memorize them, and you’ll be able to draw shoulders and neck any time you want!
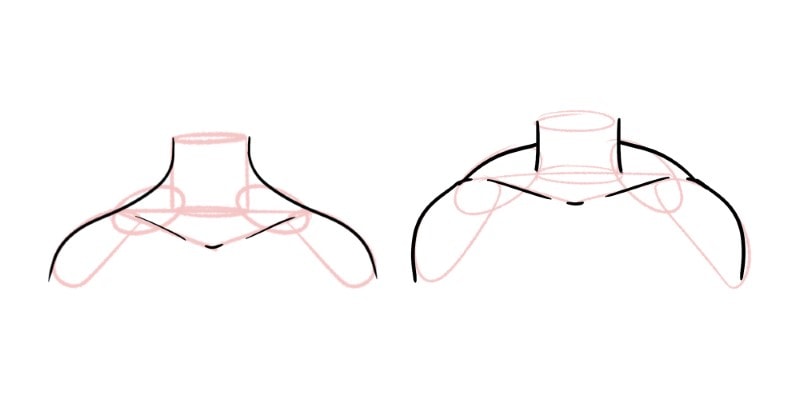
Drawing The Neck And Shoulders From Different Angles
Once you get the hang of drawing the neck and shoulders from the front view, it’s time to learn and practice other angles.
You’ll be mostly using the same shapes but will need to adapt them depending on the view.
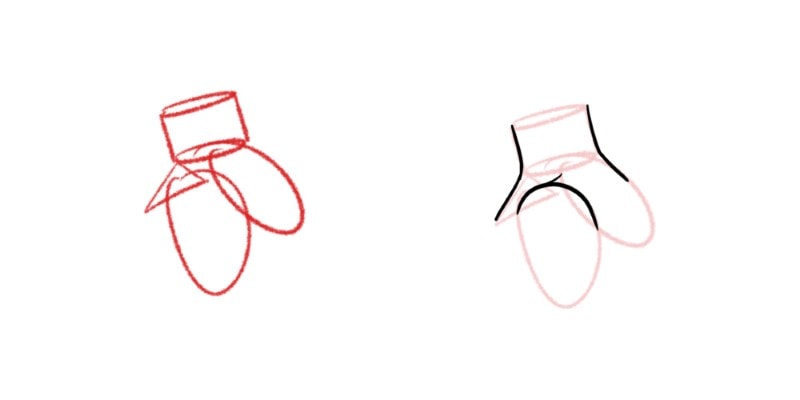
Side View
For example, from the side view, you’ll only see one side.
That means drawing only one shoulder, and most of the forms will overlap.
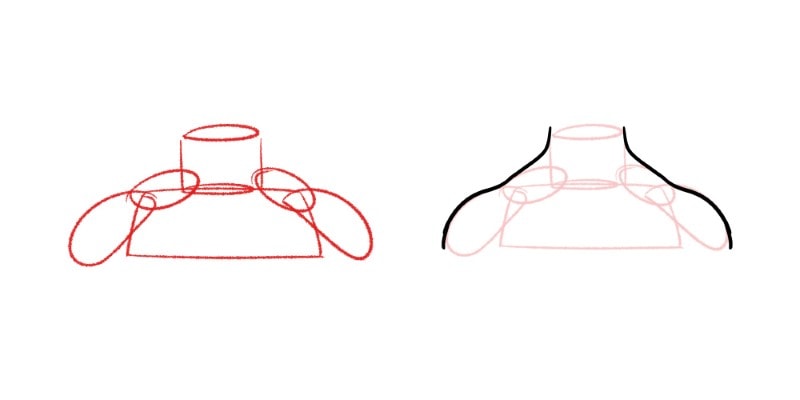
Back View
From the back, draw a trapezium shape instead of a triangle.
We don’t see the collarbones from the back. However, we see a lot of the trapezius muscles, so focus on those!
3/4 View
Finally, a 3/4 view requires you to think more about dimensionality, depth, and perspective.
So, instead of drawing flat shapes, focus on 3D shapes.
Practice these angles as much as you can. Once you feel confident, you can start experimenting and drawing more complex neck and shoulder poses!
Muscular VS Regular Neck And Shoulders
There are many body types you can draw, but you’ll notice a big difference when drawing muscular people.
A regular person won’t have their muscles too defined.
That’s why you don’t need to focus too much on the muscles that connect the neck with the shoulders.
However, if you’re drawing a muscular or even bodybuilder type of body, the muscles will stand out quite a lot!
We start seeing big, round muscles on each side of the neck.
This is something you should take into account when drawing different types of people and characters.
If you want your character to appear very strong and muscular, add more muscle mass to the edges of the shoulders and other neck muscles.
The stronger the character is, the bigger their muscles will be. You can even exaggerate the proportions!
And if you’re ready to draw some amazing heads to accompany these necks and shoulders, check out our article on How To Draw Heads Easily!
Or keep going with the 7 Best Anatomy Drawing Tips For Artists.
Patricia Caldeira is the main writer here at Don Corgi. She's an art teacher with over 20.000 happy students across many platforms and courses!
Enjoy your stay and as always:
Keep on drawing!


")