Starting to draw anatomy and the human body is a great task! And to succeed at it you need to take time and practice.
It might feel hard and frustrating at times. However, there are a few anatomy drawing tips that will make you improve much quicker at drawing the human body!
Table Of Contents
1. Focus On SHAPES First
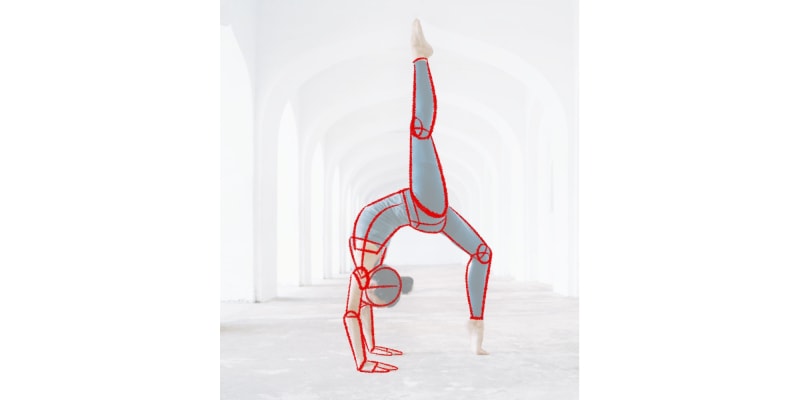
When we look at an image of the human body, the first thing we try to do is draw the whole outline of it.
This is a mistake.
We follow the lines of the body, trying to build it up exactly how we see it.
But there’s a problem with this. If you’ve done it before, you’ll notice that many mistakes will start appearing in your drawing. The proportions will appear off, and certain features will be in the wrong places.
This is very natural since we’re not yet used to drawing anatomy.
We’re kinda skipping quite a few steps ahead and trying to do something way too advanced.
And sometimes, even with years and years of experience, it’s hard to draw the body through its outline.
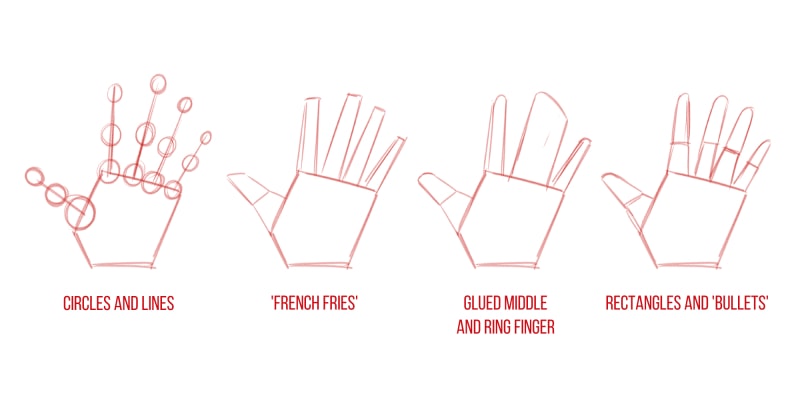
What I like to recommend and always teach in my classes is to instead look at a reference and divide the body into simple shapes!
These are easy to draw. You can draw rectangles, circles, triangles, squares, and other irregular shapes.

They don’t need to be perfect. But what matters is that it’s a shape that you feel comfortable drawing and that you understand.
When dividing the body into shapes, look for a group of shapes that make sense to you.
What do you see? Probably a circle for the head, a square for the torso, and rectangles for the arms and legs.
Try to divide the body into as many shapes as you can. Maybe the joints are triangles!
Fingers can be small rectangles and feet trapeziums or triangles as well.
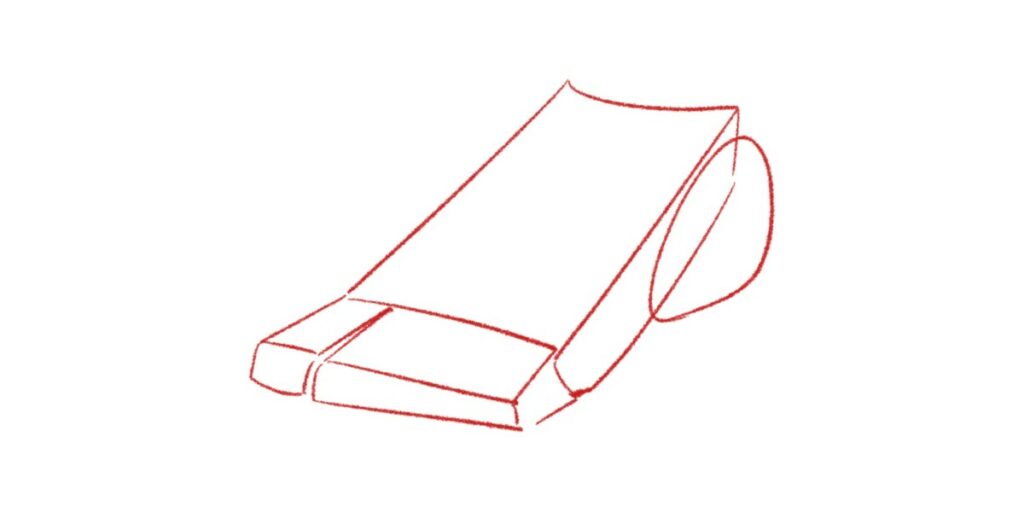
The shapes I see might be different from the ones you see. We can have different ways of interpreting the body, but what matters is that it works!
After you’ve figured out the shapes, practice them. Don’t try to draw the human body yet. Just the shapes.
Get used to them and let your body memorize them. Then, you can go to the next step and start adding more details until it looks like a human body!
You’ll see that once you start using this method, drawing anatomy won’t seem such a herculean task and it will become a much easier activity!
This is one of those beginner drawing tips that you just need to know (here are 14 more).
2. Forget About Drawing Details
I know, I know. You want to be able to draw every single little detail of the human body right away.
But, enjoy the whole journey.
Learning, failing, learning from your mistakes, and getting better with each drawing is part of the process.
Everything takes its time. So try to focus on the general pose and body anatomy first, and later add the details.
This goes especially if you’re just starting out.
Details are just the cherry at the top of the cake.
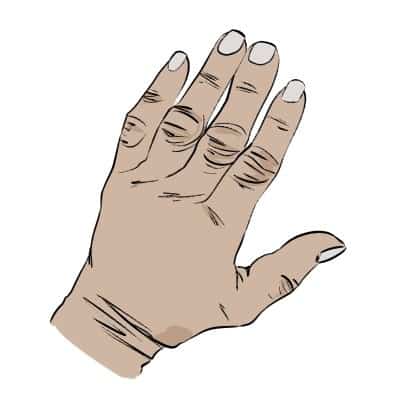
It’s those final touches you add to a drawing to give it more uniqueness. And we don’t want to reach the finish line just yet.
First, you need a solid foundation, and that comes with what I mentioned above:
Learning basic shapes, try out different shapes until you find the ones that work for you.
Repeat them over and over until you can do it with your eyes closed. And then, yes we can start adding details and more complexity to our anatomy drawings.

A great way to do this is by timing each of your drawings.
Set up a 2 to 5-minute timer for each study.
This way, you can’t focus on details. Just shapes and the overall feel of the body!
It may seem a bit daunting at the beginning, but I learned that this is a great way to draw quick sketches, with simple shapes but still translate the body very well.
But to also ignore details and all the complexities of the body that are not important at the beginning!
3. Practice The Gesture Of The Pose
Speaking of timed drawings, I couldn’t help but mention Gesture Drawing.
This is a very good exercise if you want to learn anatomy and get better at it.
Gesture Drawing is essentially a quick, simplified sketch of the human body.

Usually, it’s done by watching a model posing in different ways or by looking up different photographs and trying to replicate the poses through very quick sketches.
Now, these are usually timed. The idea is for you to capture the pose through very simple and quick lines.
The shorter the timer, the more difficult it is to capture the pose, but it will also make you better at recognizing what are the important parts of the human body to capture in a drawing.
I usually recommend my students set up a timer of 2 minutes. This is usually enough to get a feel of the pose and be able to translate it into paper.
At the same time, it’s little enough time, so that you won’t get lost in details.
In my Complete Figure Drawing Class, before learning to draw specific parts of the body, we go through a whole session of gesture drawing.
This way my students can get familiar with it, practicing different poses and it’s a great warm-up before going for more detailed drawings!
Gesture is also a great opportunity for you to relax and experiment. Try out different shapes, different techniques, even different tools!
Since these are usually very messy and quick drawings, it is also an excellent tool for you to start getting familiar with pushing a pose and exaggerating it.
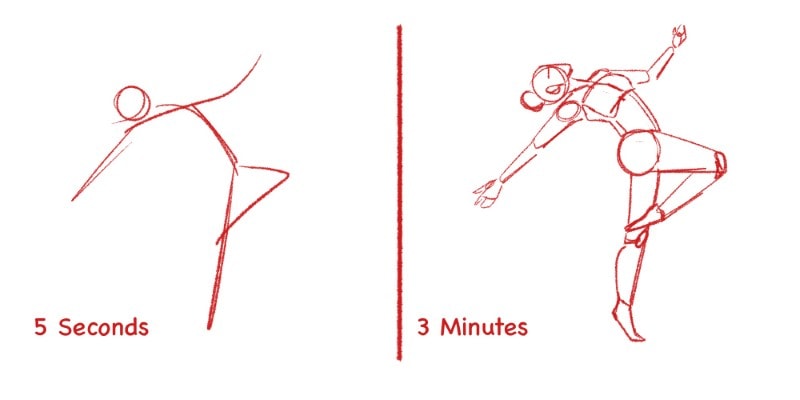
Exaggerating a pose is a great way to make your anatomy drawings more interesting, but also make your pose even clearer to the viewer.
So sit down, relax, and just have some fun with quick sketches.
I highly recommend for any artist to do small sessions of Gesture Drawing, as often as they can. Even 15 minutes can be enough and you’ll notice an improvement in your drawings very quickly!
4. Don’t Forget Your Anatomy Drawing References!
If you want to learn to draw something, then you need to see it.
For example, if you want to learn how to draw eyes, you’ll want some good portrait reference photos!
Sometimes we’re a bit lazy and just want to start drawing. We think we know how to draw a human body.
I mean, we do look at people every single day, so we should know what it looks like, right?
In theory…yes.
But once we start drawing from memory we realize we actually don’t know a single thing about it!
And that’s natural.
We can’t really rely on our memory, especially when it’s about something so common that our brains won’t take in every single detail anymore.
We only see the overall shape of another human being. We’re not thinking of details, or on how to translate that figure into paper.
So, of course, our brain won’t pick up those complexities.
Now you can go outside or sit down at a cafe. Open your sketchbook and start drawing random people who pass by.
However, I feel this can be a bit hard. Especially if you’re just starting.
The people we see outside are going about their own lives. They move around.
They’re not stopping to pose for you so you can internalize every single detail.

Even though it’s an excellent exercise and, again, it will force you to focus on the important aspects of the body and pose, there’s an easy way to do this:
Get some references!
Sit down, open your browser, and lookup for pictures of random people. Search for specific poses you want to draw.
Search for different types of bodies, different gender, and even different ages!
Now if you don’t know where to find good reference images, don’t worry, I got you:
Here are the 7 best free pose reference websites for artists!
You’re looking for something very specific and can’t seem to find a good image of it?
Then, take pictures of yourself! This way you’ll be sure to have exactly what you need.

Artists very often will make their own references so it’s easier and quicker to gather resources.
Once you have a good reference image that you want to make studies of, take a good look at it.
Think about the steps you’d go, to draw it. Where do you start, what kind of shapes you’d use, and so on.
Better yet! Draw on top of your reference images.
Open it up on a software of your choice, add some transparency to it and draw the main shapes on top.
This is a great way to learn what kind of shapes to use when drawing the human body.
If you prefer to draw traditionally. Print out a few images, again with some added transparency to them, and then use a pencil or pen to draw on top of them!
This is not cheating and you’re not tracing an image either.
You’re figuring out how to build the human body through shapes. So don’t be afraid of doing this.
Whenever you’re having some difficulty with a pose, draw shapes on top of a reference. It will really help you out!
Then, you just need to practice those shapes and poses in your sketchbook!
So, remember: use references, anytime!
Even when you already know how to draw something, having visual aid will always make your drawings better.
5. Try Different Techniques
If something isn’t working for you, try something else! Don’t like cross-hatching? Try stippling.
Do you prefer to use lines instead of shapes? Go for it!
I usually recommend going for shapes, because it’s what I found out works for me and for many other people around the globe.
However the same might not be true for you.
What matters is that the process works for you. If it doesn’t, then you’ll end up giving up on it because it’s just not fun or stimulating.
I watched several tutorials and artists, and most of the time, the way they went about it just didn’t work for me.
Was it frustrating? YES!
I couldn’t understand how people could draw using a certain technique and be really good and effortless about it and I couldn’t!
Only you can know the right anatomy drawing technique for you! So… experiment!
It felt like there was something wrong with me.
But one day, I found yet another tutorial and exercise, and it finally clicked.
I finally understood what worked for me. The right process for me. And that’s what I teach now.
Because I wanted to share what I learned with other people, so they don’t go through the same frustrations as I did.
But even though I teach a certain way, I always think it’s important to point out that it’s ok to find different exercises and methods.
Even if the way I teach works for you, you’re still free to find variations to my method.
Little things that make the process easier for you.
That’s why I think it’s so important to experiment when it comes to art.
Give each drawing technique a fair shot! Even when you already found what works for you, don’t discard other methods right away.
You never know when you can find another technique that ticks with you even better than the one you’re using right now!
6. Set Some Exciting Goals
One of the best ways to keep up practice in every hobby or activity is to set some goals!
This goes for almost anything and not just drawing.
You also don’t need to set really difficult and complex goals. In fact, the simpler the better.
This way you can achieve them more easily, which makes you feel good about yourself and your skill.
So, instead of thinking of a huge goal like: I want to be able to draw the human body.
Try to divide that into smaller goals.
Here are a few examples:
- Fill up 5 pages with drawings of hands, until the end of the week;
- Be able to draw 8 different eye styles from memory;
- For a month, take 15 minutes for Gesture Drawing practice;
- Draw one pose a day;
- Fill one page with head studies, per day, for 2 weeks.
These are just some examples. But you should come up with your own since you know better than anyone what you want to improve at!
It’s also a good idea to always set up a deadline for your goals. This way, you’ll feel more motivated to reach them.
Otherwise, we might feel compelled to postpone it.

‘Oh I’ll do it tomorrow’ or ‘Today, I don’t feel like it’s a good day for drawing, maybe tomorrow’ or even, ‘It’s too late already, let’s leave it for another day.’.
We can be very creative with excuses. However, if we set up a deadline, you’ll have to plan your schedule with your goals taken into account.
This way, it will be hard to avoid your goals, and, believe me, it will feel really good when you tick off yet another goal.
Not only that, but you’ll be improving your drawing skills, it keeps practice more interesting and it will make you a better artist much faster!
I’ve written more about great drawing goals for artists here!
7. Be Patient.
The human body is one of the hardest subjects to draw (along with drawing horses!) so take your time and don’t give up.

Try to enjoy the whole process. Accept that you’ll make many mistakes and a lot of your drawings won’t be as good as you want them to be.
It’s only natural. So, instead of becoming frustrated with some of the results, sit down and try to learn from the mistakes.
This way, you’ll bring something new to your next drawing!
It will take time but you’ll improve if you stick to it.
Keep up a daily practice, or as many days in a week as you can.
Don’t try to look for improvement from one day to the next.
Instead, every month, sit down and take a drawing you did recently and put it side by side with another that you did a month ago.
Now, look up the differences. See how much you’ve improved!

I know that looking at our art every single day, it’s hard to notice the improvements.
But if you compare it with art that you did some weeks or months ago, you’ll be able to see them very easily!
Simply comparing yourself with your previous art will make you see how far you’ve come already.
Keep on practicing, be patient, and focus on enjoying the whole process. The improvement comes with time!
Frequently Asked Questions
Why is drawing anatomy so hard?
The human body is very complex. There’s a lot to learn about it, so it’s only natural that it’s hard to draw. It’s also something we see every single day. We see people every day and, a lot of times, the thing that we look at constantly is the one that is harder to draw.
We think we already know everything we need to know to draw it, but that’s not true. And that’s when it becomes the hardest. That’s why it’s important to look up references and learn all the basics first!
How do you draw anatomy simplified?
Shapes! When you look up at the human body, don’t focus on the whole. Divide it instead into simple blocks and shapes. This way drawing anatomy will feel much less daunting.
If you focus on smaller parts of it and draw it through basic shapes, you’ll start understanding that anatomy can be much easier and fun to draw!
How do you draw cartoon anatomy?
Same as the basic anatomy for any style. But drawing cartoon anatomy requires you to simplify many shapes (depending on the style of cartoon you’re going for!) and change it up accordingly.
I recommend you to study your favorite cartoons and try to mimic their style! It really helps you learn how the original artist went about drawing it.
And if you’re looking for more drawing tips for beginners, do check out my article on the 15 Best Drawing Tips for Beginner Artists.
Back to the Blog
Patricia Caldeira is the main writer here at Don Corgi. She's an art teacher with over 20.000 happy students across many platforms and courses!
Enjoy your stay and as always:
Keep on drawing!
