
Drawing legs can be quite complicated for a beginner artist since they appear to have many different shapes, muscles, and even joints to draw.
However, by breaking each section of the leg into easy shapes to memorize, you’ll always be able to draw legs in any position you want!
This tutorial is organized as a step-by-step guide so we can draw each leg section as simply as possible, so you can learn how to draw legs the easiest way.
Table Of Contents
Proportions Of The Leg Anatomy
There are many ways to figure out the human body’s proportions.
A good tip when learning figure drawing is to find a few reference images and draw on top of them.
This helps you figure out how to draw anatomy and better understand the body’s proportions.
For this, you can use several guidelines to know where everything goes.
For example, when it comes to legs, they roughly occupy half of the body.
So, if you divide the human body into 2 parts, the tighs of the leg will begin in the middle of the body.
As for the lower part of the legs, they’ll end just slightly above the feet.
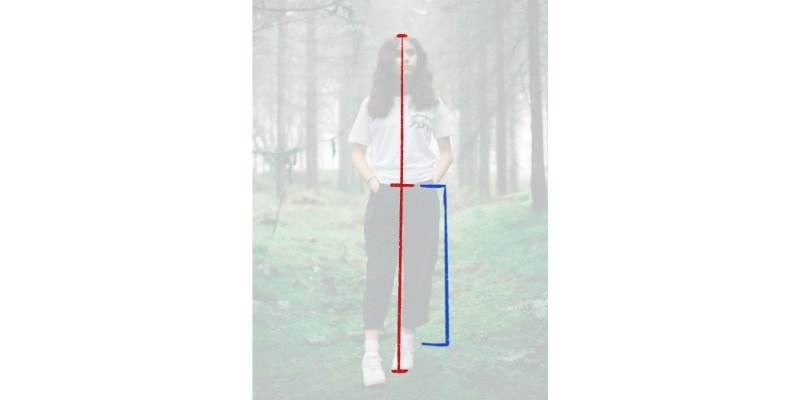
This can give you a good idea of where and how long to draw the legs of a figure.
Another thing you can do is use the head as a measure. Draw a circle for the head, then repeat it along the body.

With that done, you now know how many heads long is each body part.
It can differ depending on how tall the person you’re drawing is, but generally, the legs will be 3 and a half heads long!

Using the head as a measurement is useful since it doesn’t matter how tall the body is. You’ll always get the proportions right by counting heads and drawing each body part accordingly.
Drawing The Leg Step-By-Step
Now that we’ve figured out the proportions, it’s time to draw the legs.
It’s good to break everything down into simple shapes, one by one, so you can draw them in any position later on.
The shapes you’ll use to draw the legs are always the same. All you have to do is adapt them depending on the leg’s position!
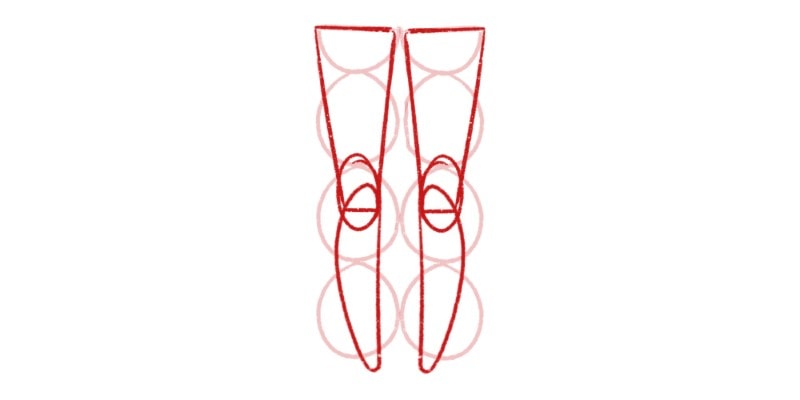
Step 1 – Drawing The Upper Leg
The upper part of the leg is predominantly known as the thigh. This area of the leg is usually thicker than the rest and rounder.
Start by drawing an upside-down trapezium. This shape starts at the edge of our first half-circle and ends halfway through the second circle.
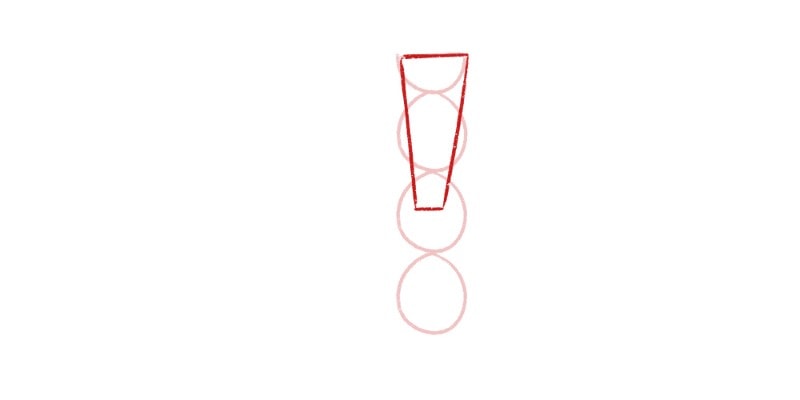
There is no right shape to use here. For example, an oval shape can work too.
You can even mix both of these shapes, making the outside of the thigh curvier while the inner side looks straight!
Simplify your shapes as much as you want or need. What matters is that the shapes work for you.
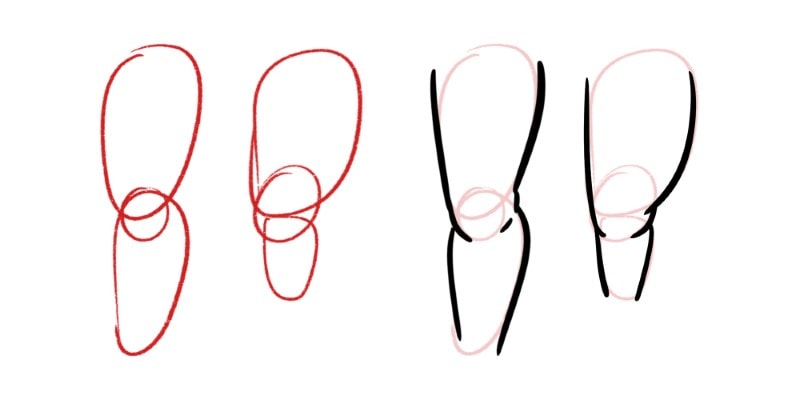
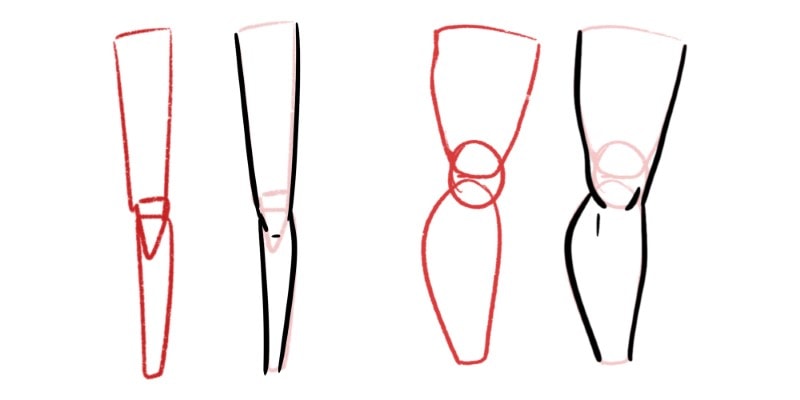
Step 2 – Drawing The Knee Shape
Let’s use the simplest shape we can for the knee joint.
A circle will be more than enough for it.
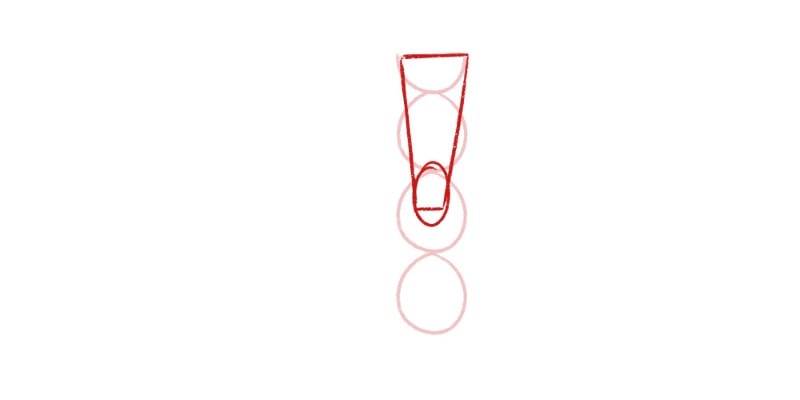
The knee connects the upper area of the leg with the second, so when drawing it, it will intersect with both shapes.
Step 3 – Drawing the Lower Leg
Our leg drawing is nearly finished. All we are missing is the lower part of the leg.
We’re going to be using a different shape here.
If you look at a reference image or your legs, you’ll notice that the calf muscle shows up from the back of the leg, even when drawing the front of the leg.
That muscle creates a big curve on the outer edge of the leg.
On the other hand, the inner side of the leg looks much straighter.
So, a good shape to use here is something similar to a lemon wedge.
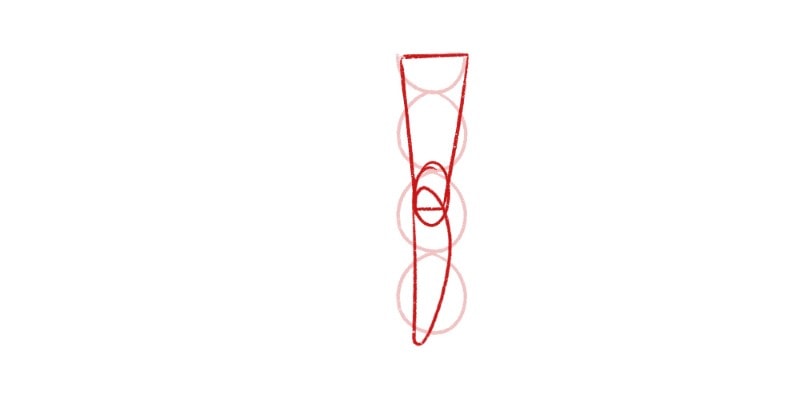
One side of the shape is curved, while the other is almost a straight vertical line going down.
This shape intersects with the knee and ends at the bottom of our final head guideline!
With three very simple and basic shapes, you have the blueprint to draw legs in any position!
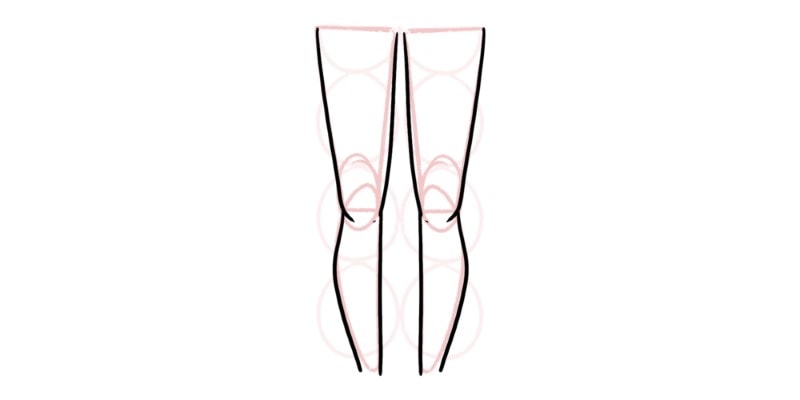
Step 4 – Clean The Sketch With New Line Art
Now that all shapes have been drawn, it’s time to finish our drawing of the legs.
If you want, you can even repeat and practice those shapes by drawing the second leg.
The shapes are the same but mirrored.
Once that’s done, draw clean line art by outlining the leg shapes!
You can also take the opportunity to add some color and details to the legs.
Even though they’re quite simple, it’s possible to make legs more unique by adding hair, beauty marks, scars, or tattoos!
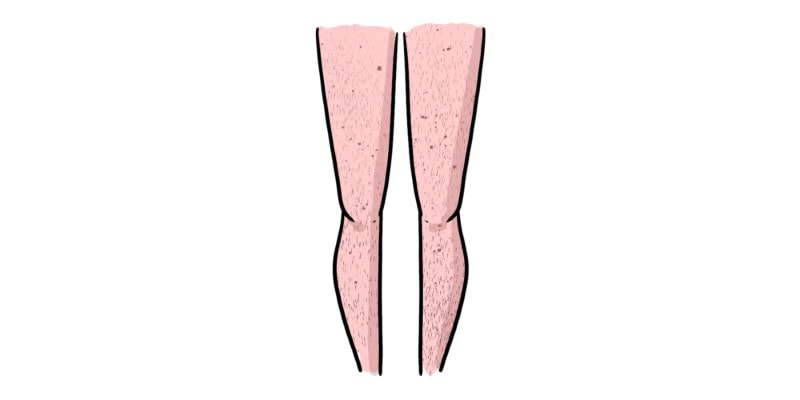
Get creative with your drawings so your characters look even more unique.
Try Drawing Different Leg Shapes And Sizes!
As you can see, you don’t necessarily need to learn muscle or bone names to be able to draw legs.
These can be interesting and useful to learn, but you can easily draw legs or any part of the body by breaking them down into simple shapes.
Once you’ve learned those, you can play with those shapes to draw different types of body shapes and sizes.
For example, if you’re drawing a plus-sized person or character, use round shapes and even play with their proportions.
Depending on their size, the upper part of the leg can be bigger and chubbier, while the lower leg can appear smaller!
The opposite is also true. When drawing a tall and thin person, you can exaggerate the leg shapes to appear very long, thin, and with almost no curvature.
You can exaggerate the calf muscles for muscled legs and draw them very prominently.
It’s important to experiment, mix, and match different shapes and even exaggerate proportions to create a unique and interesting style for yourself.
So have fun with that!
And if you’re ready to jump into drawing the entire figure, click here!
Patricia Caldeira is the main writer here at Don Corgi. She's an art teacher with over 20.000 happy students across many platforms and courses!
Enjoy your stay and as always:
Keep on drawing!
Patricia’s courses have enrolled 22 000+ students around the world, in platforms such as Udemy, Skillshare, Gumroad and more.


")
")