Learning to draw the hips and waist is fundamental in figure and anatomical drawing.
It can be difficult to get it right, especially when connecting them to the leg area.
However, breaking and using basic shapes makes the whole process much easier!
In this tutorial, we will draw the waist and hips and learn the whole structure needed to draw them in any position!
Table Of Contents
Basic Hips Proportions
It can be hard to understand where the hips start and end.
For that reason, that’s one part of the body that is easy to get wrong and many artist’s source of frustration!
Find a reference image to figure out where the hips should be drawn. Then, draw two lines: one right below the neck and another on the crotch area.

Now, roughly divide the area between those lines into two parts. The hips start on the new guideline, roughly at the center of the torso, and finish at the crotch area!
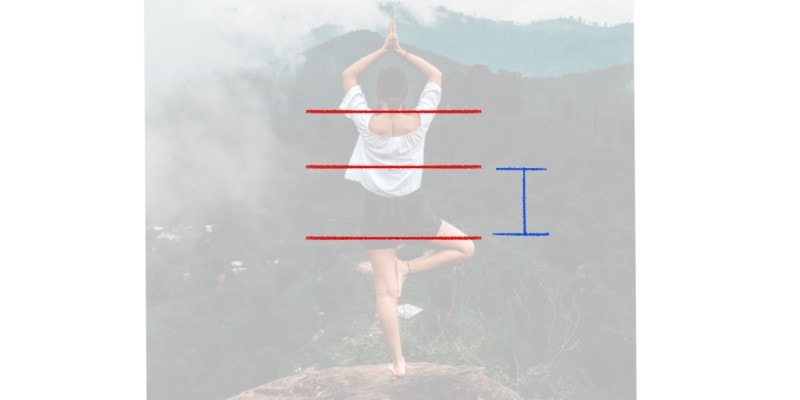
Another way you can do this is by using the head as a measurement unit. Grab a reference image and draw a circle for the head.
Now, draw that same shape along the body.

Find the area between the middle of the torso and the crotch. According to our drawing, the waist and hips are 2 heads long.
One of the circles is divided into 2 equal parts, while the other remains as it is.

With this method, you’ll always get the body proportions right!
Once you learn how many heads long each body part is, you’ll always know their proportions and the right size for them.
Drawing The Hips
Now that we know the hips’ proportions, it’s time to draw them.
We can do this very simply by breaking everything down into simple shapes!
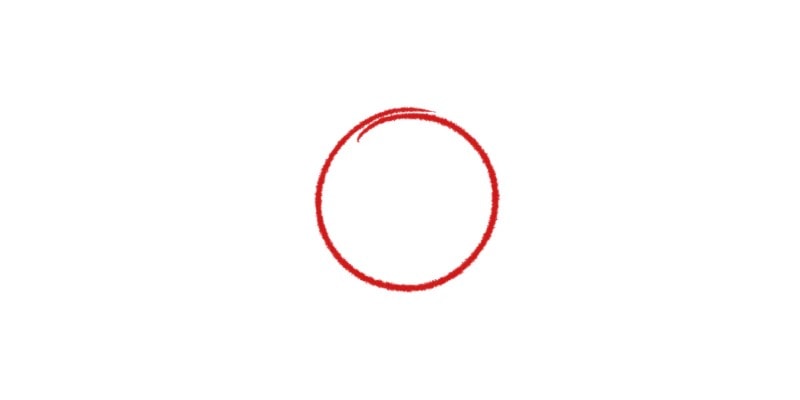
Step 1 – Draw the Guidelines
First, let’s draw our guidelines so we don’t get lost in our drawing.
This way, we won’t get distracted and miss the right proportions!
Draw one circle.
Then, draw 2 half circles, roughly with the same proportions as the first one. One half is drawn above it, and the other below the circle.
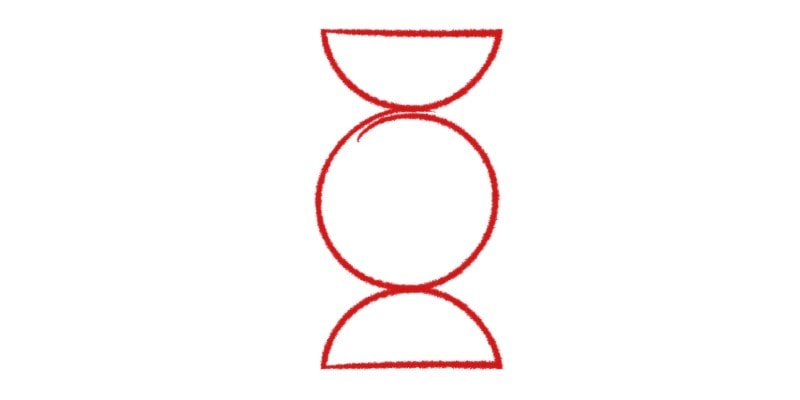
We have the needed guidelines. Next, we’ll learn what shapes can be used to draw the hips!
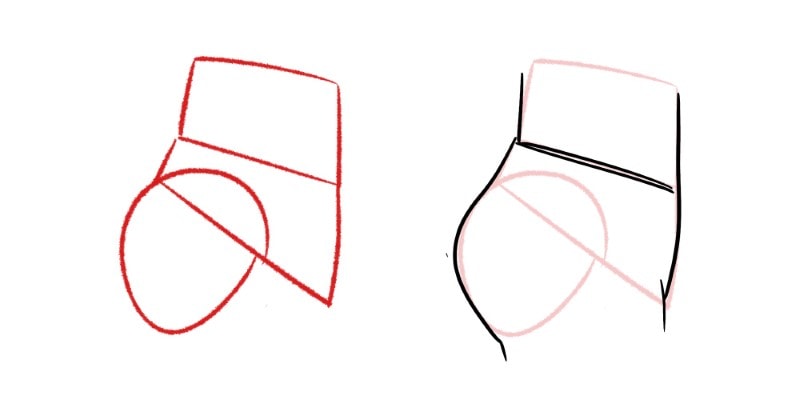
Step 2 – Start by Drawing a Rectangle
Starting at the top, draw a rectangle.
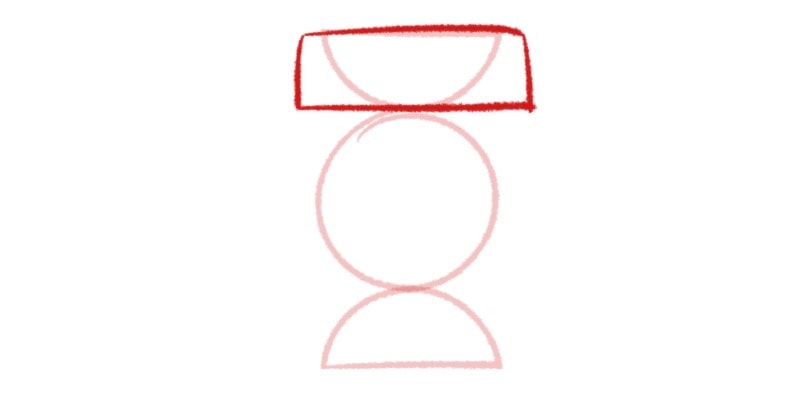
Something similar to a trapezium also works, especially if you want to draw a curvier body type.
This shape will roughly fit half of the first circle guideline.
Step 3 – Draw an Upside-Down Triangle
Add an upside-down triangle or mountain shape below the shape you just drew.
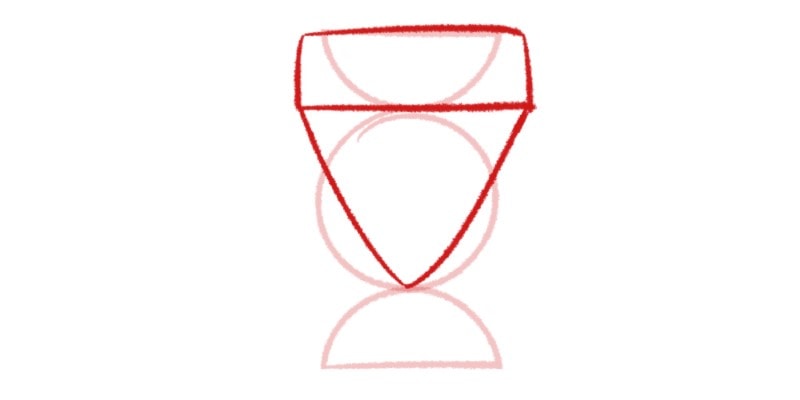
This shape should end at the bottom of our circle guideline!
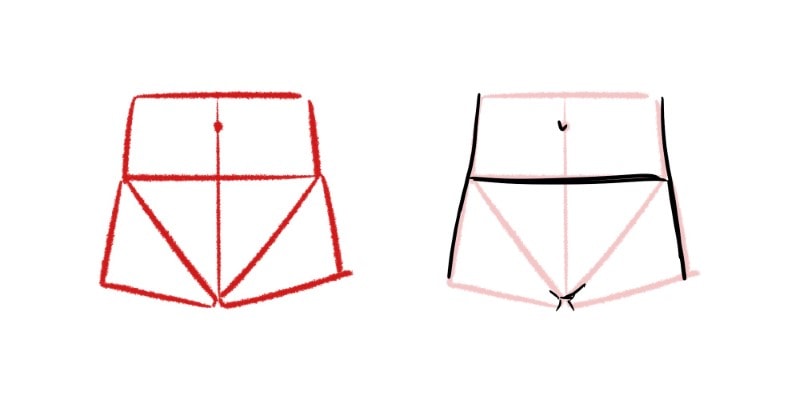
Step 4 – Add Two More Rectangles
This is our last set of shapes.
To one side of the triangle, draw an irregular rectangle shape.
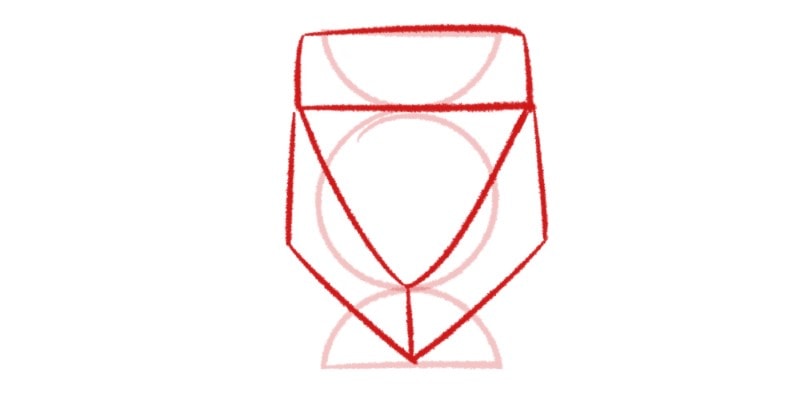
This shape goes along the side of the triangle and goes as far as the crotch or the bottom of the half circle we use as a guideline.
Draw a similar shape on the other side, and it’s done!
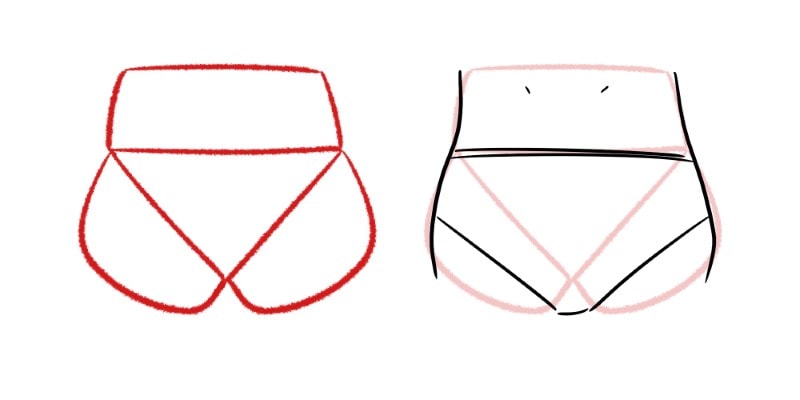
We have all the shapes needed to draw the hips of the human body.
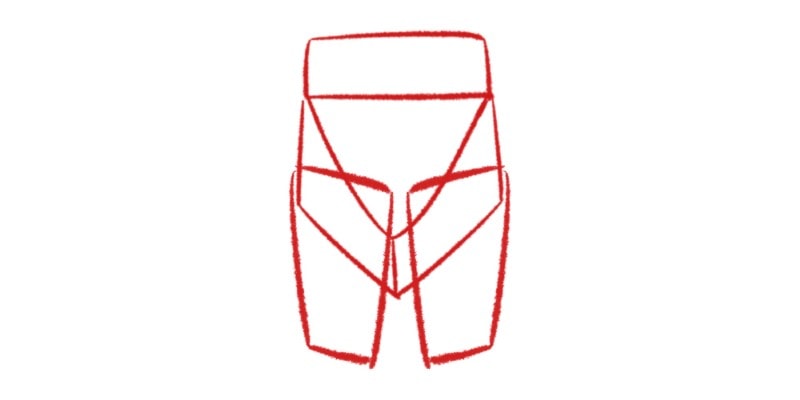
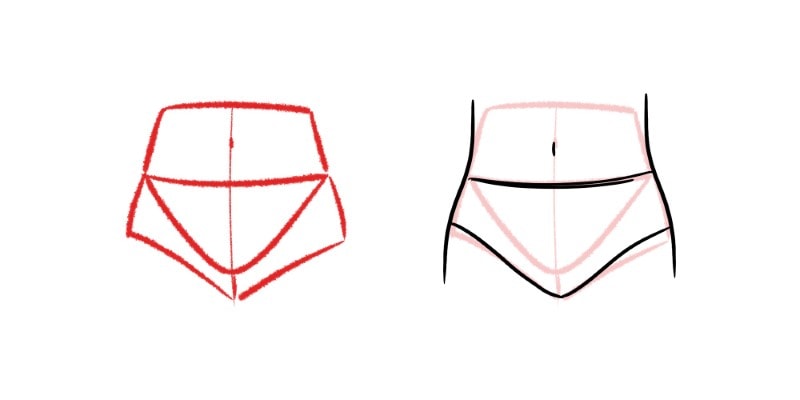
Step 6 – Clean Everything with New Lines
To finish your drawing, outline the shapes you’ve just drawn.
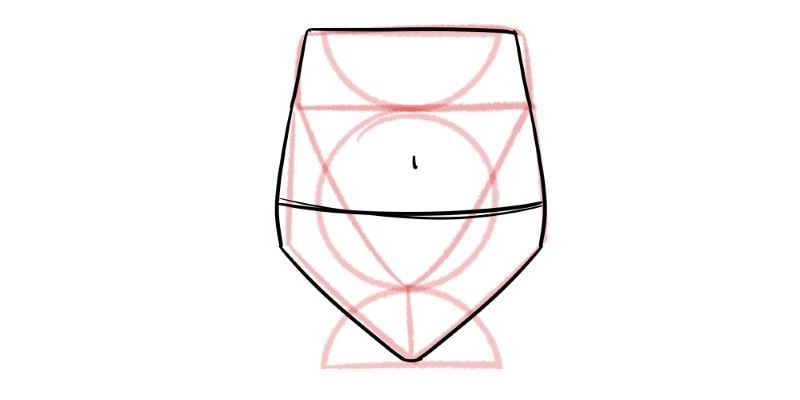
Now it’s also a good opportunity to color and add details like clothing, for example!
Intersecting the Legs with the Hips
You will want to learn how to connect the different body parts when practicing figure drawing.
This is one of the most difficult parts to get right regarding anatomy.
However, you’ll never get it wrong by breaking it into simple shapes.
Let’s take a look at our hip shapes again.
The upper leg shape starts in the same place as the bottom area of the hips.
We intersect these shapes with a new one, such as an upside-down trapezium!
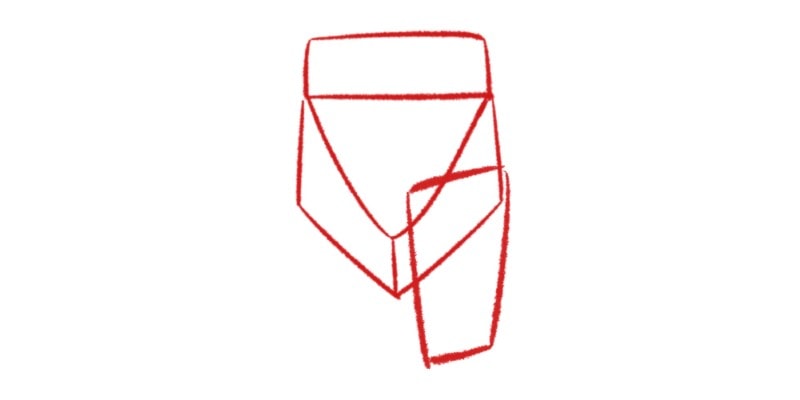
After you draw the hips, you can also draw part of the legs, just like we did, so you get used to that connection!
Go ahead and draw another similar shape on the opposite side as well.
Again, outline the whole drawing and add some color to it!
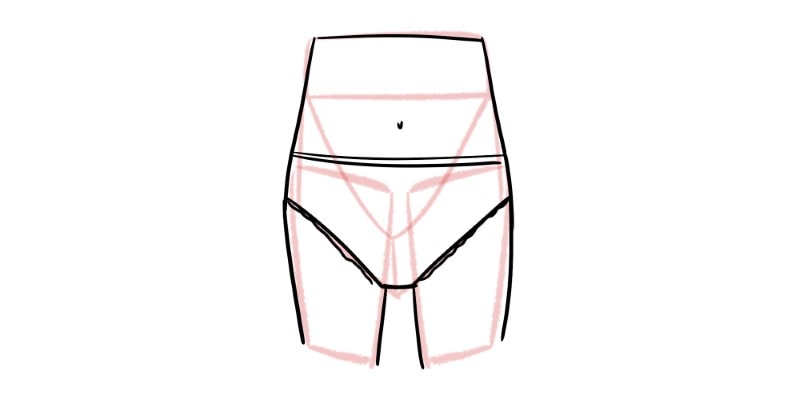
There you go, a nice looking drawing of the legs after the hips!
You can learn how to draw the entire Leg Anatomy here!
Drawing The Hips in Different Positions
Now that you know the base shapes to draw hips, it’s time to explore different positions!
For example, if you’re drawing the hips from the side, giving the shapes more dimensionality is good, so it has more depth and form.
From that view, we also see part of the glutes, so use rounder shapes.
For the same reason, when drawing a person or character from the back, the shapes for the hip area must also be adapted!
Observe different reference photos or take your own, posing differently for each one.
See how the hips move and how you should adapt your shapes as effectively as possible!
Don’t be afraid to draw on top of your references. That’s the best way to find the right shapes.
Drawing Male VS Female Hips (Differences)
Depending on the body type, you might need to draw it differently.
The shapes are almost the same but must be adapted for the body you’re drawing.
For example, women are curvier than men, especially in the hip and waist areas!
When drawing a female type of body, focus on rounder and curvier shapes.
The transition between each shape can be more obvious, so the body looks narrower in some areas than others!
On the other hand, when drawing a male body, every shape looks very straight.
There are not many curves, and those that exist are almost imperceptible.
Focus on bulkier and straight shapes while still keeping a sense of volume!
These are the kinds of shapes I recommend using, but each artist has their own process.
Experimenting and trying different shapes are necessary to find the most comfortable and optimal way of drawing anatomy!
Ready to draw the whole figure? Check out my Complete Figure Drawing Course!
Patricia Caldeira is the main writer here at Don Corgi. She's an art teacher with over 20.000 happy students across many platforms and courses!
Enjoy your stay and as always:
Keep on drawing!

")

")