Procreate is a very simple and intuitive software to use for illustration.
With it, you can make from the simplest to most detailed and rendered pictures using straightforward tools.
To shade in Procreate, first choose a good shading brush such as the Soft Blend brush or any of the airbrushes. Then choose a light source direction and shade and blend your artwork smoothly.
There are many ways to shade in Procreate, but through this article, you’ll learn how to shade any illustration in a very easy-to-follow process, step by step!
Update: I’ve created a video that you can follow to shade your art in Procreate easily!
Table Of Contents
Step 1 – Set Up Your Artwork For Shading
Start by opening an artwork you already have or create a new file on Procreate.
If you want to practice adding shading to your drawings, it doesn’t need to be a complex drawing.
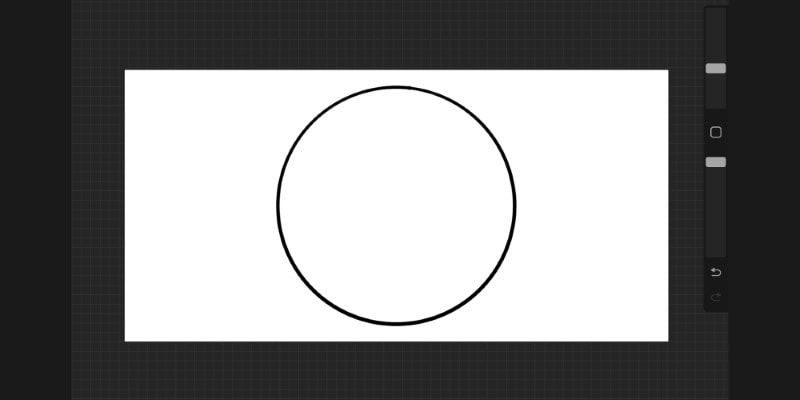
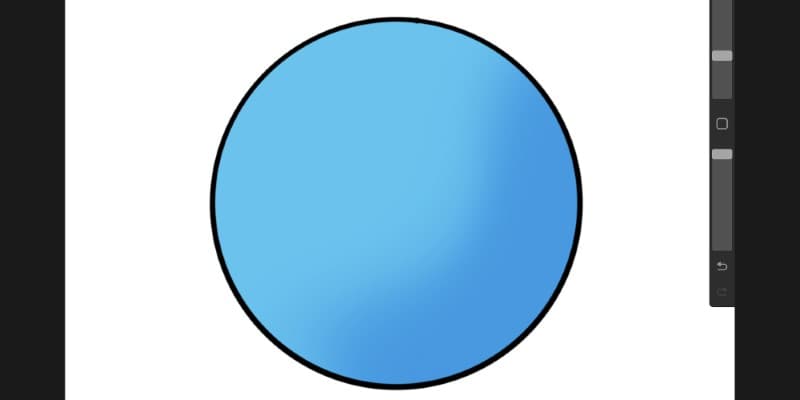
Create a new file and draw a circle or any other shape you want. Once that’s done, add some color to your circle.
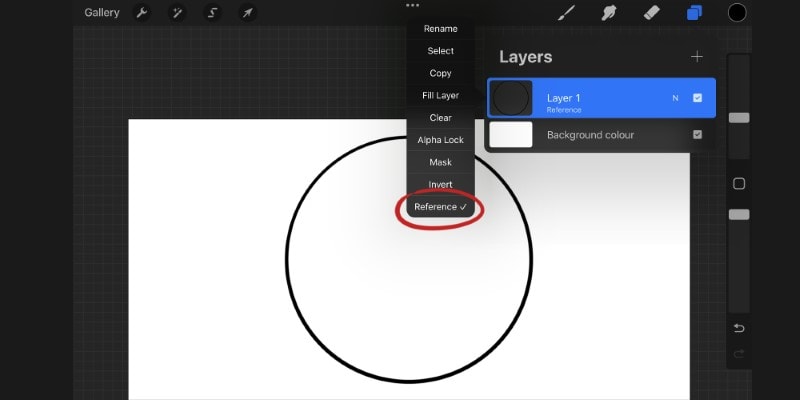
To do this, set up the layer as reference by tapping it and then tap ‘Reference.’
Create a new layer below your drawing. This is where our base color is going to be.
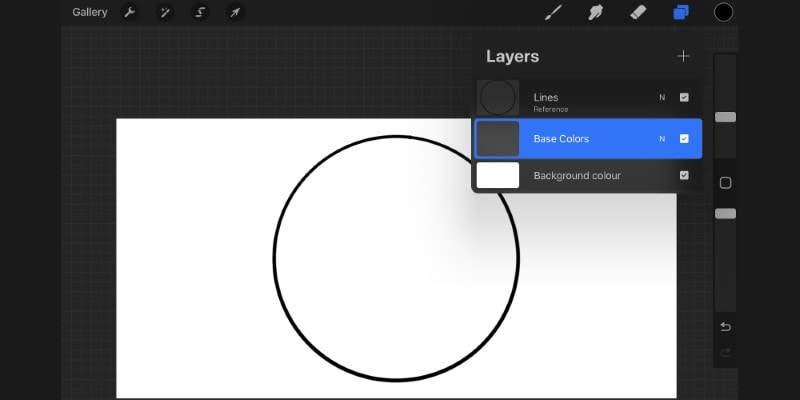
With the new layer selected, choose another color or keep the same one and hold and drag it into your circle.
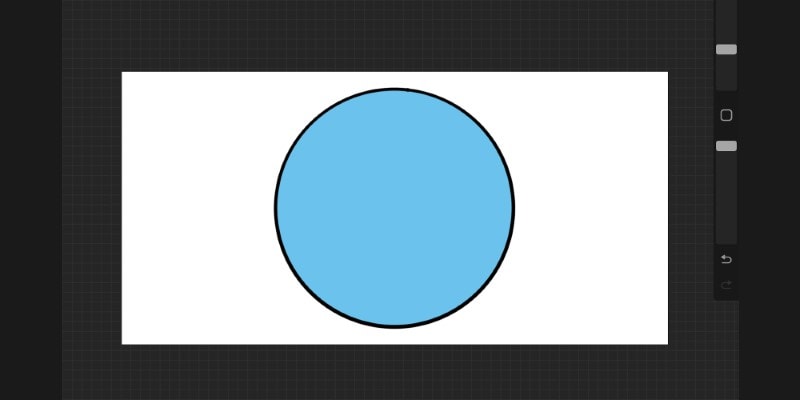
Your circle has been quickly colored, and your artwork is ready for shading!
If you want to use a more complex drawing for this exercise, you can do so. All you have to do is draw your lines and color them using the same process we did just now!
Step 2 – Create A New Layer For The Shadows
Now that our drawing is ready for shading, it’s time to create a new layer.
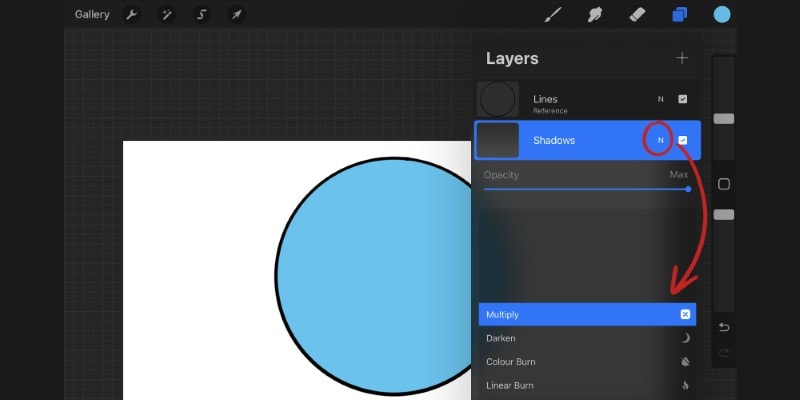
Create a new layer. This layer should be between the line art and the base colors layers.

There are many ways to add shade to a drawing, but I’ll show you the one I use more often, and that is the easiest and quickest to use!
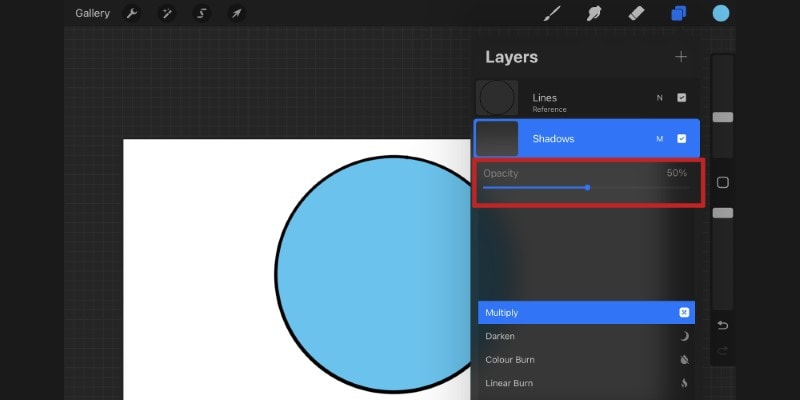
Tap the ‘N’ that appears to the left of your shadow layer’s name once. Then change its Blending Mode to ‘Multiply.’
In the same menu, lower the layer’s Opacity to about 50%. The layer’s opacity can be changed later on, but for now, let’s keep it in the middle!
Lastly, tap the shadows layer once and then tap Clipping Mask. Your shadows layer will now take into consideration the layer below.
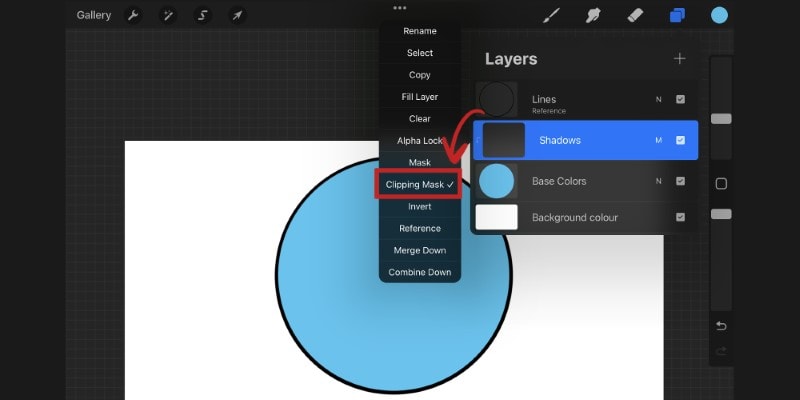
This means that if you go beyond your base colors, it won’t show on your canvas. You’re basically applying a simple mask to the layer below.
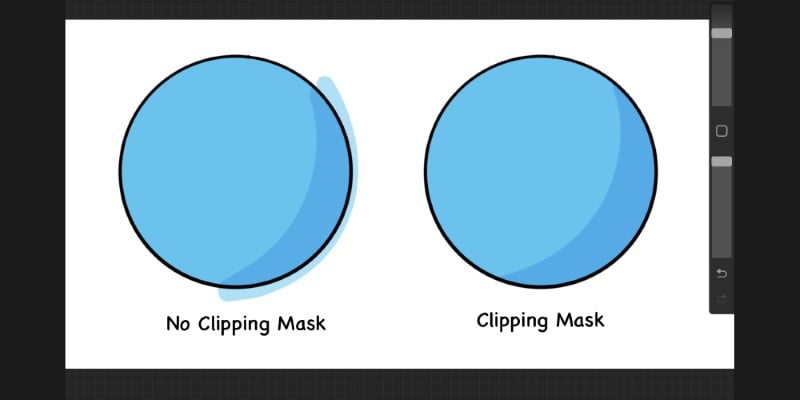
Doing this will help our whole shading process since we don’t have to focus on not going out of the drawing’s lines.
Everything is prepared, so now we need to choose a brush!
Step 3 – Choose A Good Shading Brush
Which brush to use is completely up to your preferences and art style. There are many amazing default procreate brushes to choose from!
For example, if you have a more painterly style, you might want to use a softer or textured brush.
On the other hand, if you have a more cartoony or anime style, then a hard brush would be the better choice.
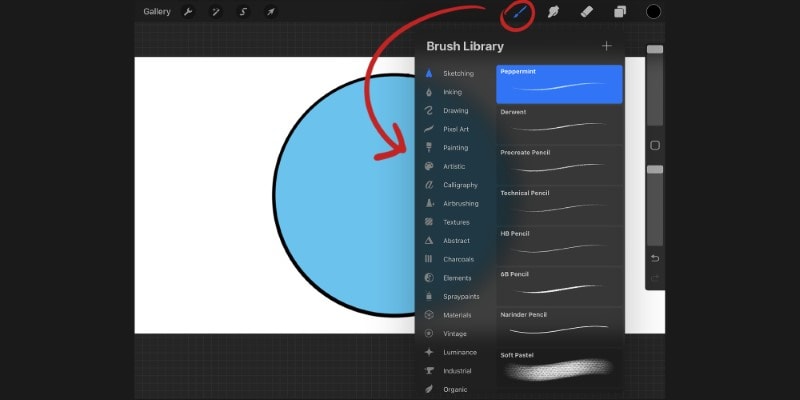
Procreate offers a wide range of brushes to choose from, and I highly recommend you take some time to explore and try several of them.
Every brush is divided into different categories, so tap the brush tool icon and start with the ones that resonate with you and your style.
For example, for soft shadows, you can find several different options in the Airbrushing category.
These brushes range from the softest to the hardest, and for the softest shadows, I’d recommend both the Soft Blend or the Soft Brush.
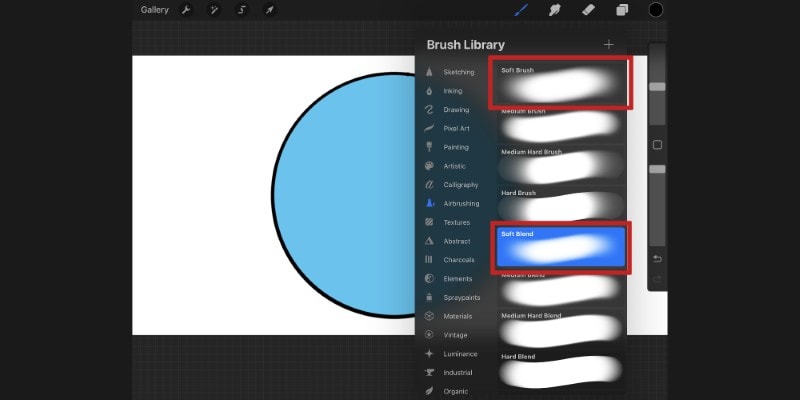
The Soft Blend is especially great for shading since you can paint and blend simultaneously as you draw. This way, you can fully control the intensity of your shadows as you paint them!
For a more cartoony style, hard brushes work better, and again, there are many options to choose from.
I’m a big fan of the Inking brushes, for example, particularly the Studio Pen and Dry Ink.
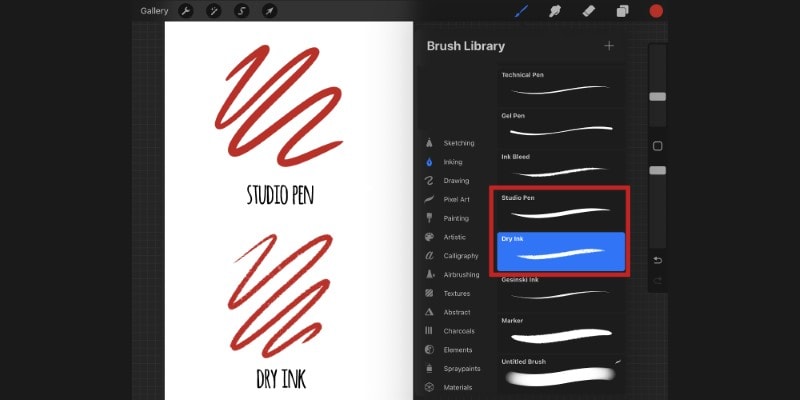
The Studio Pen is a hard and easy-to-control brush, while the Dry Ink has a subtle texture if that is something you want in your drawings!
The soft texture also helps to soften your shadows while keeping the cartoony look.
Speaking of textures, you’ll find many different textured brushes when using Procreate, and it’s one of its bigger strengths.
If you like to use texture in your drawings, you’ll definitely find something to make your shadows pop up.
The best categories for texture brushes are the Sketching, Painting, Artistic, and Charcoal categories.
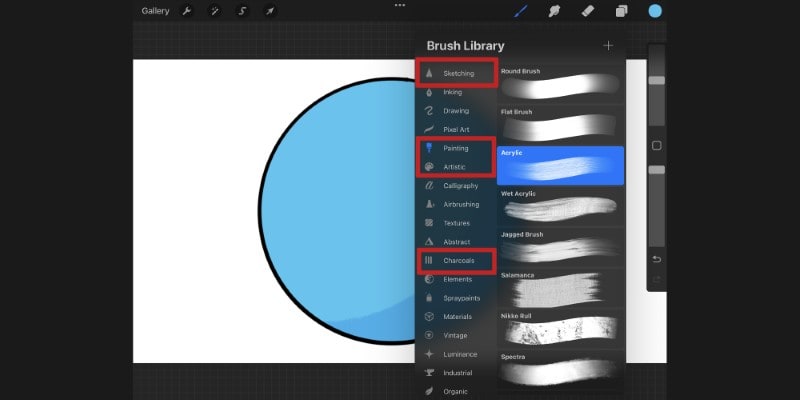
These have many textured brushes that can be used for painting and even to add shadows.
I’m particularly fond of the 6B Compressed Charcoal brush and Tarraleah Artistic brush for a watercolor texture.

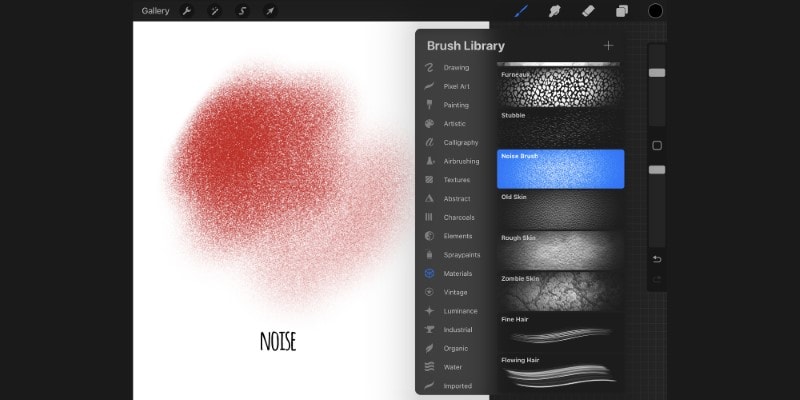
Another brush that I highly recommend to add textured shadows to your drawings is the Noise Brush, found in the Materials category.
It’s very soft and grainy, giving a subtle texture to your artwork!
For this exercise, I’ll use the Studio Pen for the shading.
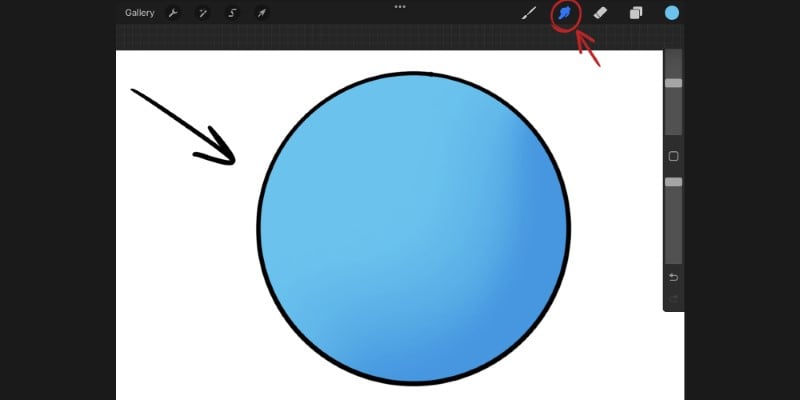
Step 4 – Choose A Light Source Direction
Now comes the most important step: choosing where the light comes from.
This decision will dictate where to draw your shadows.
If the light comes from one side, it will cast a shadow on the opposite side.
So you don’t forget or get confused while painting your shadows, it’s good first to decide where your light source is coming from.
You can even make a mark, like an arrow on your canvas, so it’s easier to remember and keep focus.
To keep things simple, we will only focus on the cast shadow of our drawing.
So, for example, if your light source is coming from the left, then your casted shadows should be drawn on the right.
If the light comes from the right, your shadows will mainly appear on the left side.
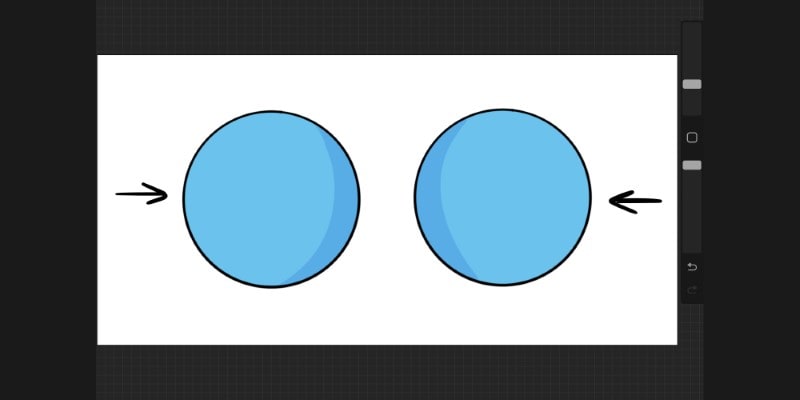
The same goes for any other direction your choose. It doesn’t matter where the light is coming from. The casted shadows always appear on the opposite side!

Once that’s decided, remember to draw a small arrow indicating the direction of your light source.
When you get the hang of it, you can skip this step, but for now, it’s a good habit to have so you don’t lose sight of your shadow’s direction.
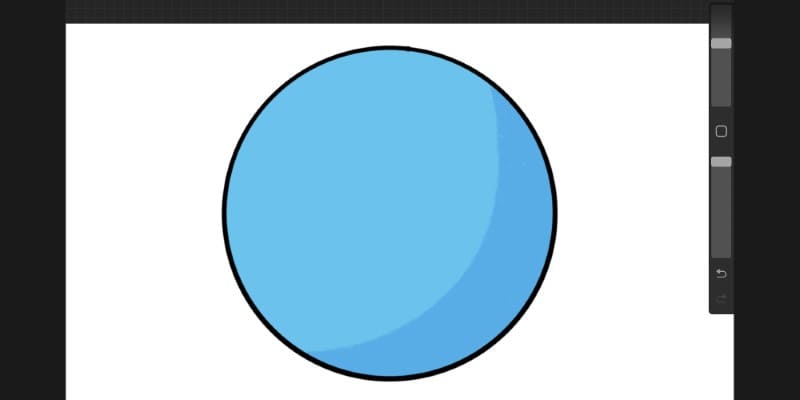
Step 5 – Paint Your Shadows
It’s now time to apply the actual shadows to our artwork.
Since our layer is set to Multiply, we don’t need to choose any color for our shading.
Pick the base color and then paint the area you want to shade.
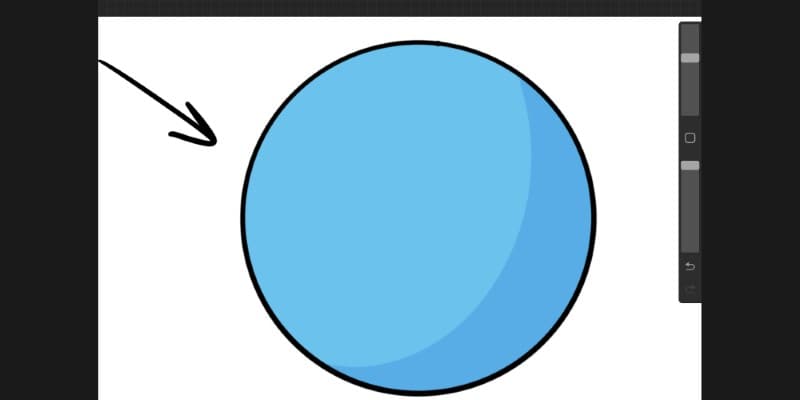
If you’re using a softer brush, some areas (the ones closer to the light source) can be lighter, while the areas farther from the light should be darker.
If, on the other hand, you’re using a hard brush, then your shadows always look the same, with no softer edges.
In this case, all you have to decide is how far the shadows should go.
This all depends on how close or farther away is your light source. The closer it is, the less shading you see.
In other terms, it all depends on how intense or how much shading you want to add to your artwork.
Just start shading and keep at it until your whole artwork is properly finished. You can then adjust and change minor details in your shading!
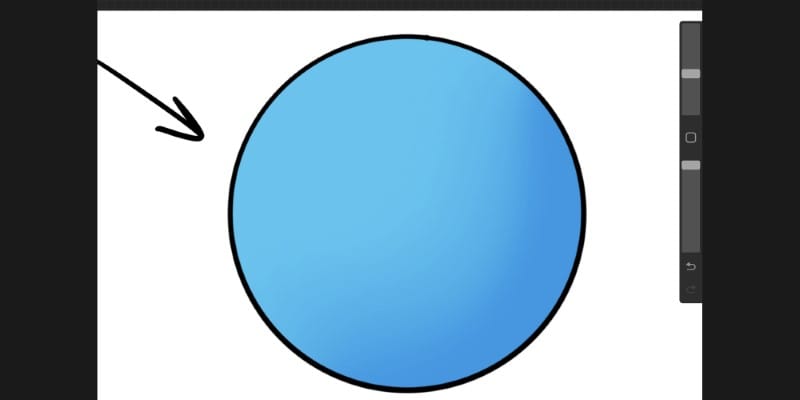
Step 6 – Adjust Your Shadows
We just went through all the steps needed to shade on Procreate, so it’s time for smaller adjustments.
For example, you can now play with the layer’s opacity to better translate the mood of your artwork.
More opacity will create a bigger contrast between shadows and base colors, while less opacity equals a softer piece.

Another option is to use the Smudge Tool at the top bar to create more different shading effects.
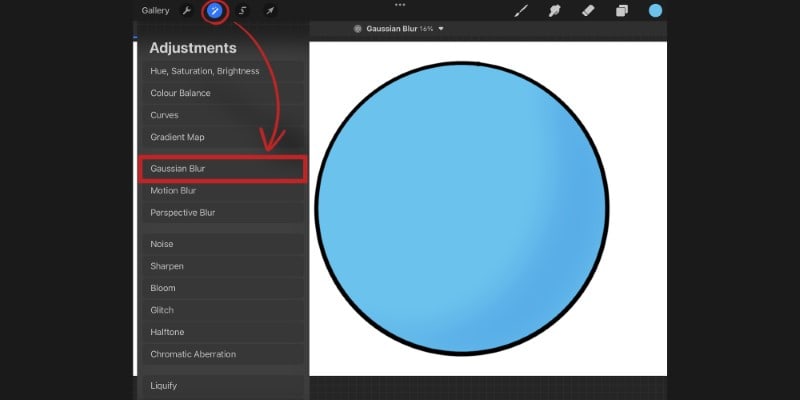
Alternatively, if you want to apply softer edges to the shadows, you can apply a Blur.
To do it, tap the Adjustment icon on the top bar of Procreate and then Gaussian Blur.
Then, use your finger to slide and add as much blur as you want!
Using this filter can help to shade and blend the whole artwork so it looks more harmonious.
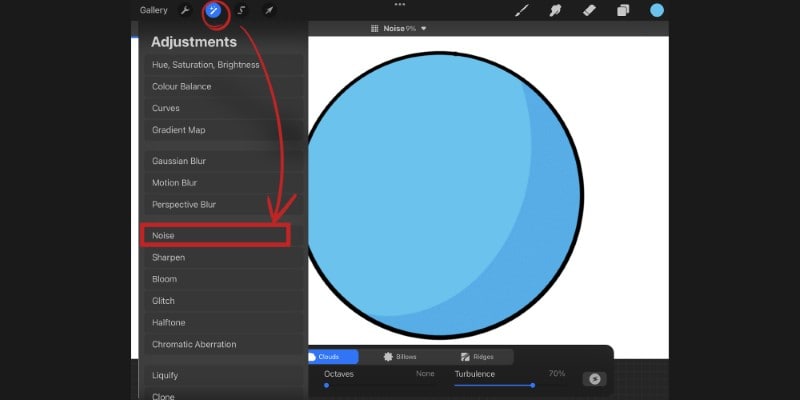
If you want extra texture, you can even apply a Noise filter to the layer. Again, go to the Adjustment menu and then choose Noise.
Then, move the slider around until you’re happy with the effect.
Adjust and try different things until you’re happy with the result!
Bonus – Add Highlights
Now that this guide to shading has ended, it’s time to add a little extra bonus so our artwork pops up even more.
Adding some highlights completely changes the mood and vivacity of an illustration, and it can be done with very few steps.
Start by creating a new layer on top of everything else.
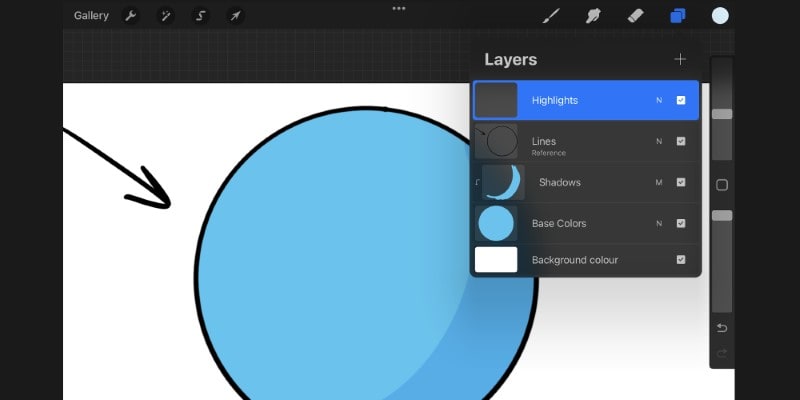
Now, pick a lighter color, as close as possible to white. Then start adding small dots or strokes to places that cast light.
Things like eyes, jewelry, metallic, plastic, or even silky materials will cast some glow when hit by light.
Contrary to the shadows, these highlights should be drawn on the same side the light source is coming from.

You don’t need to overdo it. Sometimes, a small detail in one or two places is more than enough!
Lastly, you can make a few adjustments, such as changing the layer’s opacity so the highlights look more or less intense.
Ready for more? Check out some fun Drawing Exercises you can do in Procreate.
Patricia Caldeira is the main writer here at Don Corgi. She's an art teacher with over 20.000 happy students across many platforms and courses!
Enjoy your stay and as always:
Keep on drawing!
Patricia’s courses have enrolled 22 000+ students around the world, in platforms such as Udemy, Skillshare, Gumroad and more.
")

")
