Perhaps you’ve just got your new iPad with Procreate or want to practice drawing on Procreate with some drawing exercises.
Getting a new device or even trying new drawing software is always challenging. It’s an excellent idea to start with simple drawing exercises to familiarize yourself with Procreate and its tools!
But what drawing exercises should you start with on Procreate?
- Draw Basic Shapes;
- Create Fun Patterns;
- Color Some Line Art;
- Practice Gesture Drawing;
- Draw the same Subject using different Brushes;
- Create Art out of random blobs.
These are a few examples and some of my favorite drawing exercises on Procreate. Many of these use specific tools on Procreate, so you can learn and get more familiar with it!
Let’s review these exercises to improve your drawing skills and bring you to the next level!
Table Of Contents
1- Draw Basic Shapes
Drawing basic shapes is always a great warm-up! Not only that, but it’s an excellent way for you to improve your lines.
In Procreate, it’s especially helpful practicing these since the software also offers a few features to help us create these shapes.
That’s why I recommend this exercise: to learn Procreate while warming up and getting more confident in your lines. This is a drawing exercise that I also recommend in my article on Drawing Tablet Exercises.
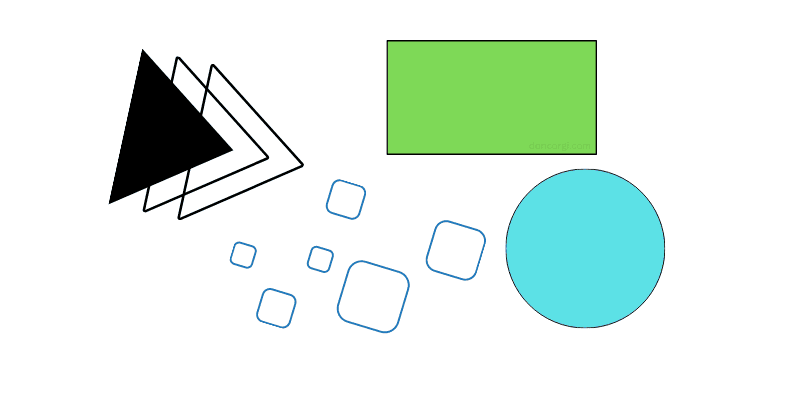
Let’s start simple:
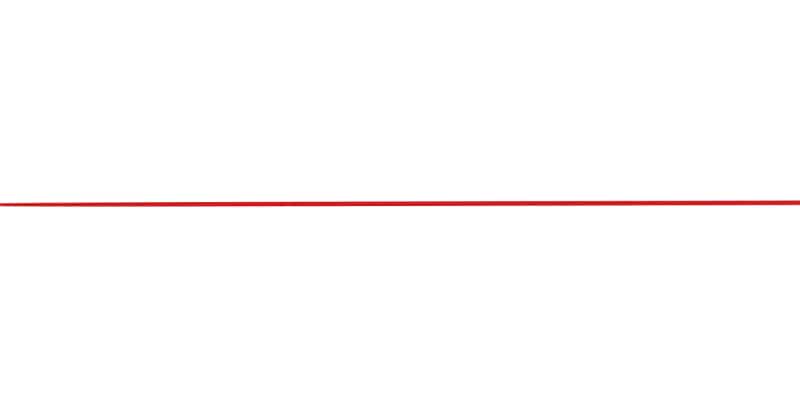
Draw A Straight Line
Before drawing an actual shape, simply draw a straight line. It can be horizontal or vertical; it’s up to you.
Drawing a straight line can be extremely hard at first. And even if you want it to be perfect, it’s tough to do so. However, Procreate will help you with that!
Let’s do another straight line, but this time, do not lift the pencil when you finish the line. Instead, keep the pencil down and wait a few seconds.
When you do this, Procreate will recognize the gesture and will immediately fix the line so it looks 100% straight.
Before lifting the pencil, you can move that line around and even control how long you want it to be!
You don’t need a rule or struggle to draw a straight line; just keep your pencil down when making a line, and Procreate will perfect the line for you.
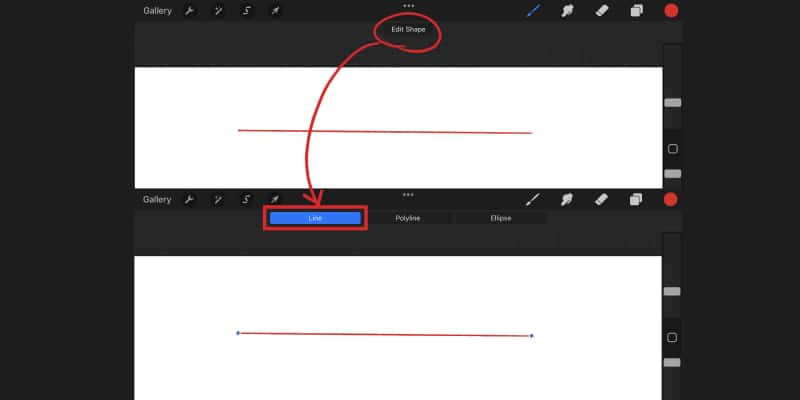
Another exciting feature is that you can edit your line even more once you lift the pencil from the iPad.
Look up at the top of the screen, and you’ll notice that an ‘Edit Shape’ button appears. When you tap it, you might have several options, depending on how you drew your line.
The most common one is ‘Line.’
When tapping ‘Line,’ two dots will appear on your line.
One at the beginning of it and another at the end. You can move these points around as much as you want.
Depending on your movement, Procreate might recognize the line has more than two dots.
When that happens, you might have more options to play with, such as ‘Polyline.’
If you tap this option, you can move around several points of your line and might end up with a completely different result!
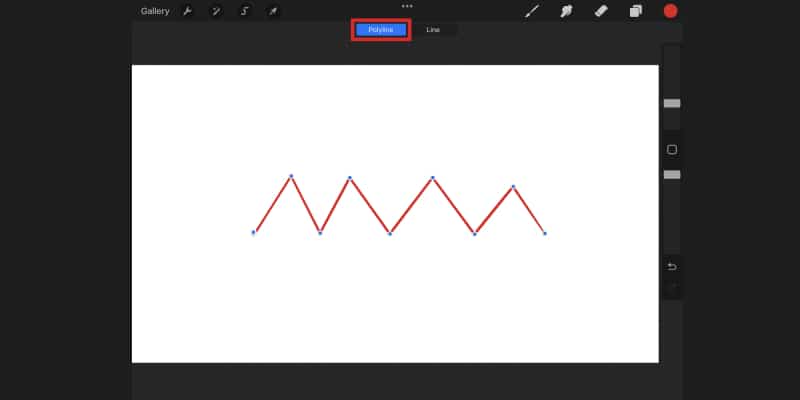
This option is beneficial if you want to create a zig-zag line, for example.
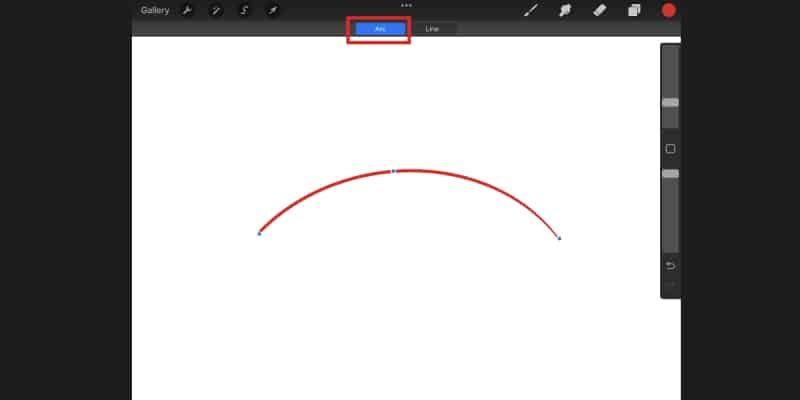
You can also do this exercise with curved lines! Instead of a straight line, draw a curve. Again, keep the pencil down until Procreate recognizes your gesture.
Once you lift it, tap ‘Edit Shape’ again. You should now have at least two options: ‘Arc’ and ‘Line.’
You can now edit your curve by moving the different dots around by tapping’ Arc.’
If you want a straight line, tap ‘Line,’ and Procreate will transform it!
Keep drawing a few lines while experimenting with the Edit Shape feature. When you’re ready, let’s go to the next level.
Draw A Rectangle Or Square
You might have noticed that Procreate has no specific tool to create shapes, like most drawing software.
However, the feature still exists and might even give you a bit more liberty when it comes to drawing different shapes!
In this exercise, we’re gonna draw rectangles. This way, we can practice our straight lines again while drawing something specific.
Again, keep it down instead of lifting the pencil until Procreate recognizes the shape you just did.
You’ll have the ‘Edit Shape’ option when lifting the pencil. However, this time Procreate does recognize you’ve created a shape.
You’ll have a few options when tapping ‘Edit Shape’. ‘Quadrilateral’ is possibly one of them!
Tap that option. Again, a few dots will appear when you do, one in each corner. You can move these around, so you can change your shape.
Another option you might encounter is the ‘Rectangle’ button. When tapping this one, Procreate will transform the shape you just drew into a regular rectangle.
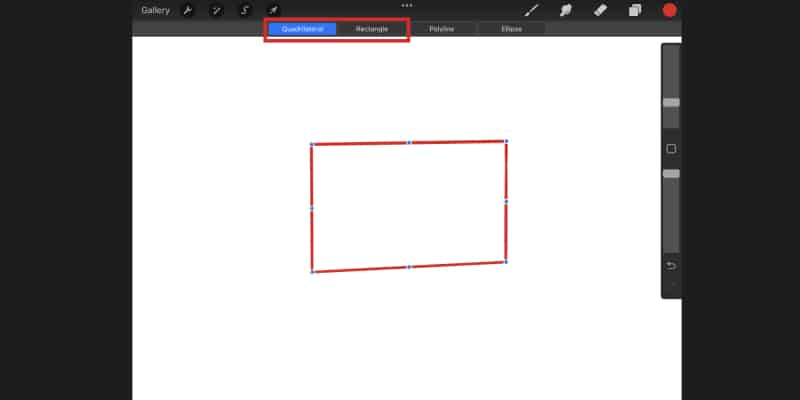
Because it’s hard for us to draw a perfect regular rectangle, Procreate will help you with that!
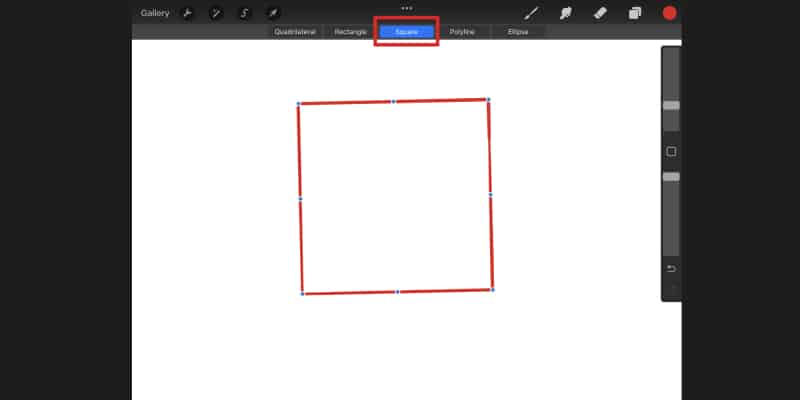
Finally, try to draw a shape that more easily resembles a square. You’ll also have the ‘Square’ option available.
Like before, Procreate will make the shape into a perfect square when tapping this button.
Drawing Circles and Ellipses
We reach the third part of our warm-up: circles!
These shapes are notoriously hard for many artists; truth be told, it’s highly improbable that you’ll create a perfect circle.
But practice is always the way to go. Start by drawing a few circles on your canvas.
After a few tries, let’s play with Procreate tools once again just like we did before!
Draw a circle, but this time, don’t lift your pencil right away.
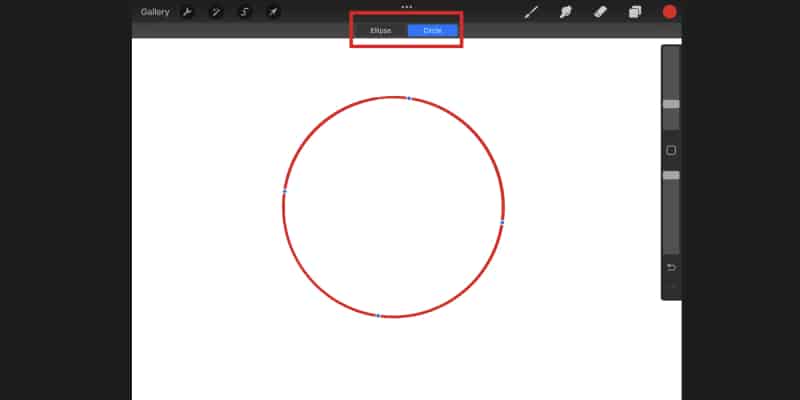
Tap the ‘Edit Shape’ button. This time, you’ll have two options: ‘Circle’ and ‘Ellipse.’
By tapping the Circle button, Procreate will immediately transform your shape into a perfect circle.
Notice that a few blue dots will appear in said shape. Like before, you can move these dots around to make the shape exactly as you want!
The ‘Ellipse’ option is very similar, but Procreate will transform your shape to resemble an Ellipse instead of a circle.
Again, you can still edit your own shape however you want by moving the dots around.
Practice shapes on your own or by using the Edit Shape tool of Procreate. Both are good to learn and know, so have fun with them!
2- Create Patterns Using Symmetry Tool
It’s time to have some fun!
Drawing a repetitive pattern is a great way to practice your lines. Now, you can go into your canvas and start drawing fun and cute patterns with different elements.
But why not introduce another of Procreate’s tool here and make this whole process fun?
Go to’ Canvas’ in the Action menu (the icon that resembles a tool at the top left).
Toggle on the ‘Drawing Guide’ option. Now right below that, tap ‘Edit Drawing Guide.’
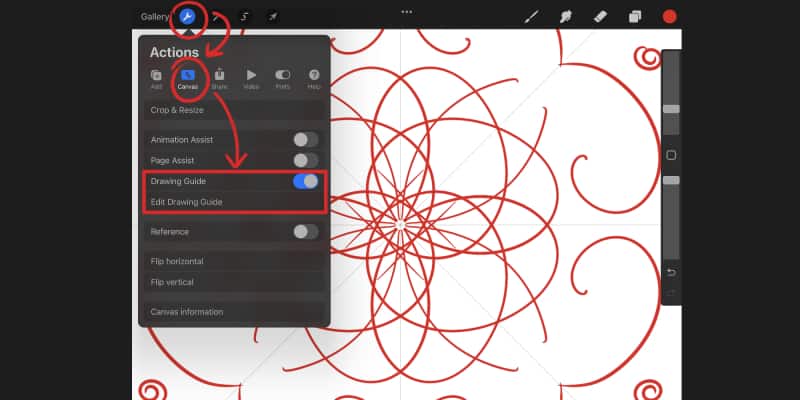
You’ll enter a new menu where you have several different Guides to choose from. This tool is excellent when you want to use perspective in your drawings!
You can create one, two, or more point perspectives, and by keeping the Guide active, the grid will help you draw your lines according to the view you chose.
Aside from this, you also have the ‘Symmetry’ tool. This one is fun to use, especially if you want to draw very symmetrical designs.
As always, you have a few options here. Tap the ‘Options’ button.
You’ll notice that you can create your guide in different directions and parts:
- Vertical – A vertical guide will divide your canvas into two equal parts. What you draw on one side will be reflected on the other;
- Horizontal – This time, your canvas will be divided into two parts by a horizontal line;
- Quadrant – When you tap this option, your canvas will be divided into 4 equal parts;
- Radial – Lastly, the radial option divides your canvas into 8 parts. This one is excellent for creating intricate patterns like mandalas!

Finally, there are two more options that you can toggle on or off:
- Rotational Symmetry – In this mode, your stroke will not only be reflected but rotated as well;
- Assisted Drawing – Your lines will be drawn according to the guides you created. When you set up any Symmetry Guide, this option will toggle on automatically.
Alright, now that you know what each option does, it’s time to try them out.
Play with the different options and create different patterns with them!
Even if you don’t usually draw patterns, this exercise boosts your mood and motivation.
3- Color Line Art

Another simple exercise that lets you not only relax a bit but also explore coloring on Procreate.
You can either draw your own line art or find some coloring pages online for this one.
Since the goal here is to focus on coloring, I’d say to look up something you like unless you already have some line art ready to color!
We have a few coloring pages on our Gumroad page; you can download these for free. Just open them on Procreate and have some fun.
When it comes to coloring, there are two ways you can go about it. You can pick up any brush and manually color your art.
Alternatively, you can drag the color into specific parts of the line art. Like you would with a paint bucket!
There are just a few steps before starting to color:
- Make sure there are no gaps on the line art, otherwise when you drag the color into it, Procreate will fill the whole canvas;
- Instead of coloring on the same layer as the line art, create a new layer and move it, so it stays below your lines layer;
- Tap the line art layer and then tap ‘Reference.’ Now, when you add colors in another layer, Procreate will consider the layer above and paint only inside the lines.
Once everything is set up, it’s time to choose a color palette!
This can sometimes be the most challenging part; however, Procreate already has quite some fun palettes for you to use and experiment with.
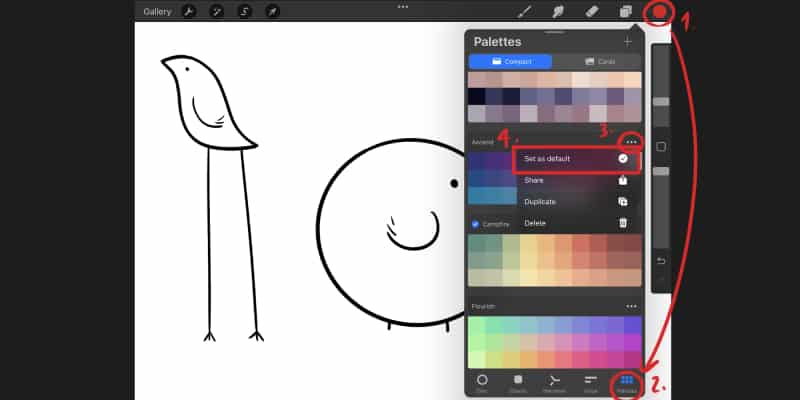
In the Color Menu (last icon on the top right), tap ‘Palettes.’ You can now choose from any of these palettes.
Once you do, tap said palette and then ‘Set as default. By doing this, you can go back to any color modes, and the palette you choose will always be visible!
You can also create your own palettes or a color palette from your camera or photos you already have saved on your iPad.
To explore these options, simply tap the ‘+’ sign on the Palette menu.
If you lose any of the Default Palettes or want to learn more about creating or importing new Color Palettes, check out our ‘How To Restore Your Default Procreate Palette’ article.
Now that you have a color palette, it’s time to add colors. Either drag and drop the color into the line art or paint manually. It’s up to you!
Color, shade, add highlights, and even textures. This is the perfect opportunity to practice your coloring abilities and explore different brushes in Procreate.
4- Draw The Same Subject With Different Brushes
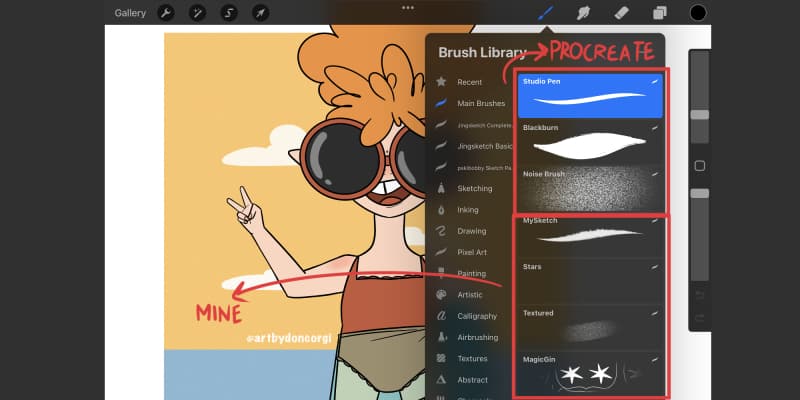
Speaking of brushes, let’s explore those as well. Even though you can download, create, and import brushes into Procreate, this software already offers a lot of brushes for you to try out.
These are divided into different categories, so you can try very different brushes for different purposes. Some of these even replicate traditional mediums.
To start this exercise, pick a subject; it can be anything you want. We got a list with 23 Easy Drawing Ideas to help you out, so you can also choose something from there!
It’s good to go for something simple since you’ll be drawing it several times.
Create a new file on Procreate, pick any brush you find interesting, and draw the subject you chose.
You can even draw it small, so you can have different versions of the same drawing, side by side.
There’s no limit to how many drawings you can make and how many brushes you can use.
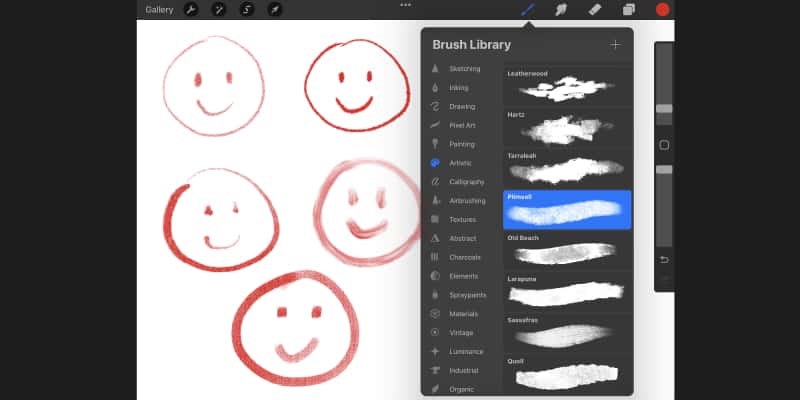
But to make things easier, especially the first time when you don’t know where to start with, here’s what you can do: go through categories!
Start with the first category, go through the list of brushes, and choose one you find interesting.
Draw your subject using that brush.
Now, go for the following category of brushes and choose another! Rinse and repeat until you get to the end of the list.
Next time you do this exercise, you can do the same thing, but this time choose different brushes than the ones you used before.
This exercise might end up increasing your used space on Procreate, though. So find out here how you can backup your Procreate work to iCloud and save some storage.
Alternatively, you might want to explore each Brush Set to learn what you like the best.
In that case, choose one Brush Set/Category, like Inking. Draw your chosen subject several times using each inking brushes you have available.
There are many ways you can tackle this exercise; what matters is that you have fun with it.
This exercise is also an excellent way to warm-up while also learning more about Procreate’s brushes (here are the best default Procreate Brushes) and maybe even finding your new favorites!
5- Gesture Drawing Using The Reference Window
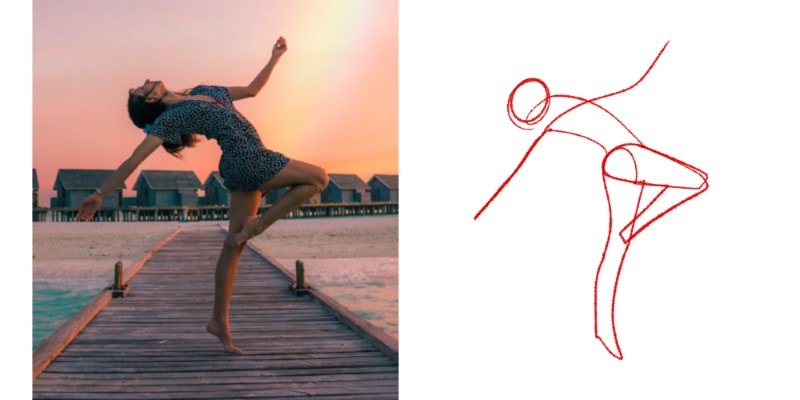
It’s time to go to the next level. This time we’re gonna explore the Reference Window on Procreate while practicing drawing some poses.
Before going on Procreate, let’s first find some references. You can find photos of people acting out different actions and poses in many places.
Another option is to take your own photos or ask for help from a friend!
To help you out, here’s a list of 7 Free Reference Websites. You can find several photos on these websites, download them for free and use them to practice anatomy and gesture drawing.
You don’t need a lot of images for this practice, but it all depends on how long you’ll draw each pose.
In gesture drawing, the idea is to capture the pose in swift and simple strokes. You’re not trying to capture details, only movement and posing.
For that reason, 2 minutes is usually long enough to draw something recognizable.
However, if you want to draw something more detailed, you can do so. But it’s good not to go above 10 minutes per pose, while doing Gesture Drawing.
If you want to learn more about Gesture Drawing, check my complete guide here.
Now go back to Procreate and create a new file. If you want, you can import a photo into your canvas, but that will take up space that can be used to draw on.
This is when the Reference Window comes to our help!
Go to your Action Menu and then ‘Canvas’. Toggle ‘Reference’ on.
A new window will appear on your canvas. On this window, tap ‘Image’ and then ‘Import Image.’
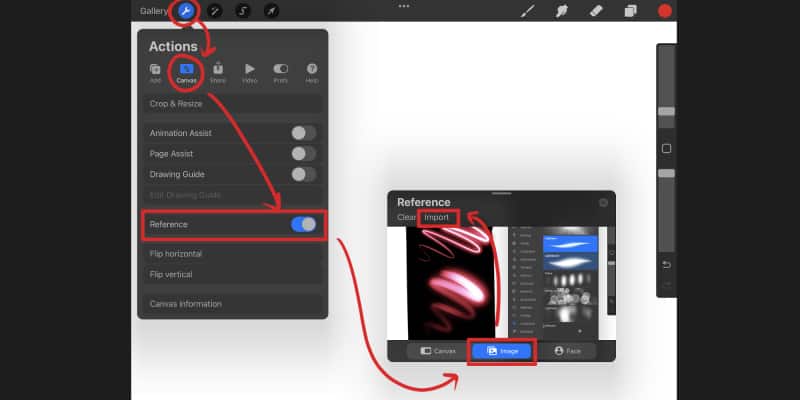
All you have to do is choose one of your reference photos, and it will open!
You can move this window wherever you like. So now you can draw while having the reference right by your canvas.
Once you’re done with the first reference, import another photo and draw that new pose!
6- Create Art From Random Blobs
This is our last exercise, but not the least fun. This exercise does not use any specific Procreate tool, but it’s an excellent way to boost your creativity and imagination.
Procreate has a good number of brushes that resemble paint. Let’s give those a try!
Pick any brush you think looks fun.
The Painting Brush Set has some exciting ones, for example.
Pick any color you want and draw a random blob on your canvas. Repeat this process until the canvas is filled with random blobs of paint.
You can pick different colors and brushes as you go making things more interesting and fun.
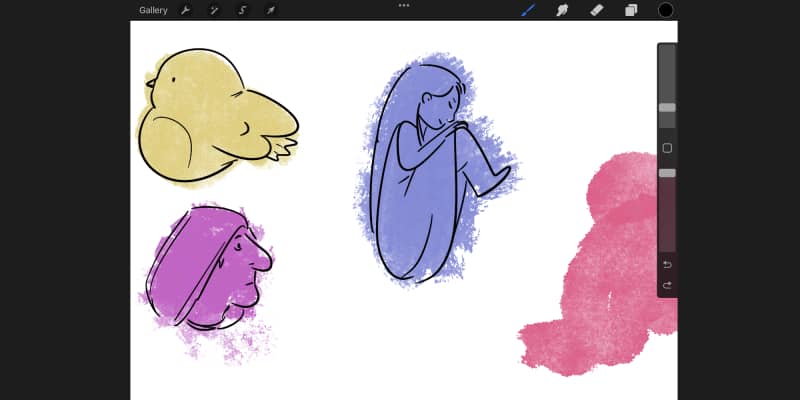
Now it’s time to draw! Pick a different brush, like a Sketching or Inking brush, and choose a color for your line art.
Go through each blob and draw whatever that blob resembles. Maybe it’s a flower, a witch, or a dog?
It’s almost like when you look at clouds with your friends and tell each other what each looks like to you.
These drawings can be as simple or as complex, as you want; what matters is that you have fun.
Again, you can change brushes and colors with each drawing. This way, you can try out different brushes as you go!
Does Procreate Have Drawing Tutorials?
Procreate is a very intuitive and beginner-friendly software. However, it’s good to have a guide or tutorial to understand its tools more efficiently and easily. This is why I’m creating these articles and guides!
You can find my Procreate tutorials by clicking here.
Officially, you can read the Procreate Handbook. Although it does not go into a lot of detail, it does go over each feature of this software, so you can know what options and tools you have!
You can also go to Procreate’s official forum, ProcreateFolio, where many artists post their questions, ideas, and suggestions.
If you have any doubt, it’s worth looking in the forum for answers since someone else might’ve been in the same situation and had their problem solved!
Finally, there you can find several tutorials online. On Youtube, there are several videos you can watch and follow.
If you’re just starting to use Procreate, I highly recommend looking up tutorials on Procreate’s Basics.
These are always quite simple and will give you a quick rundown of Procreate and how to use it.
As you become more familiar with it, you can start looking for more specific tutorials!
Finally, you can also go on Pinterest. There, you can find several quick and easy tutorials and tips.
I always like to find new things I can do on Procreate, so I save those into my Pinterest boards, so I can watch them whenever needed!
Due to Procreate’s popularity, you can always find easy-to-follow tutorials almost anywhere. Whenever you’re in a bind, just do a quick search, and you’ll find your answer.
How Do You Improve Your Drawing On Procreate?
Just like with any other skill, the secret is practice.
Find and learn different exercises. These can be very general or specific if you want to focus on a subject.
For example, if you want to draw people and create different characters, then practicing gesture drawing, drawing from references, and learning anatomy will help you improve!
It’s essential to be patient. Some days drawing will come more easily than others. But don’t give up or feel demotivated when drawing doesn’t go well.
It’s ok and normal to happen. The next day will be better!
As you draw, you’ll learn new things about your art and how to fix your mistakes. So it is vital to make those mistakes, so you can improve.
Try to create a schedule. Take a few minutes every day or go for a longer session, every few days.
You know what’s the best schedule for you. What matters is that you have set up a time to draw on Procreate throughout your week consistently.
Try out different exercises so you don’t get bored of doing the same thing repeatedly.
What matters is that you make this whole process enjoyable for you while improving!
And if you already have some traditional art skills, that will make it much easier to improve on Procreate! So I would advise you to get some Anatomy Reference Books For Artists; here are my picks.
Patricia Caldeira is the main writer here at Don Corgi. She's an art teacher with over 20.000 happy students across many platforms and courses!
Enjoy your stay and as always:
Keep on drawing!


")
