Although there’s no specific shape tool in Procreate, drawing circles in this software is quite simple.
There are several ways to make a perfect circle.
You can draw it and let the software automatically turn it into an ellipse or circle.
Another option is to use the Selection Tool and fill that circular selection with any color or even create a round brush just for circles!
In this tutorial, you will learn how to make circles in Procreate, along with a few tips for creating these shapes in very easy ways.
Table Of Contents
Manually Drawing a Perfect Circle In Procreate
Manually drawing a perfect circle is quite simple to do in Procreate.
Although the process differs from most drawing software, it’s very intuitive.
Once you learn it, you’ll never forget it!
Step 1 – Choose a Brush
Start by picking a brush you like.
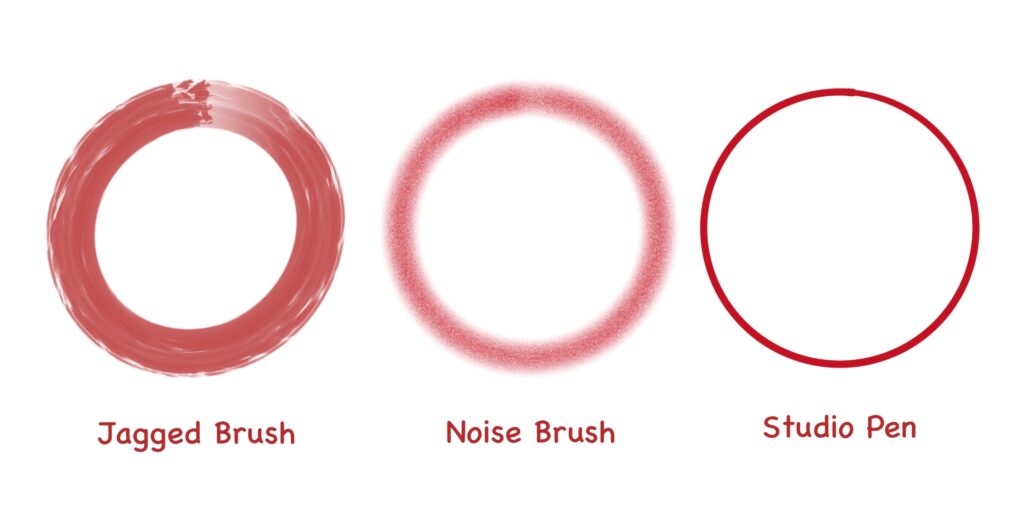
It really doesn’t matter which brush you use. However, your brush might add texture to the circle you’ll draw.
For example, using a painting brush, the circle will have a painterly look.
A textured brush, such as the noise brush, will make the circle fuzzy.
For a non-texture, solid-colored circle, you can use something like the Studio Pen in the Inking Brushes section, for example.
It’s all a matter of preference, so choose a brush you’re comfortable with and use more often!
Step 2 – Draw a Rough Circle Without Lifting the Pencil
Now, put your pencil down and draw a circle.
It doesn’t need to be perfect. Just draw it roughly, and don’t lift your pencil.
If you do so, for a few seconds, Procreate will create a shape out of the line you just did. In this case, a circle or ellipse!
As you do so, a small bar will appear at the top of the screen.
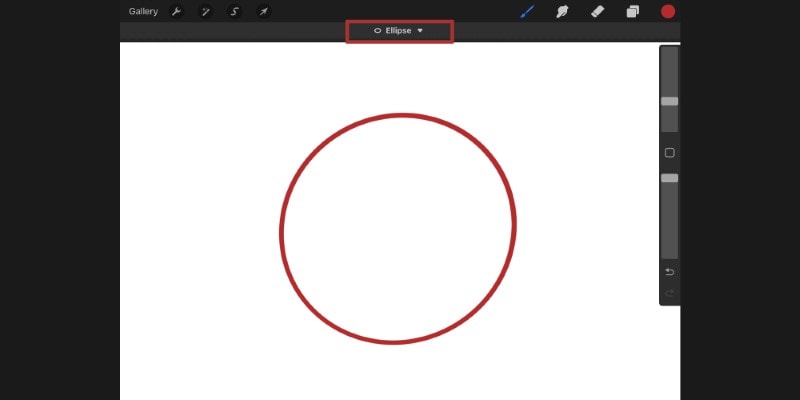
This is the QuickShape feature of Procreate.
Using this feature, you can make a few changes to your circle.
Step 3 – Use the QuickShape Feature to Edit the Shape
Tap the new bar that is shown at the top of the screen.
Once you do, a few options will appear. Depending on the kind of shape you drew, the options might differ.
Right now, we want the Ellipse and Circle options.
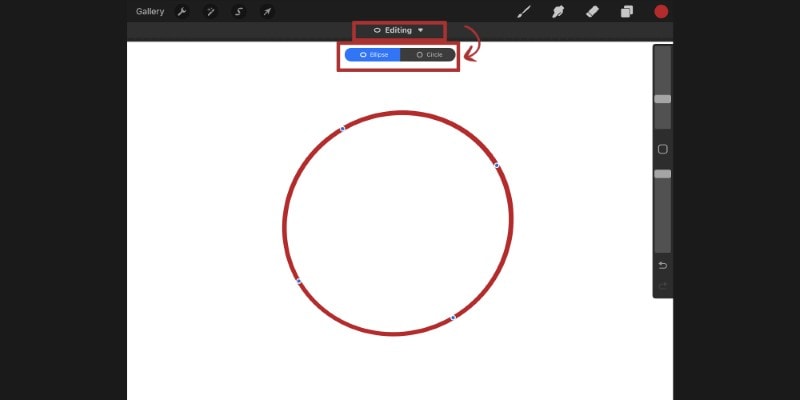
The Ellipse option will keep the circle you drew as it is.
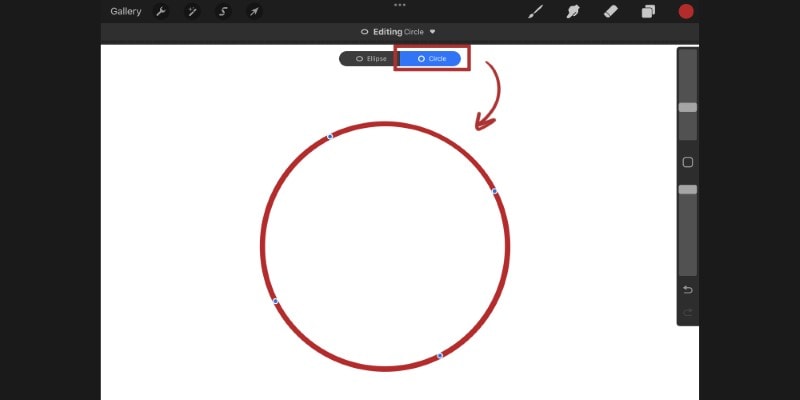
However, tapping the Circle option will transform the shape into a perfect circle!
Just like that, you can easily make a perfect circle without properly drawing it.
But that’s not all. Once you activate the Quickshape feature, a few nodes will appear on the shape you drew.
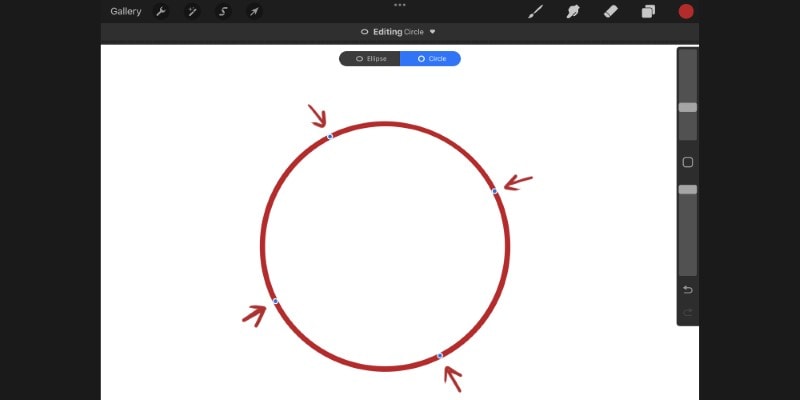
You can move these around and edit the shape. Just hold and drag each node in any direction you want.
Once you’re happy with your circle, tap anywhere on the canvas, and you’re done!
This is also great if you want to add some symmetry in procreate.
This is the quickest and easiest way to draw a circle, but there are other methods that you can use.
Using the Selection Tool
Many artists prefer using the selection tool to perform diverse actions while drawing.
This includes using it to create different shapes!
In a way, it does allow for more creativity and even control, especially if you want to draw a very irregular shape.
The selection tool offers different options, including the Ellipse Selection, useful for drawing circles.
Step 1 – Enable the Ellipse Selection Tool
Tap the second to last icon on the top left of your screen to enable the selection tool.
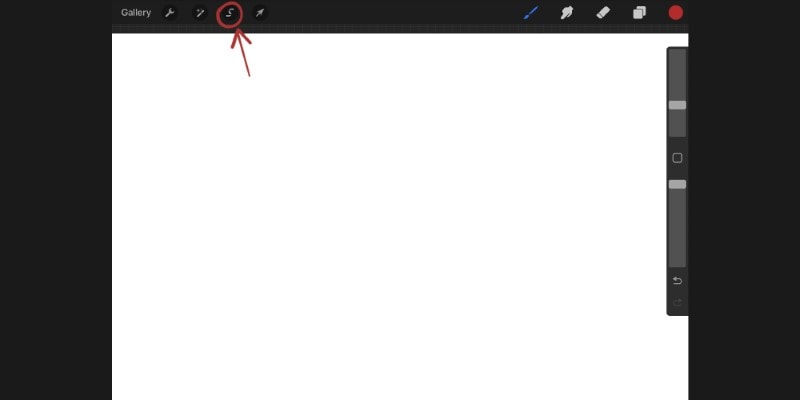
Once you do, a few options will appear at the bottom of the screen. Select the Ellipse option by tapping it.
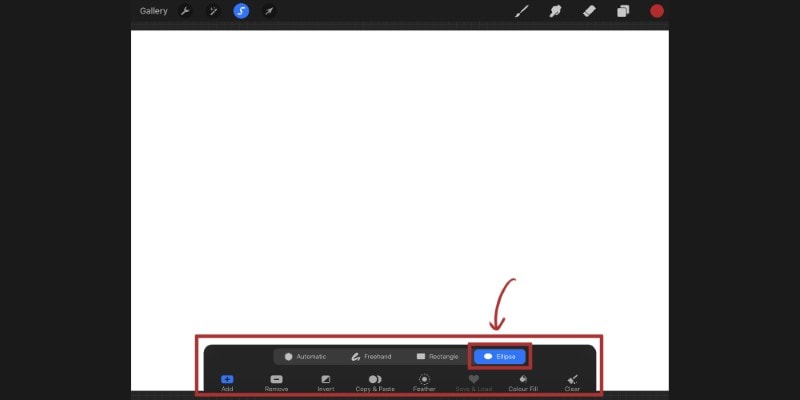
This option will allow you to create oval selection shapes easily without having to draw them perfectly.
Step 2 – Draw a Circle on the Canvas
Using your stylus, draw a circular selection on your canvas. This selection can be of any size you want.
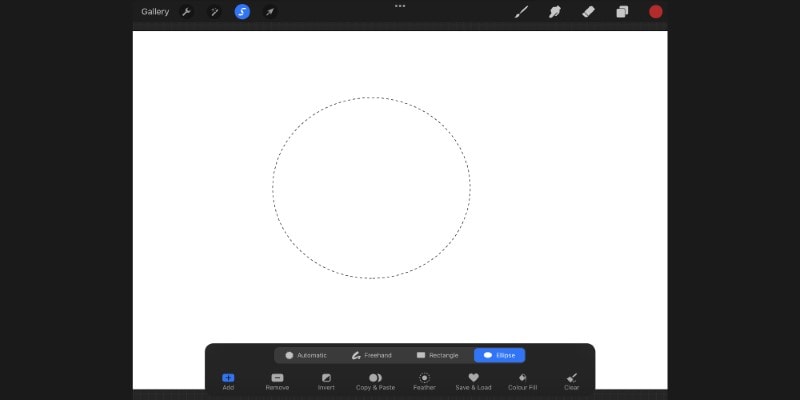
To create a perfect circle, tap and hold one finger on the screen while using the stylus to draw the circle with the other hand!
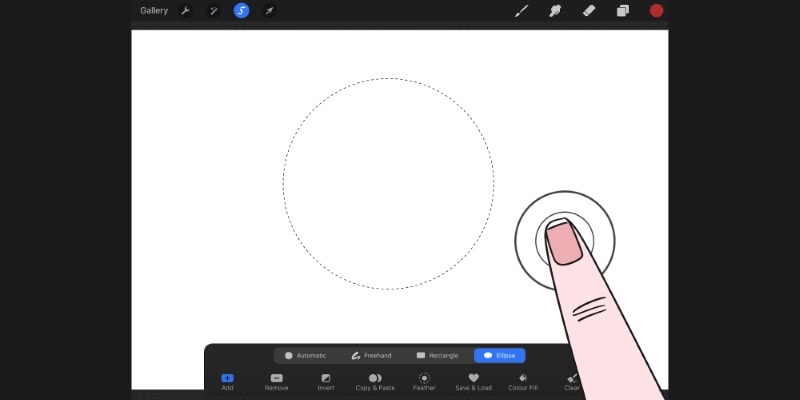
Move the stylus as much as you want until you find your desired shape and size.
Once you’re done, release the pencil from the screen, and the selection will remain on your canvas.
All you have to do now is actually draw the circle from the selection you just made!
Step 3 – Pick a Color and Drag it Into the Selection
Tap the color menu at the top right and pick any color you want.
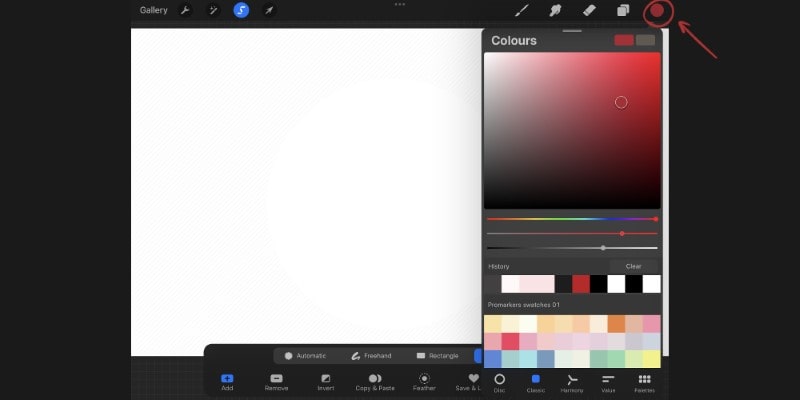
Once you do, hold and drag it into the selection to fill it with color.
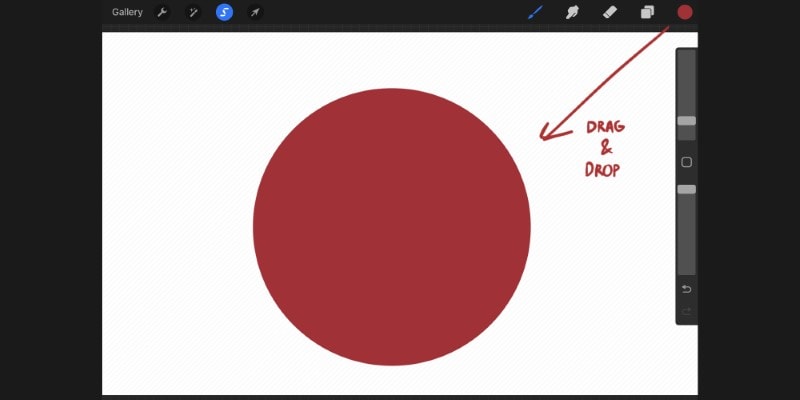
Finally, tap the selection tool icon again to deselect everything.
Your circle is now finished!
Using A Brush
You can use a brush to draw a perfect circle on your illustration.
To do so, you must first create or import a brush with a circular shape.
Although it takes a few extra steps the first time, you’ll have a brush to use whenever you need to draw a circle!
Step 1 – Create a Blank, Squared Canvas
First, we need to create our brush.
For that, create a new and squared canvas.
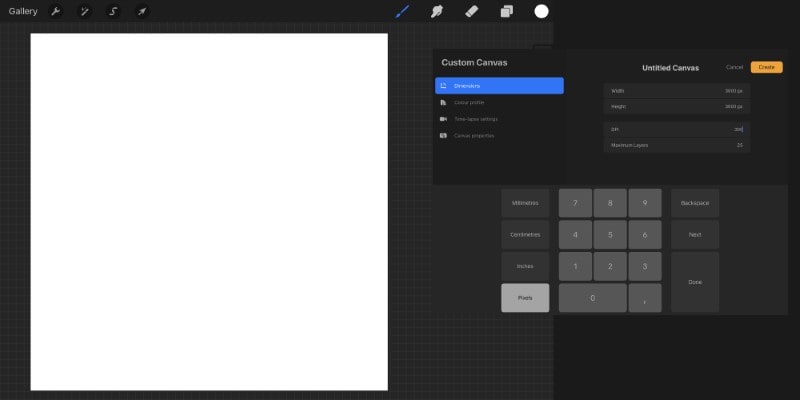
It can be of any size, but it should be quite big to allow you to create big circle shapes later on.
Step 2 – Draw a Circle
Using any of the methods shown above, draw a circle.
This circle should be almost as big as the canvas.
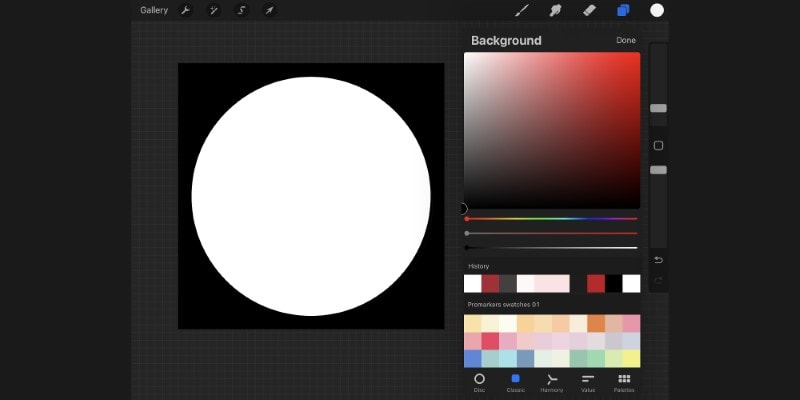
Once you’re done, fill the shape with white color. Then, change the background color to black.
The brush shape is finished.
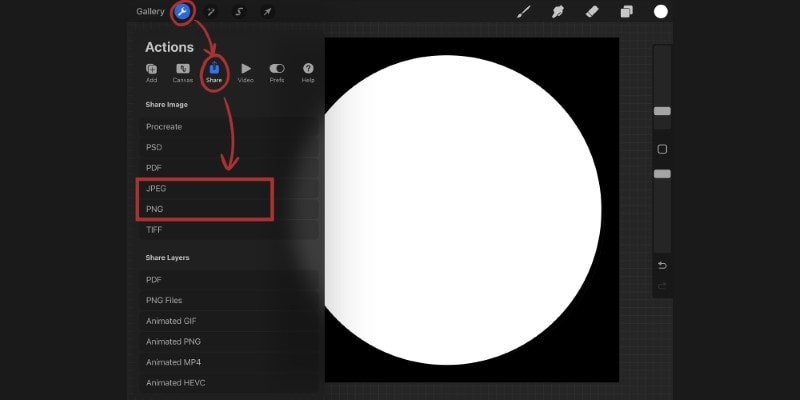
Step 3 – Export the Image
Let’s export the image.
Open the Actions menu by tapping the wrench icon. Then, tap the ‘Share’ button and choose the JPEG or PNG option.
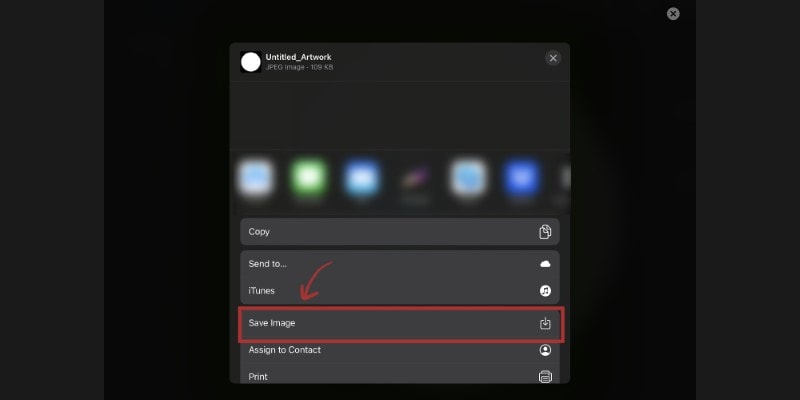
Now, pick the ‘Save Image’ option. This will save your image in your device’s gallery.
We’re now ready to create our brush.
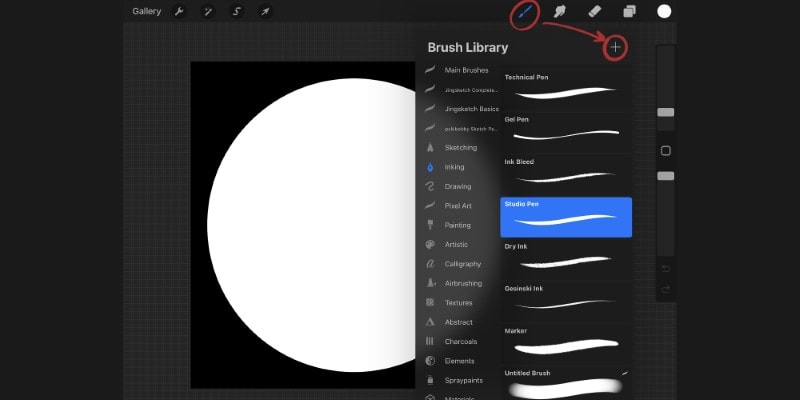
Step 4 – Create a New Brush Using the Circle Shape
Tap the brush library menu at the top right. Then, tap the ‘+’ sign to create a new brush.
The brush menu will open.
We will create a simple brush, making the process easy and quick.
Tap the ‘Shape’ option to the left. Next, tap the ‘Edit’ button to open the Shape Editor menu.
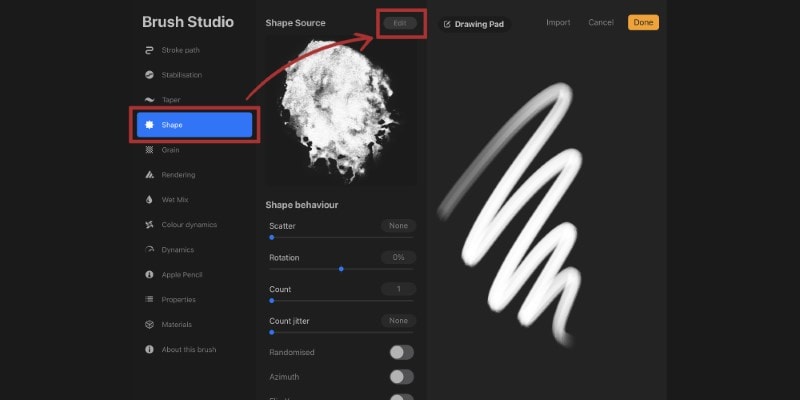
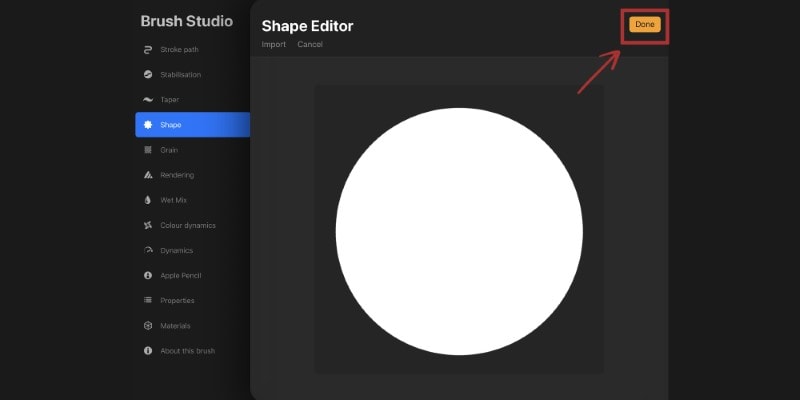
Tap ‘Import,’ followed by ‘Import a photo,’ and select the image you just exported.

Tap ‘Done’. For the brush we’re creating, we don’t need to make any other changes to its shape.
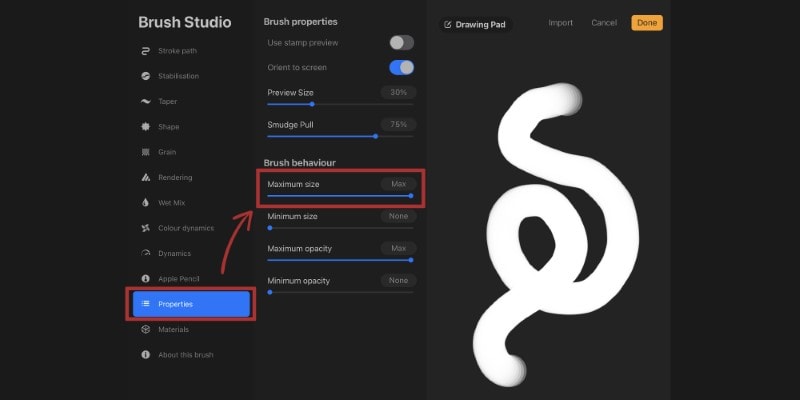
All you have to do now is go to ‘Properties’ at the bottom and then move the ‘Maximum Size’ bar to maximum.
Our brush is ready. If you want, go to ‘About this brush’ and change its name by tapping the text at the top.
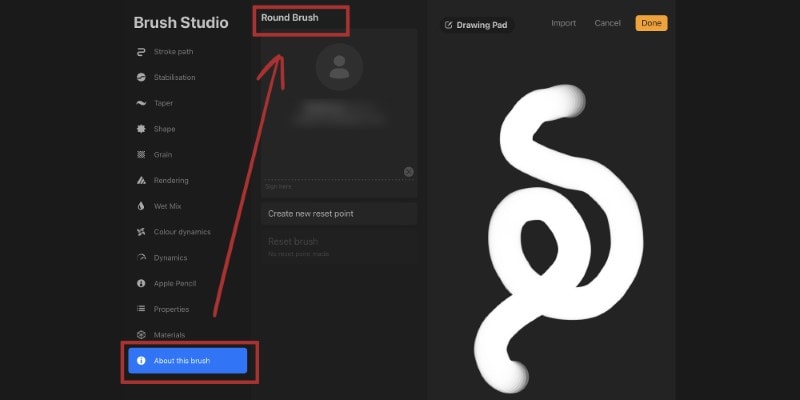
Tap ‘Done,’ and you’ll go back to your canvas. Test your round brush by tapping it once on your canvas.
If you do so, it will draw a perfect circle!
You can use this brush to draw anything you want in your artwork besides circles.
It will be kept in your brush library whenever you want to draw a circle.
Pick it, move the size slider around, and tap the canvas to create a perfect circle in Procreate!
Scaling and Transforming a Circle
After drawing a circle, you might want to change it.
When the QuickShape tool is enabled, as long as the circle is selected, you can edit the shape as much as you want.
You can adjust each node, giving you more control over its shape!
To further scale or transform your circle, you can use the Move/Transform tool in Procreate, shown by an arrow icon at the top of the screen.
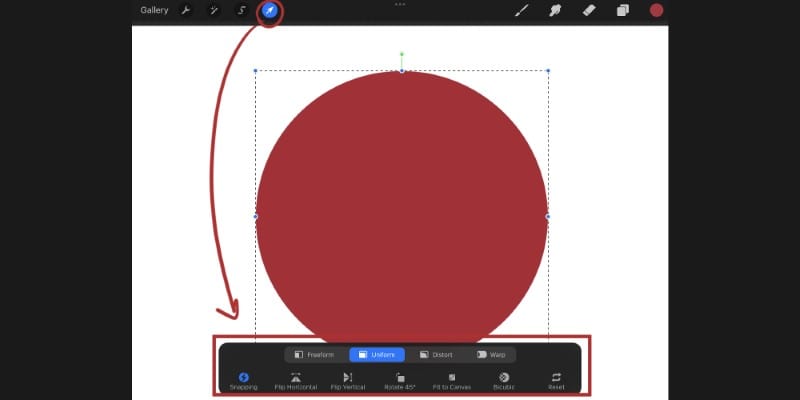
Once you tap it, you have several options to choose from:
- Freeform;
- Uniform;
- Distort;
- Warp.
With these, you can transform or scale a perfect circle and change it to something else!
The Freeform and Uniform options allow for scaling. In Freeform, you have more control over the scaling, while the Uniform will maintain the aspect ratio of the shape!
With Distort and Warp, you can completely change the circle shape into something else and give it some perspective.
Test and experiment with different tools and features, and be creative with your shapes and circles in Procreate!
Be sure to try using Adjustments in Procreate to change things even more.
Conclusion
There are many different ways to create a perfect circle in Procreate.
You can try different techniques and choose your preferred method, but all of them allow you to draw circles quickly, intuitively, and easily.
Let’s quickly summarize how you can draw a perfect circle on Procreate:
Summary of Steps To Draw A Perfect Circle
- Choose a brush and draw the shape;
- Without lifting your pencil, wait for the stroke to snap to an oval shape;
- Tap the bar that appears at the top of the screen, called QuickShape;
- Tap the Circle option to turn it into a perfect circle;
- Finally, tap the screen, and it’s done!
Hope you had fun with this tutorial!
Want to dive into more advanced and fun topics? Learn how to use Clipping Masks In Procreate!
Or do some of these Procreate Drawing Exercises to improve quickly!
Patricia Caldeira is the main writer here at Don Corgi. She's an art teacher with over 20.000 happy students across many platforms and courses!
Enjoy your stay and as always:
Keep on drawing!

")

