Using Symmetry in Procreate is not only simple and straightforward but also a very handy tool to work faster.
Instead of struggling to get a drawing perfectly symmetrical, by drawing everything, you can just draw one side and let Procreate mirror your drawing on the other side, for example!
It’s also a good tool for creating interesting and creative patterns in a fun and quick way.
In this article, we’ll go over everything you need to know about using symmetry in Procreate, along with a tutorial section of exercises you can do using this tool!
Update: Here’s a video I created explaining how to use the Symmetry tool in Procreate in several ways!
Table Of Contents
- 1 What is the Symmetry Tool in Procreate?
- 2 How to access the Symmetry Tool in Procreate
- 3 Types of symmetries available in Procreate Symmetry Tool
- 4 How to turn off the symmetry settings
- 5 Working with the Symmetry Tool
- 6 Customizing the Procreate Symmetry Settings
- 7 Tips and Tricks on Using Symmetry in Procreate
- 8 Summing It Up
What is the Symmetry Tool in Procreate?
Procreate has a very useful tool for when you need or want to draw very geometric or symmetrical drawings.
With the Symmetry option activated, you can draw something while Procreate mirrors every line you make!
You can use Procreate’s symmetry to draw mandala patterns, snowflakes, perfect and symmetrical shapes, faces (never worry about that second eye again!), icons, and even some animals.
Due to its mirroring feature, this is a great tool to not only be sure you’re drawing something perfectly symmetrical, but it will also speed up your work.
This is also very handy for creating orthographic drawings!
There are many different types of symmetry available in Procreate, and we’ll go through each of them throughout this article.
How to access the Symmetry Tool in Procreate
To turn on the symmetry option in Procreate, open a new document with any canvas size you want.
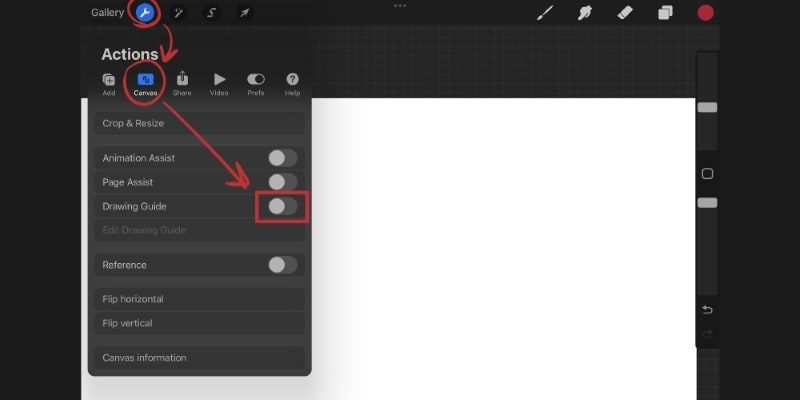
Now open the Actions menu by tapping the wrench icon. Then, tap ‘Canvas’ and enable ‘Drawing Guide’ by tapping the slider button.
You now have the option ‘Edit Drawing Guide’ available.

Tap it, and you’ll be redirected to the Drawing Guides Menu. At the bottom bar, tap ‘Symmetry’.
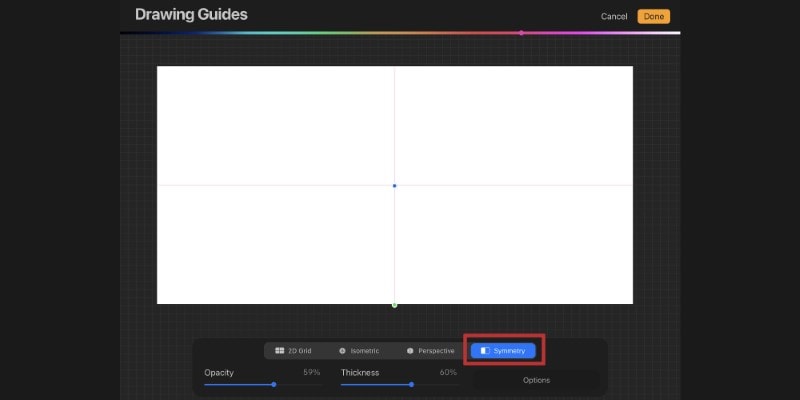
You can now choose from different symmetry options, along with other settings, and start drawing with symmetry!
Types of symmetries available in Procreate Symmetry Tool
There are 4 different types of symmetries available in Procreate. Some allow you to draw more complex drawings or patterns, while others merely mirror your lines.
By tapping the ‘Options’ button inside the ‘Drawing Guides’ Symmetry menu, you’ll find the following options:
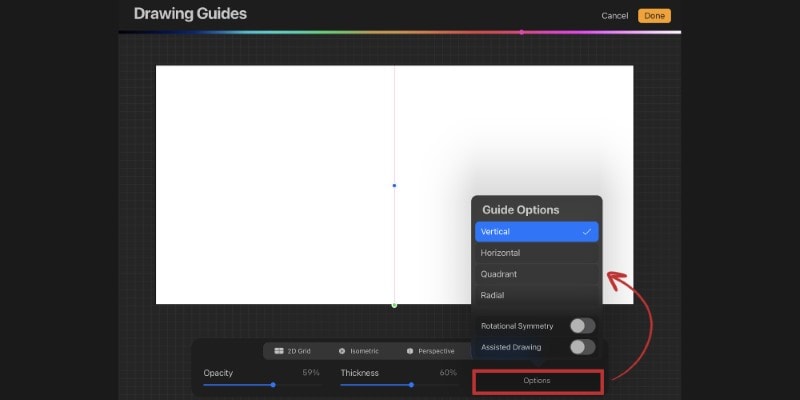
- Vertical: divides your canvas witha vertical symmetry guide;
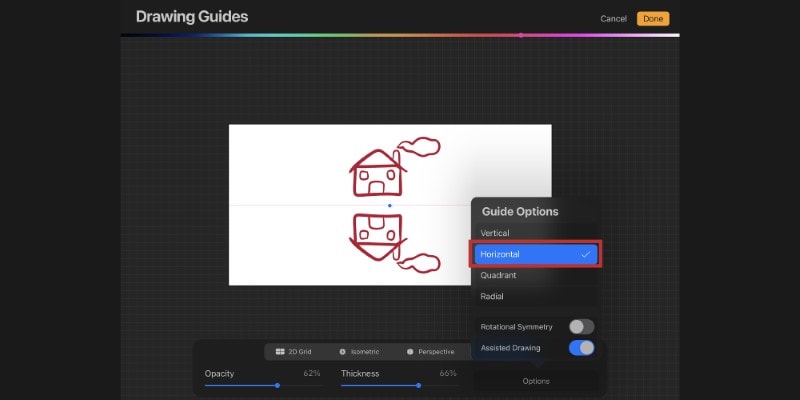
- Horizontal: your canvas is divided by a horizontal symmetry guide;
- Quadrant: your canvas is divided into 4 equal parts;
- Radial: divides your canvas into 8 sections.
The most common type of symmetry to use is the Vertical one. However, when drawing creative mandalas or other complex patterns, Radial symmetry will do wonders for your work!
How to turn off the symmetry settings
Once you’re done using the symmetry feature, you can very easily turn it off by going to the Actions menu again, then ‘Canvas’, and finally, turn off Drawing Guide by tapping the slider button.
If the button is back to gray instead of blue, the symmetry tool has been turned off.
The drawing guides in your canvas will disappear, and you can now draw normally as you usually do.
Working with the Symmetry Tool
Working with Symmetry in Procreate is fairly simple, however, as a beginner, it can be confusing at first.
Let’s go through each type of symmetry and how you can easily use it to reach the full potential of your artwork!
How to use Vertical Symmetry
The first option you’ll find is the Vertical Symmetry.
This is the most common symmetry to use, especially if you want to draw mirrored objects or subjects such as front-view portraits, cute chibi animals, buildings, and even avatars or icons.
When you activate the Vertical Symmetry, one vertical drawing guide will appear at the center of your canvas.
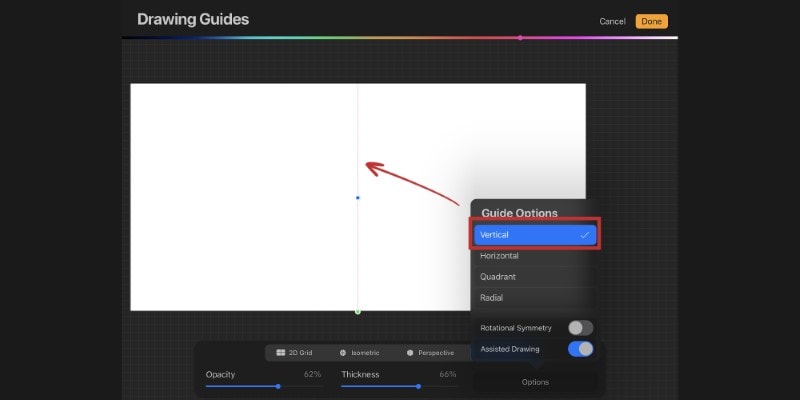
If it’s placed as you want it, you can leave it as it is.
If you want it somewhere else, you can hold and drag the blue dot in the middle of the symmetry line to move the line along the canvas!
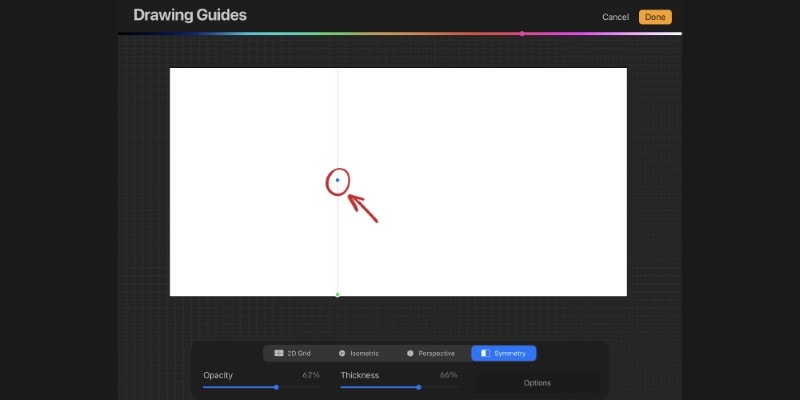
Once everything is placed as you want, activate the ‘Assisted Drawing’ setting by tapping it.

With this option enabled, anything you draw on one side of the line, Procreate will mirror it on the other.
Tap ‘Done’ at the top right of the screen and start drawing on one side of the canvas!
How to use Horizontal Symmetry
The Horizontal Symmetry Tool works very similarly to Vertical Symmetry.
The main difference is that instead of a vertical line, a horizontal line divides your canvas in the middle.
Again, you can use the blue dot to move the drawing guide along your canvas.
Just like before, be sure the Assisted Drawing option is enabled, so Procreate can mirror your lines as you draw them!
How to use Quadrant Symmetry in Procreate
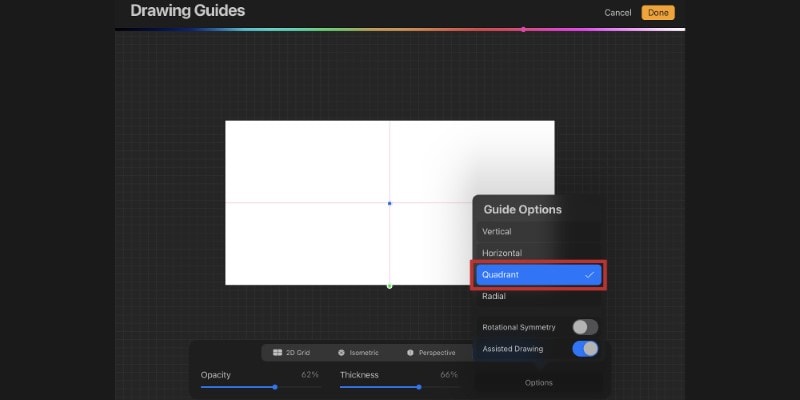
The third symmetry option is called Quadrant Symmetry.
Here, Procreate will divide your canvas into four equal parts. In this case, you’ll see a vertical and a horizontal line that crosses each other in the center of the canvas.
Again, toggle the Assisted Drawing option, and you can now use symmetry in Procreate to draw a sparkle, a snowflake, or other complex patterns!
All you have to do is draw in one quadrant, and Procreate will replicate and mirror your lines as you draw.
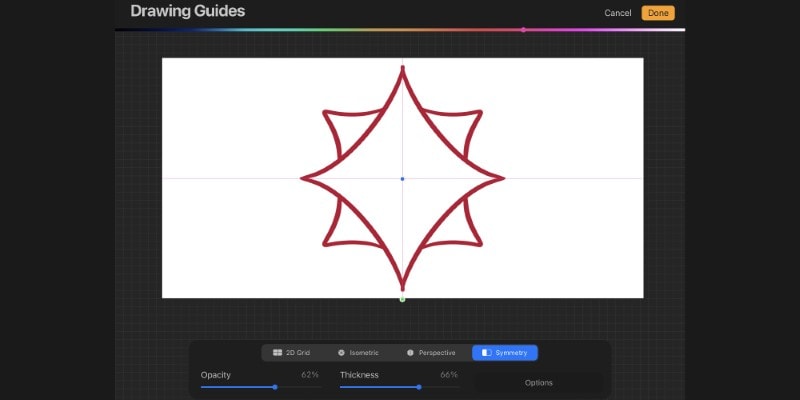
How to use Radial Symmetry?
Last but not least, you can also use Radial Symmetry.
Here, Procreate will divide the canvas into 8 parts so you can draw even more detailed patterns!
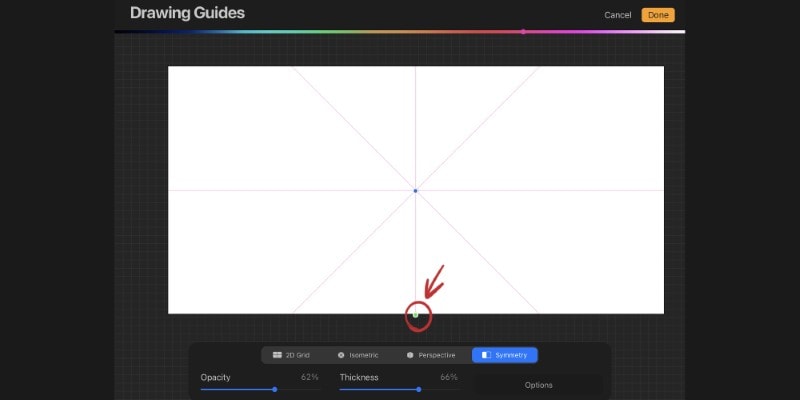
Again, you can use the blue dot to move the guidelines around the canvas, but if you want a truly symmetrical pattern or drawing, it should stay right at the center of the canvas.
At the bottom of the canvas, you can also find a green dot that you can use to rotate the radial guidelines!
With Radial Symmetry activated, you can draw flowers, complex geometric shapes, and lovely detailed patterns. Anything you draw in one section will be repeated in each of the remaining sections.

Customizing the Procreate Symmetry Settings
Even though we mentioned some of the settings you can change using the Symmetry tool, there are more fun and interesting options to play with.
Some change the guidelines and how the symmetry will look, while others are merely visual, but that can help you get organized as you work.
How to Edit the Drawing Guide
As mentioned before, you can edit the drawing guide before starting to draw.
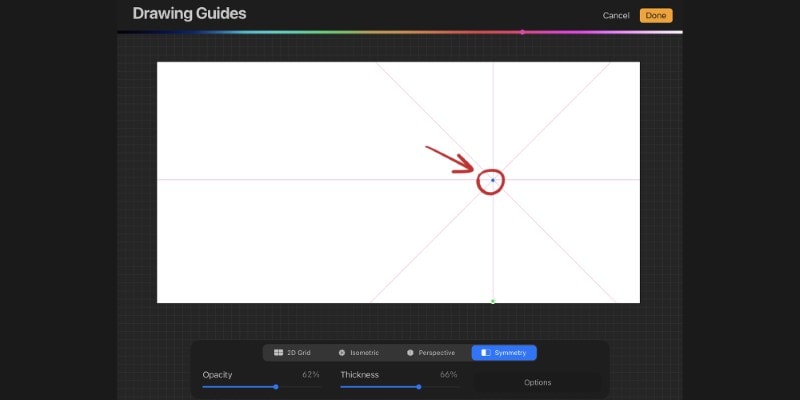
Once you choose one of the Symmetry options, you’ll see the guideline along with a blue and a green dot.
To change the place of the drawing guideline, hold the blue dot and move it along the canvas until you find the perfect spot for it.
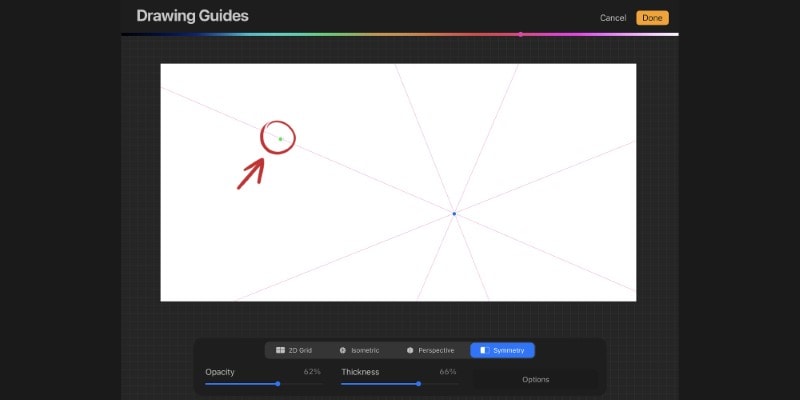
By dragging the green dot, you’ll be able to change the direction of it. This means you can, for example, have a diagonal guideline!
Furthermore, at the bottom of your screen, you’ll notice two sliders: Opacity and Thickness.
The Opacity slider changes how transparent the drawing guide is. While the other serves to adjust the thickness of the line.
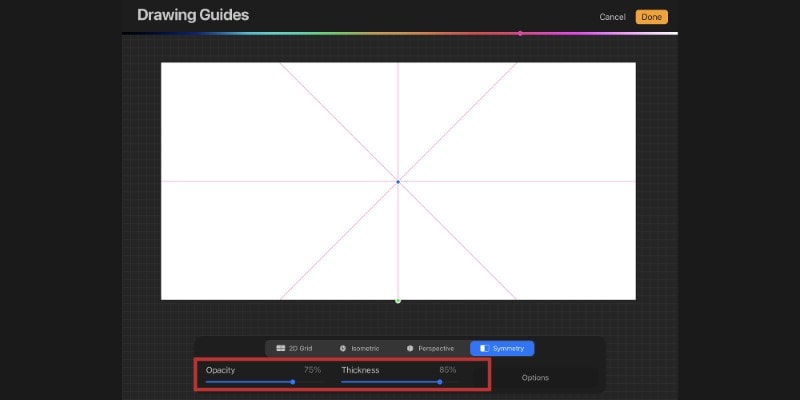
This is all up to your own preference. Some artists rather have this line almost invisible so as not to distract them from the rest of the piece, while others prefer to have it quite visible so as not to lose it!
Finally, at the top of the screen, you’ll notice a color bar. You can use it to change the color of your drawing guidelines!
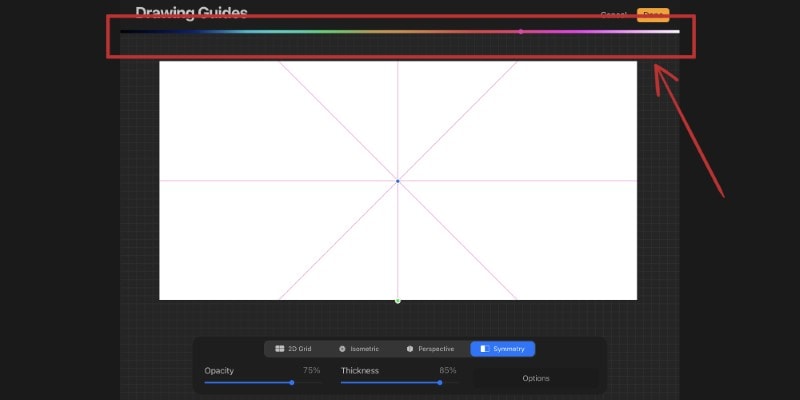
Again, it’s totally up to your preference, and a lot of times, it can be useful to use a bright color, so you can easily find it as you draw.
As you can see, there are still many ways to edit guides in Procreate while maintaining everything simple and easy to use.
How to use Assisted Drawing with Procreate’s Symmetry Tool
The Assisted Drawing option is very useful when using the Symmetry Tool.
To enable it, go to ‘Options’ in the Drawing Guide menu and then toggle ‘Assisted Drawing’.
With this option activated, your lines will be repeated or mirrored according to the type of symmetry you chose.
For example, when using vertical symmetry, whatever you draw on the left of the line, will be automatically mirrored and drawn on the other side.

The same will happen with horizontal symmetry. If you draw on the bottom of the line, your drawing will be mirrored on the other side.
Whichever symmetry type you choose, as you draw, the same lines will be repeated throughout the canvas!
How to use Rotational Symmetry?
If you look again to the bottom of the screen and tap options, you’ll find the ‘Rotational Symmetry’ feature.
Toggle to activate it.
Rotational changes your symmetry completely since instead of mirroring your image or line, it repeats it exactly in each section of the canvas.
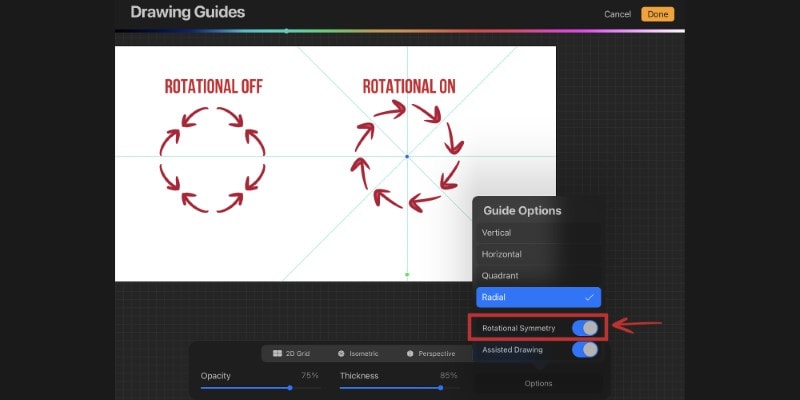
This option works with any type of symmetry and can help make very interesting and creative patterns.
Tips and Tricks on Using Symmetry in Procreate
Now that you know how to use Symmetry with Procreate, it’s time to have some fun with it.
There’s a lot you can do with symmetry, but here are a few quick and easy exercises for you!
Use The Mirror Symmetry Function To Draw Faster
When you’re doing repetitive work and need to be quicker about it, it’s a good opportunity to use symmetry and the mirror feature of Procreate.
The same goes for when creating characters that are very symmetrical.
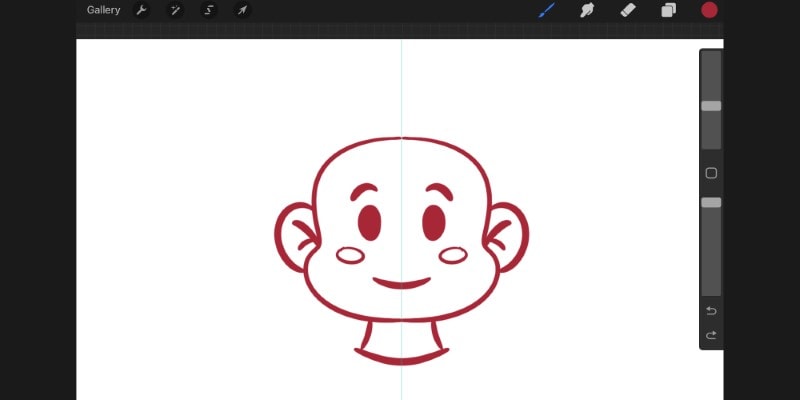
For example, you can draw a cute chibi character using the symmetry function!
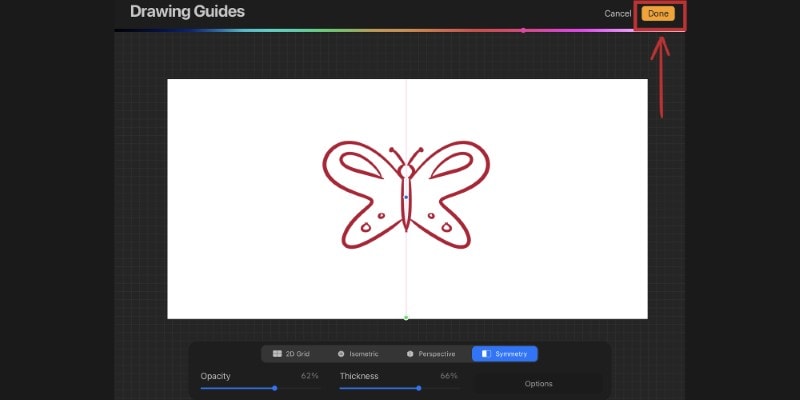
First, set up the Vertical Symmetry option. Simply tap ‘Option’ in the Drawing Guide menu, then ‘Vertical’.
Finally, tap the ‘Done’ yellow bottom at the top.
Now you’re able to draw your chibi character on the left side, for example, and the same is automatically mirrored on the right.
You can do this with many other subjects. The concept is always the same: draw something on one side, and it will be mirrored on the other!
This also prevents you from having to copy and paste and then mirroring it.
Create Fun Mandala Drawings Using The Symmetry Tool
Although Mandala drawings tend to be very detailed and complex, you can very easily draw them with the symmetry tool.
Start with something very simple at first.
For this one, go to the ‘Options’ in the Drawing Guide Menu and set ‘Radial’ active.
Go back to the canvas and draw a few circles, arched lines, and zig-zag lines.
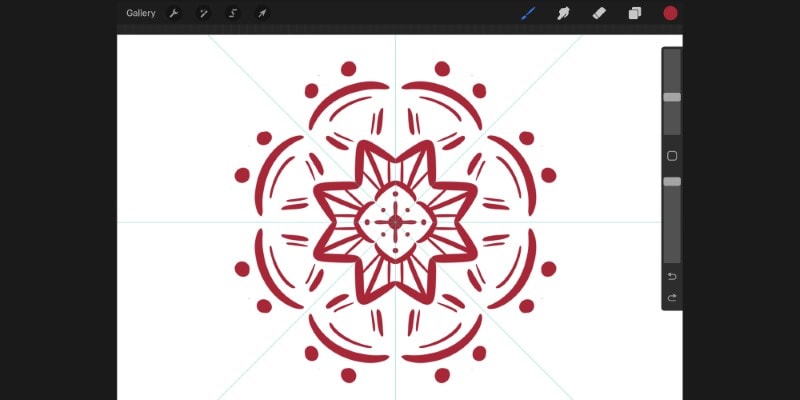
With very simple lines and shapes, you can create a beautiful mandala pattern!
You can even switch the Rotational setting and see how different your pattern becomes.
As you learn how to use symmetry, you can start going for more complicated patterns.
Use Symmetry To Create Geometric Patterns
In this last example, we’ll be drawing a simple geometric pattern, this time using the Quadrant Symmetry.
Just like before, tap ‘Options’ and then ‘Quadrant’. Keep the guides in the middle of your canvas, just as it is.
Now, pick a shape. It can be a square, triangle, or a circle.
Once you choose a shape, draw it on your canvas. Draw the shape in different sizes and directions.
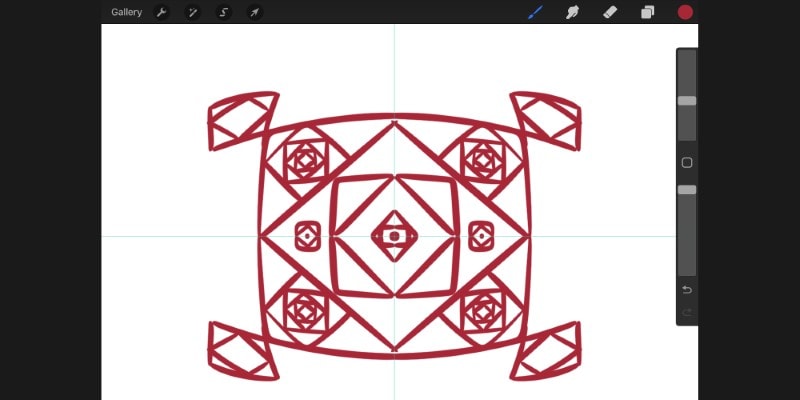
As you can see, with just one shape, you can create an interesting pattern!
You can then experiment with more than one shape and see what happens to your pattern.
Summing It Up
As you can see, it’s quite easy to use the symmetry tool. It is also very customizable, so your workspace is as optimal as possible.
To enable the symmetry tool, go to the Actions menu (wrench icon) -> Canvas -> toggle ‘Drawing Guide’ -> tap Edit Drawing Guide.
A new menu will appear where you can set up several different guidelines to help you draw.
To enable symmetry, look at the bottom bar and tap ‘Symmetry’.
There are different types of symmetry you can choose from, such as:
- Vertical Symmetry;
- Horizontal Symmetry;
- Quadrant Symmetry;
- Radial Symmetry.
To change the type of symmetry you’re using, tap ‘Options’ at the bottom bar and tap the desired style.
Before starting to draw, remember to enable ‘Assisted Drawing’ in the same menu! With this feature enabled, Procreate will replicate or mirror your lines as you draw them.
Finally, with this new knowledge, it’s time to draw something using symmetry, so take a look at the examples shown above or check out these 6 Procreate Drawing Exercises!
Or dive into a new technique, like using Blur in Procreate!
Patricia Caldeira is the main writer here at Don Corgi. She's an art teacher with over 20.000 happy students across many platforms and courses!
Enjoy your stay and as always:
Keep on drawing!
")


")