Using adjustments and filters in Procreate is a great way to add different effects and looks to your work in a very easy and quick way.
These are all very intuitive to use, but there’s a big list of adjustments in Procreate that you can use, and it can feel confusing at first.
In this article, we’ll go over each adjustment and filter you can find in Procreate, along with many examples so that you can see each of them clearly!
Table Of Contents
How To Access The Adjustments Menu In Procreate
It is quite simple and straightforward to access the adjustments menu in Procreate.
To open the adjustments menu, tap the magic wand icon at the top bar.
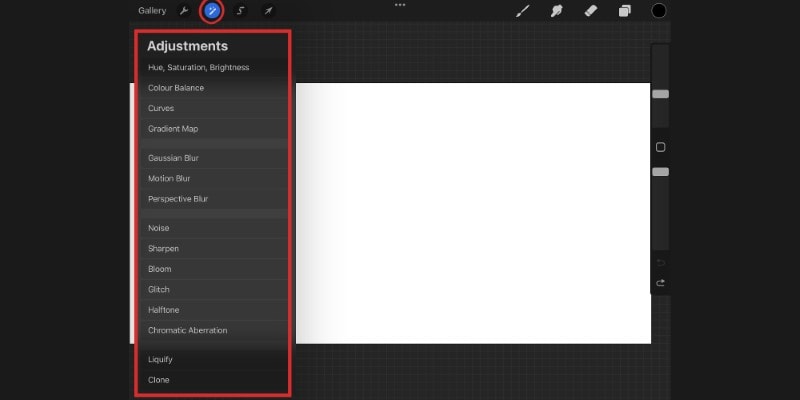
Once you do, a tab will open below, showing all the adjustments and filters you can use and apply to your artwork!
There are two different types of adjustments available: Color Adjustments and Filters.
The Color Adjustments mostly serve to change and balance the colors, lighting, and overall mood of your illustration. They are divided as follows:
- Hue, Saturation, Brightness;
- Color Balance;
- Curves;
- Gradient Maps.
As for the filter, these change your image, using special effects that can distort, blur and totally transform your artwork!
Here are the Filters you can find in Procreate’s Adjustments tab:
- Gaussian, Motion and Perspective Blur;
- Noise;
- Sharpen;
- Bloom;
- Glitch;
- Halftone;
- Chromatic Aberration;
- Liquify;
- Clone
We’ll go through each adjustment and filter below, so you can learn where and when to use each of them!
Using The Layer And Pencil Mode
When applying a color adjustment or filter to your artwork, you can do it using two different options: Layer or Pencil.
Usually, the layer option is automatically selected when choosing an adjustment.
However, you can change this by tapping the small arrow right next to the name of the filter you’re using, shown at the top of the screen.
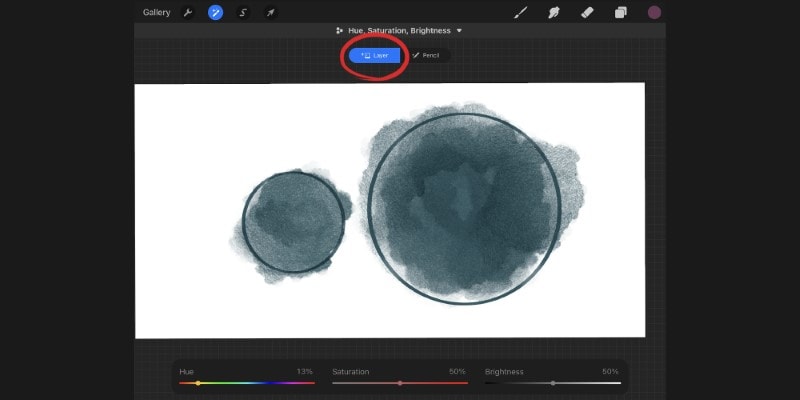
The Layer Option allows you to apply the filter or adjustment to the entire layer selected.
The Pencil option lets you use a brush to paint over the places you want to apply the adjustments to!
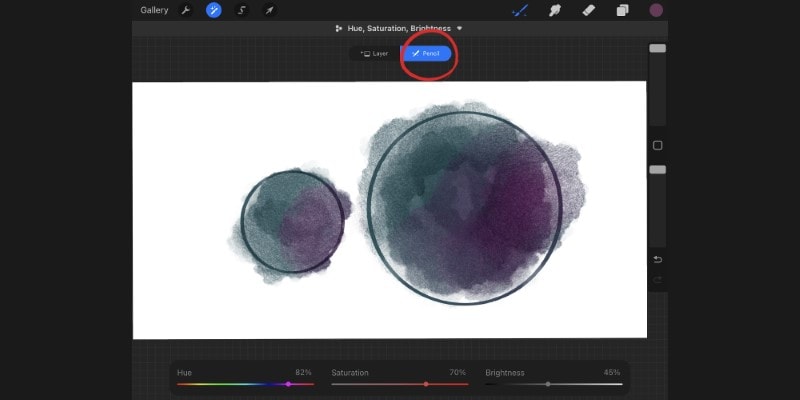
An interesting thing to know about the pencil option is that, when selected, the Brush tool icon will change and show a few sparkles.
This means you can choose any brush you want to apply the adjustments, allowing you to add different effects and textures to your filters as well!
You can also use the Smudge or Eraser tool to smudge or erase any part of the filter added.
You can change to the layer or pencil option in most adjustments and filters. The only exceptions are the Liquify and Clone tools, which only work as layer filters.
Color Adjustments
The first 4 options at the top of the adjustments tab are focused on Color.
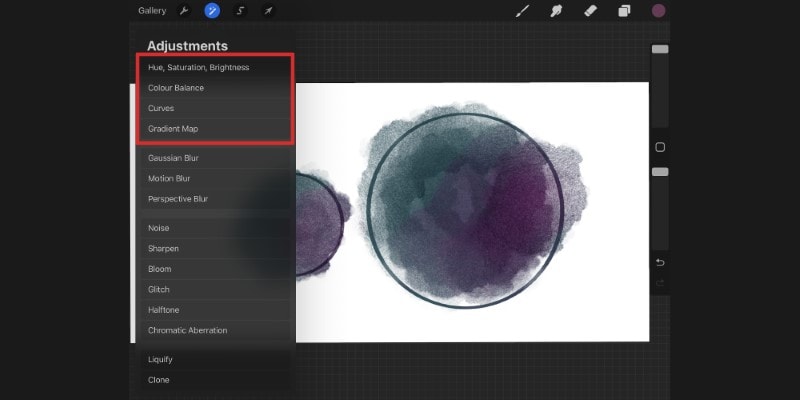
Here you can change the color, lighting, their saturation and even use gradient maps so your whole color palette looks harmonious and balanced together.
Using these can totally change the mood of your painting, making them great adjustments to experiment with when your work is finished!
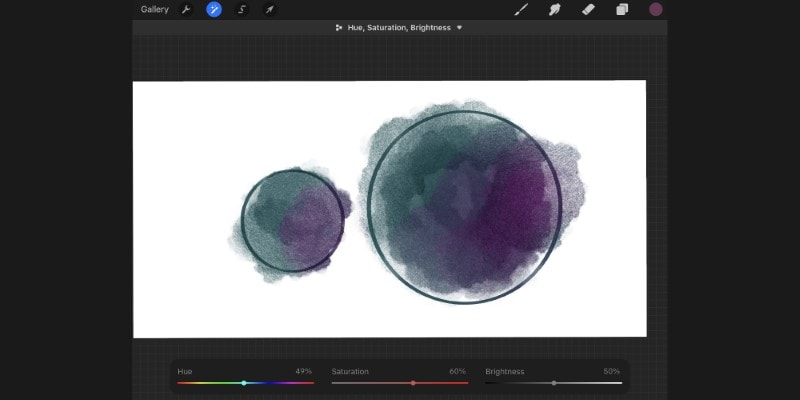
Hue, Saturation, Brightness
This is the most common color adjustment to use.
Even while coloring an illustration, it can be helpful to use and see if minimal changes in color can make the overall palette look more harmonious.
You have 3 different sliders that you can adjust:
- Hue: by moving the hue slider, you can change the color of the layer or element selected;
- Saturation: changes how saturated your colors are. The higher the saturation is, the more vibrant the colors will be;
- Brightness: here, you can control how bright and dark the image is!
By moving these 3 sliders, you can completely change the colors, vibrancy, and brightness of a whole illustration or parts of it!
The Hue, Saturation, and Brightness adjustments are also a great way to change the color of something if you change your mind about it.
Color Balance
With Color Balance, you can fine-tune the overall colors of your artwork. Here, you’ll find 3 different sliders as well that you can adjust.
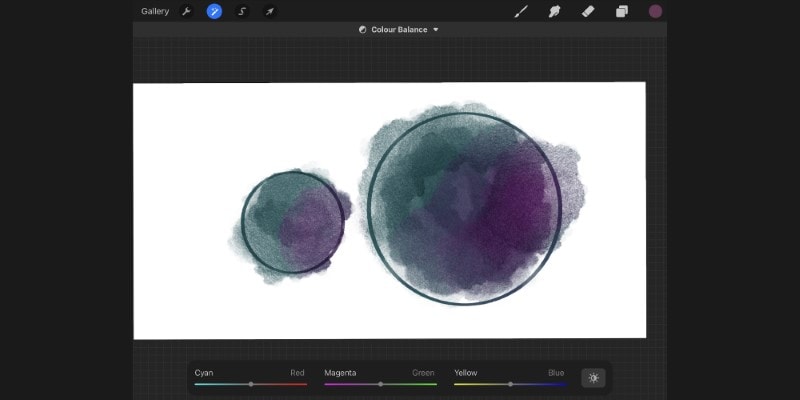
This way, you can change only specific ranges of colors instead of everything at once!
Not only that, but by tapping the sun icon at the end of the bar, you can make changes only to the Shadows, Midtones, or Highlights of your artwork.
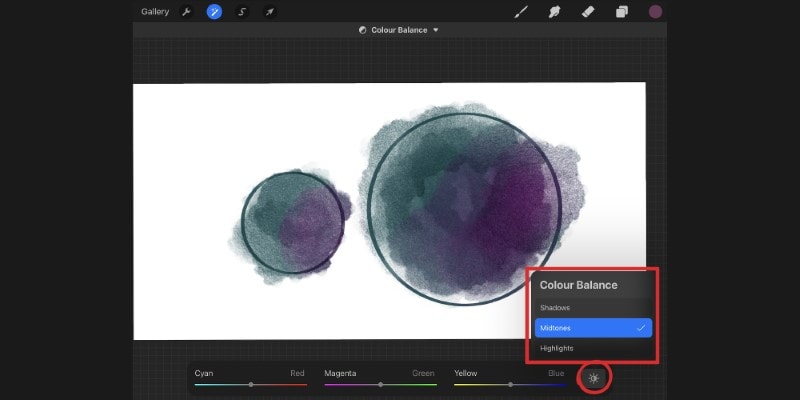
The color balance adjustment menu is a great way to make small corrections to your color scheme while maintaining everything balanced!
Curves
Here, you can adjust the gamma as well as change the amounts of Red, Green, and Blue in your picture.
Instead of sliders, you’re shown a graph where you can modify its curve and watch in real-time the differences made in your artwork.

With Curves, you can just change how light and dark your artwork colors are but also totally change their colors by controlling the amount of red, green, and blue on it!
As you change or add curves to the graph, you can also easily see the color distribution in your illustration.
Gradient Map
With gradient maps, you can apply different colors to the highlights, mid-tones, and shadows of your image.
You can totally change the image’s colors by choosing different gradient presets in Procreate.
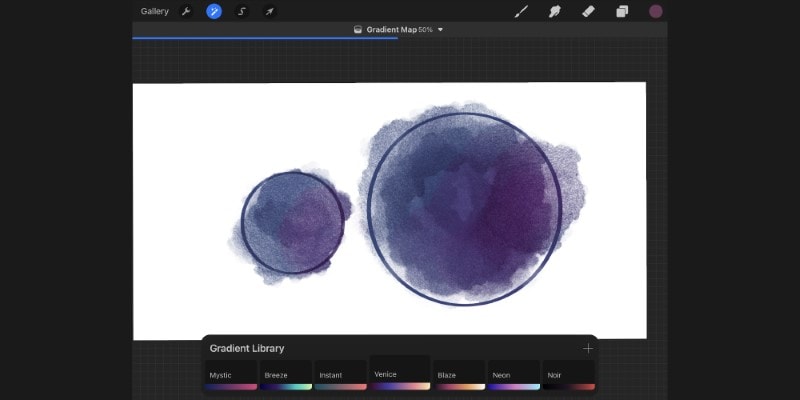
Alternatively, you can also make your own gradient palettes and save them in this gradient library so that you can use them in the future as well.
Using gradient maps is a great way to create cohesion in your color palette as well as change the mood of your illustration.
Try applying a gradient map as a last touch to your artwork and see how it transforms it!
Procreate Filter Effects
Let’s now go over the specific adjustments on procreate for the Filter effects.
Blur Effects
Using the blur filter is a great way to make images or certain parts of your illustrations seem to be out-of-focus or even create the illusion of movement.
Not only that, but you can use blur to your advantage in guiding the viewer’s eyes throughout your illustrations!
Gaussian Blur
Gaussian Blur gives your illustration or selected element a soft and out-of-focus look. You can change its intensity by sliding your finger to the right or left.
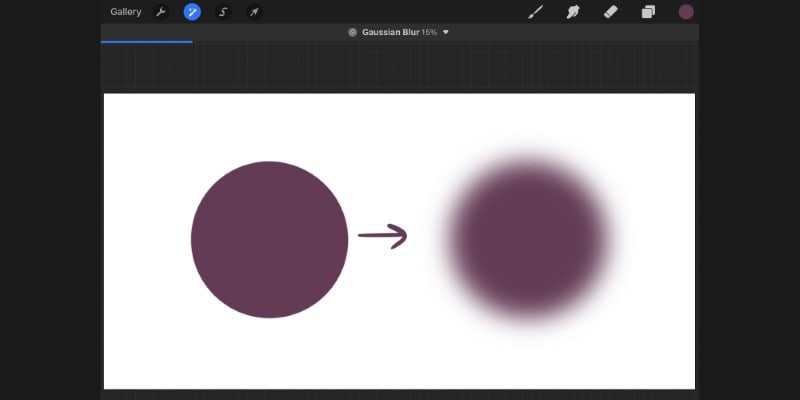
This is the most common blur to use since you can use it to make backgrounds look slightly out-of-focus so the viewer can focus on the foreground or even to soften the shadows in your illustrations!
Related Article: Learn How to Shade in Procreate Step by Step!
Motion Blur
Motion Blur creates the illusion of fast movement. It’s great to use when drawing characters running or fast-moving vehicles!
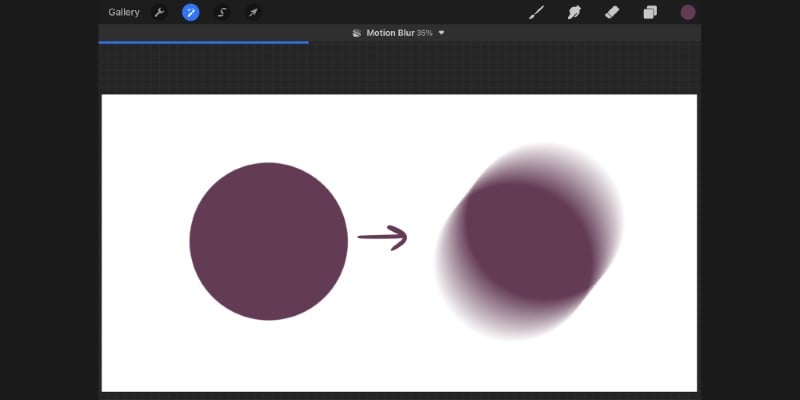
Like before, you can use your finger or pencil to adjust the intensity. However, here you can choose the direction of the blur by moving your finger horizontally or vertically.
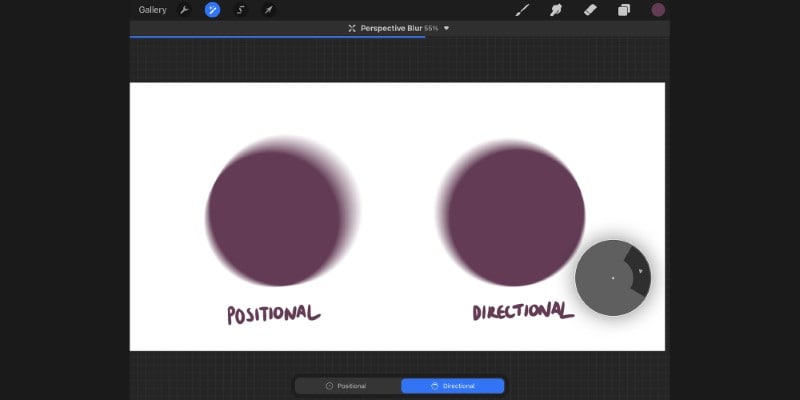
Perspective Blur
The last blur effect, perspective blur, is perfect to use when you want to create a zooming effect, for example.
Here, you have two different options to choose from: Positional and Directional.
The Positional setting creates a blur in every direction, starting from the center. With the Directional setting, it will only blur in a single direction!
For a more in-detail tutorial on Blur, take a look at our article on How To Use Blur In Procreate.
Noise
Noise is a great and easy filter to use when you want to apply a soft and grainy texture to your artwork.
If you like to keep a traditional look to your illustrations, even when drawing digitally, noise is a great way to simulate the texture of paper without much effort!
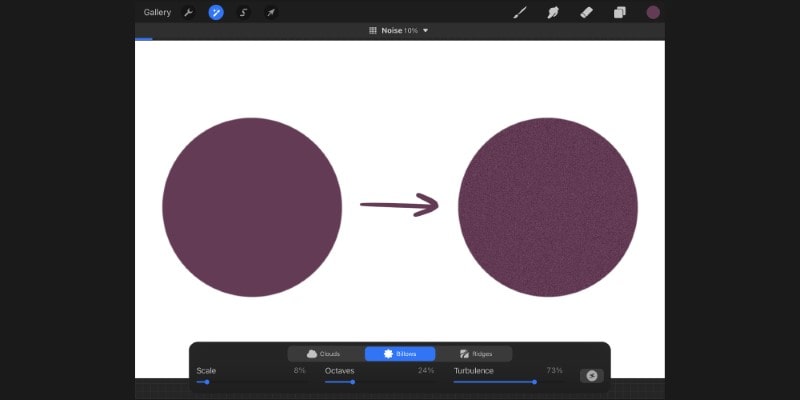
Noise will apply grain to your picture. The intensity of the effect can be increased or decreased by sliding your finger to the right or left.
There are also a few settings you can play with here! For example, texture-wise, you have 3 options to choose from:
- Clouds
- Billows
- Ridges
These offer slightly different textures that can greatly change depending on their intensity.
You can also change the texture’s Scale, Octaves, and Turbulence. All of these will change the way the texture presents itself in your illustration, so it’s a matter of experimentation until you have the desired effect.
Sharpen
If anything looks too blurry for your taste or you just want one part of your image to pop up a bit more from the rest, then Sharpen can help you with that.
Sharpen will bring out the detail in your picture and make it look more focused.
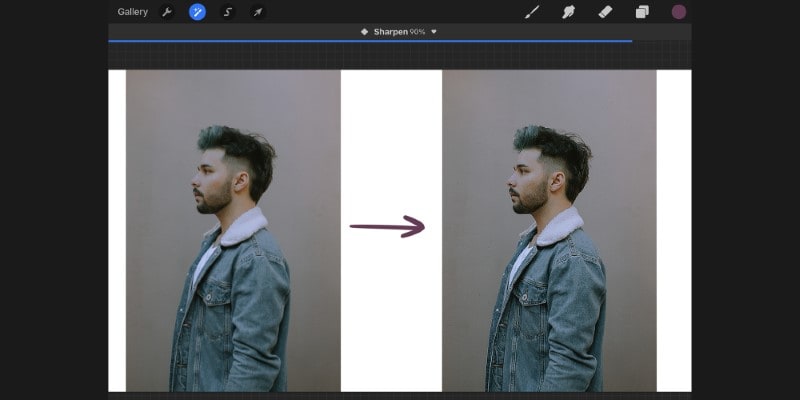
Just like other filters and effects, all you have to do is slide your finger to the right and left to add more or less intensity of it to your artwork!
Bloom
Bloom creates the illusion of glowing light.
Using Bloom is a great and quick way to add glow to certain illuminated areas of your illustrations.
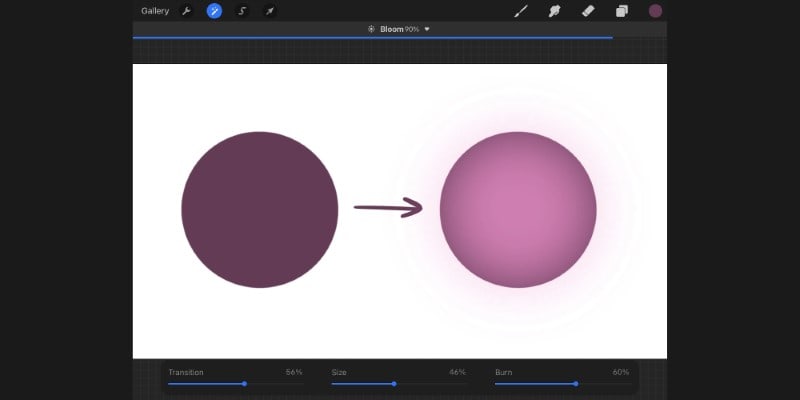
Here, you can also play with the settings, such as Transition, Size, and Burn, so the glow you’re adding is as intense or as soft as you like!
Transition refers to the amount of Bloom applied to the colors of your piece.
When adjusting the Size, you’ll be adjusting both the size and blur of the Bloom effect’s edges.
Finally, Burn adjusts the intensity of the Bloom effect.
Play with these to create different effects and adjust the mood of your illustration!
Glitch
This is a fun one to use if you like to use distortion in your work!
With the Glitch effect, you can apply glitches and distortions. These are inspired by analog and digital video glitches, akin to the ones observed when our TVs couldn’t find a signal.
Once again, you can change its intensity by sliding your finger, but more important than that is the fact that there are four different glitch styles you can play with:
- Artifact;
- Wave;
- Signal;
- Diverge.
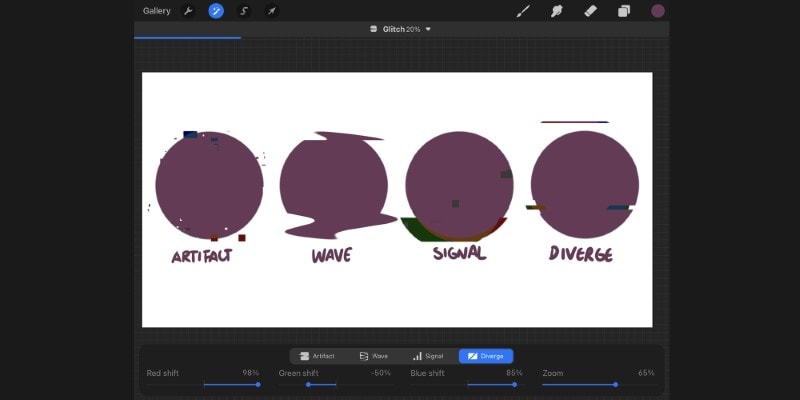
Each one of these is unique in its own way and make up different and interesting effects, so I highly recommend giving them a try and see which fits your goals better!
Halftone
Do you enjoy using Halftones in your artwork? Give that retro magazine or newspaper look to certain areas of your illustrations or even use it as shading.
Well, in Procreate, you can very easily do that by using the Halftone filter!
Once you select it, you’ll find three different types of halftone: Full Color, Screen Print, and Newspaper.
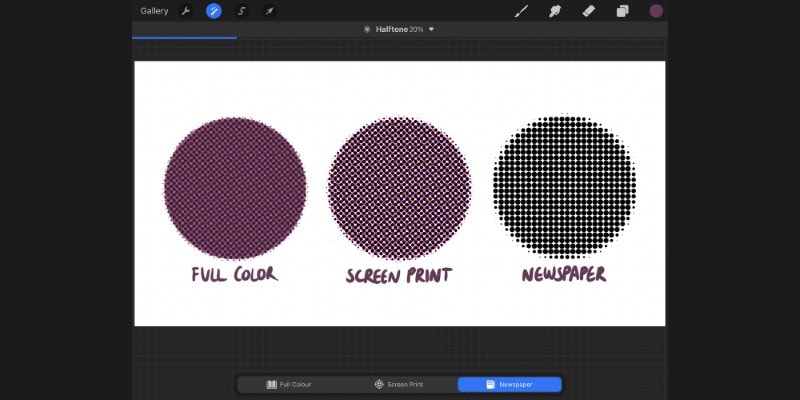
Some apply color to the halftone, while others don’t. You can also use your finger to control the pattern size instead of its intensity.
Using the Pencil option here is quite useful since then, you can draw the halftone effect as you want in any part of your work!
Chromatic Aberration
You can use Chromatic Aberration to shift the red and blue planes of your images easily.
This can be a very subtle effect, or you can go in the opposite direction and amp it up to give some color distortion to your image.
There are two options to choose from: Perspective applies the effect radially from a focal point that you can control, while Displacement applies the same effect horizontally and vertically, depending on where you slide your finger to!
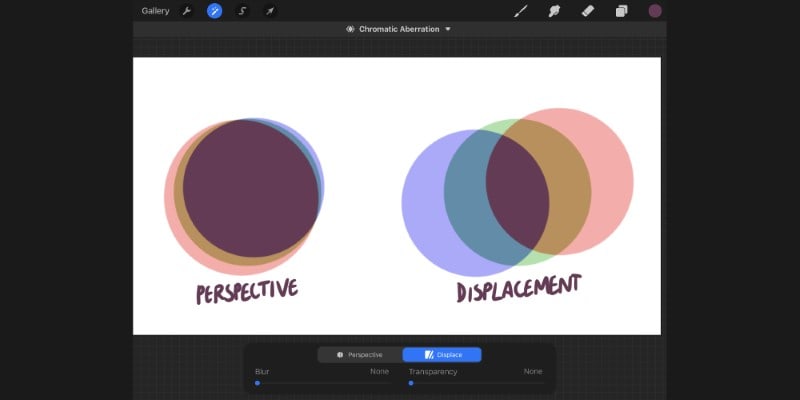
You can also use this effect on photos you’ve taken to change their look and add a slight color distortion to them.
Liquify
Liquify was one of the most-wanted and waited-for tools in Procreate, and it has been greatly delivered!
With the touch of a finger or pencil, you can create many different wrap effects:
- Push;
- Twirl Right;
- Twirl Left;
- Pinch;
- Expand;
- Crystals;
- Edge;
- Reconstruct.
You can also very easily change the size, pressure, distortion, and even momentum of your liquify effect by using the sliders at the bottom of the screen.
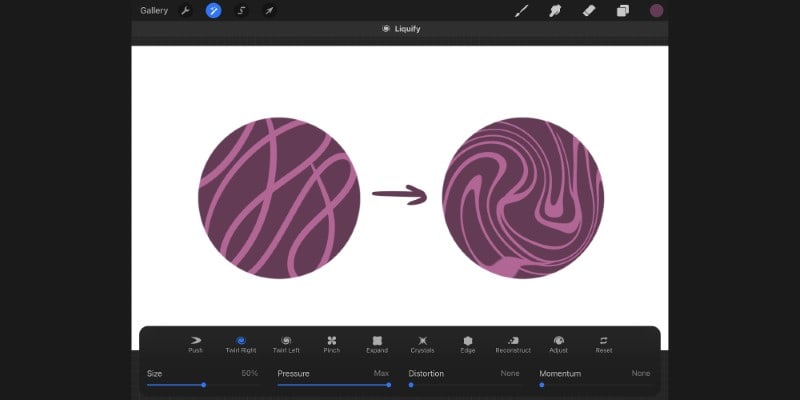
Liquify is great when you want to add a watery effect to certain areas of your art but also to fix the proportions of your characters and elements!
Clone
With Clone, you can duplicate certain areas of a picture by painting it.
Simply drag the disc along the area you want to duplicate, and then use your pencil to draw in the area you want the new copy to appear!
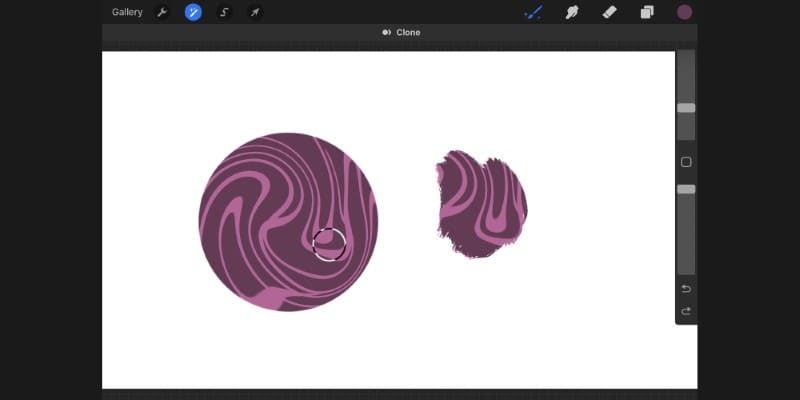
This is a really easy tool to use and perfect for a quick and natural copy. This is perfect to replicate certain areas of your drawing that have been cut off for any reason, but now you want to continue without having to draw it all over again!
Related Questions
You may have some related questions about using the adjustments panel and interface on the procreate app, so let’s go over those!
How to Apply an Adjustment to a Layer in Procreate?
To apply an adjustment in Procreate, first, be sure the layer you want to apply the adjustment to is selected.
Then, tap the magic wand icon in the toolbar at the top of the screen and choose any adjustment from the list!
Once you do, you can then change the intensity and other effects of the selected adjustment.
When you achieve the desired effect, tap the magic wand again, and the adjustment will be applied to the selected layer.
Can I Apply an Adjustment to Several Layers at Once?
Right now, you cannot apply an adjustment or effect to several layers at once in Procreate.
Instead, you can merge the layers together and then apply the desired adjustment to it!
To merge a layer with another, first, select the layer at the top. Then tap it once to show the layer options menu, and then tap ‘Merge Down.’
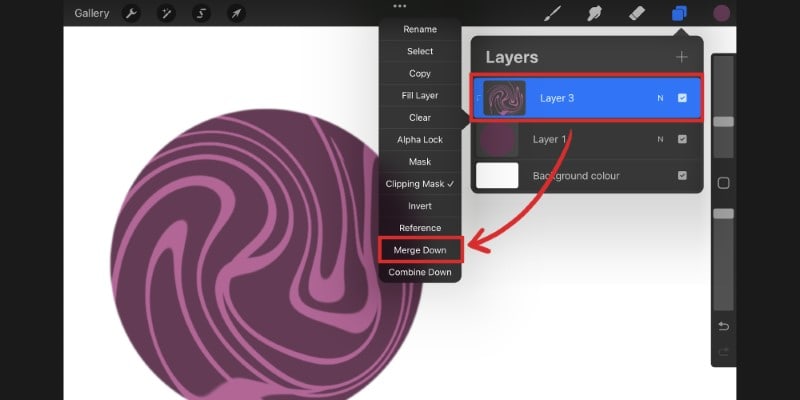
The selected layer will be merged with the layer below. You can then repeat the same process until all the layers you want to apply the adjustment to have been merged.
To merge several layers together, you can also select the first and last layers and then pinch them together!
Can I Apply an Effect Or Filter To a Clipping Mask?
Applying a filter or adjustment to a clipping mask is a great way to add effects to a layer without permanently changing it.
To do so, first, make a copy of the layer you want to apply the adjustment to. To do so, slide the original layer to the left and then tap ‘Duplicate.’
Tap the new layer to show the layer options menu. Now tap ‘Clipping Mask.’ The layer is now clipped to the layer below.
Now all you have to do is go to the Adjustments menu and select the desired filter or effect and apply it to the Clipping Mask!
If you don’t like the effect or want to redo it, you can just delete it and repeat the process.
And if you want to learn more about using clipping masks, check out our Full Clipping Masks Tutorial.
Or, if you’re ready for some exercises, check this list of Procreate Drawing Exercises!
Patricia Caldeira is the main writer here at Don Corgi. She's an art teacher with over 20.000 happy students across many platforms and courses!
Enjoy your stay and as always:
Keep on drawing!

")

")