Reference Layers is an advanced feature in Procreate that allows you to refer to other layers while drawing in another.
This option allows for faster coloring of any line work, as long as the right layer is set as ‘Reference’.
It is very easy to use, but it will change your artistic process and make it even quicker, so let’s see how you can use Reference Layers!
Table Of Contents
What are Reference Layers?
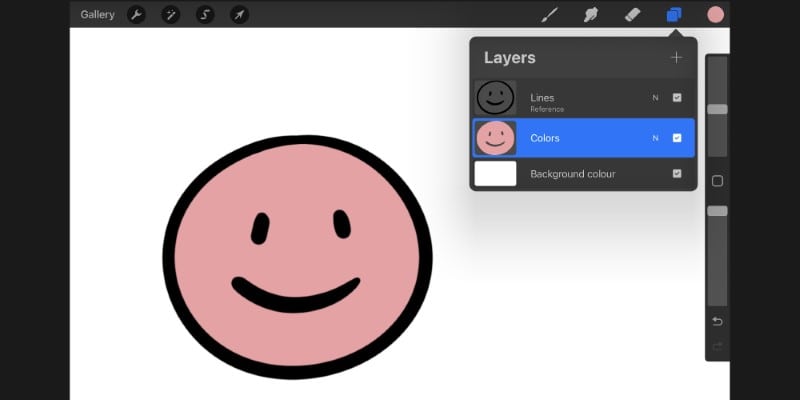
Reference Layers are a layer option in Procreate that allows you to color-fill an artwork easily and faster.
Using this option, you can draw line art and add color in separated layers, preserving both.
This way, you can easily recolor, adjust, and edit both elements independently.
It is also possible to very quickly ColorDrop when using the Reference Layer option.
Drag and drop the color inside the lines, filling the whole area!
How to Access Reference Layers in Procreate
It is very easy to access and use reference layers in Procreate.
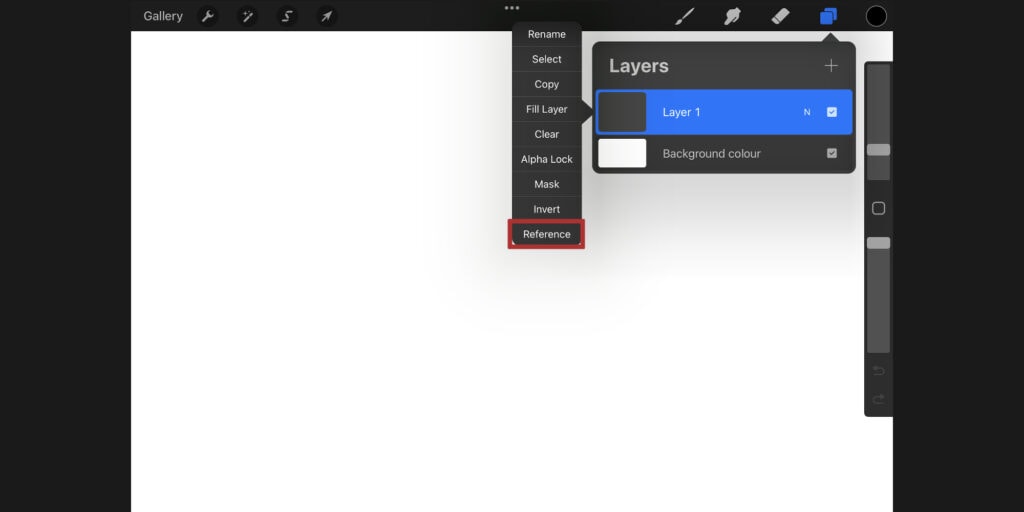
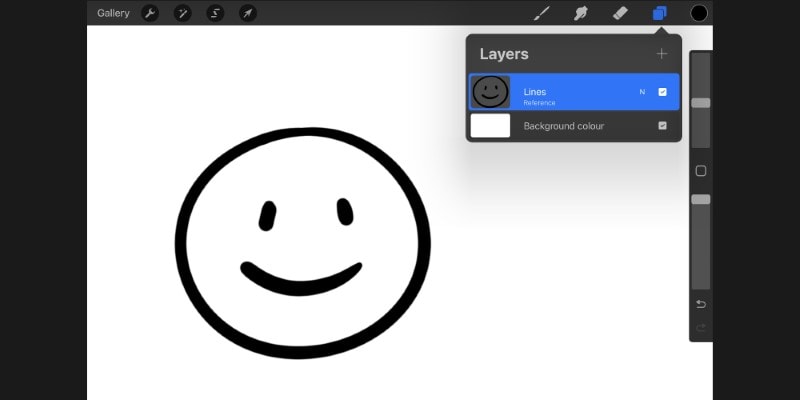
First, create a new layer.

Then, tap it to show the layer options and tap ‘Reference.’
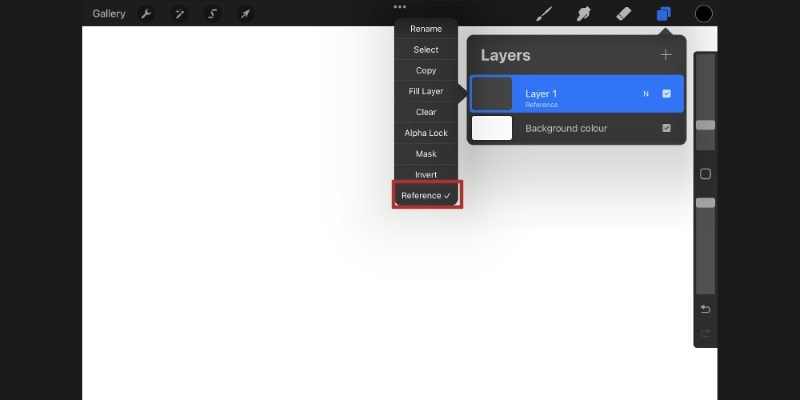
The layer will now be used as a reference!
Now, you can draw something on it and then ColorDrop it.
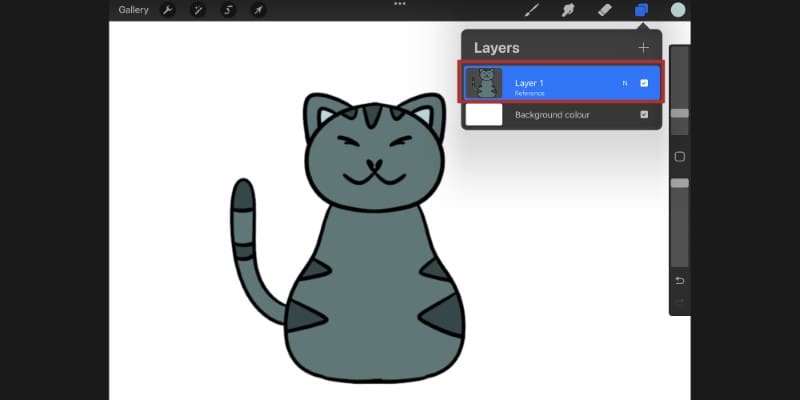
Another option is to draw the line art in the reference layer.
Then, ColorDrop in another new layer to fill everything based on the Reference Layer!
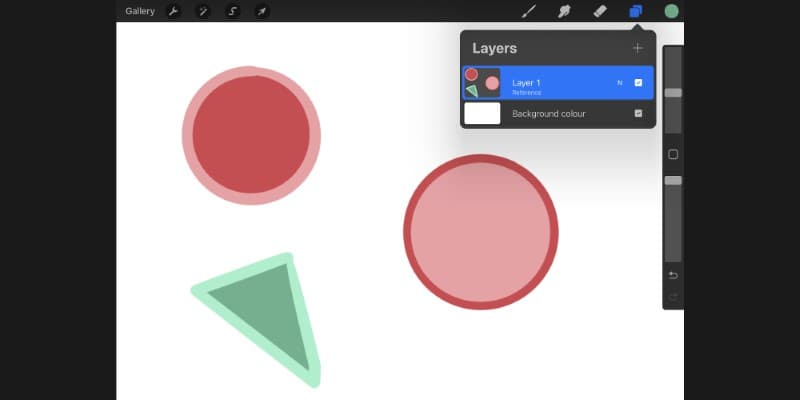
If you work with very simple coloring styles, the Reference layer option will make this process much faster.
Why Use Reference Layers in Procreate?
Artists who work with line art or tend to fill big areas with color will find the Reference layer option quite useful.
Instead of coloring by hand, you can just ColorDrop and easily fill any shape or area you want!
The coloring process becomes much faster, even if you want to add smaller details later.
It is also useful when you want to keep separate layers for different elements but still refer to them as you’re drawing.
As long as there’s a Reference Layer active, Procreate will always take that layer into account, even when working on another layer.
This also makes it easier to adjust and edit each element without changing the others.
For example, you can easily adjust the Color, Saturation, or Brightness of the base colors without changing the line art.
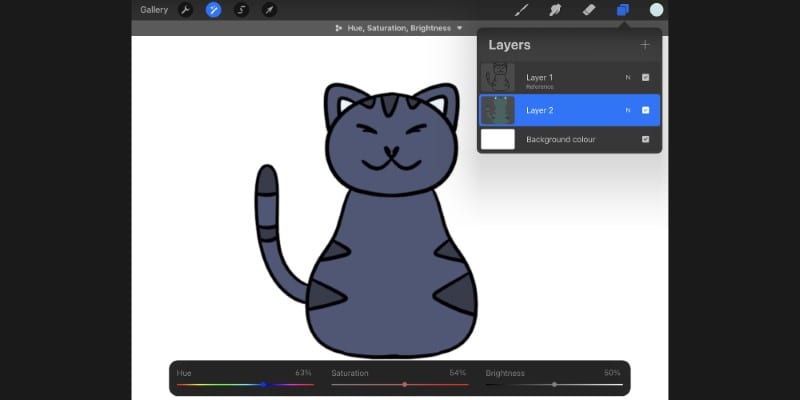
Add filters, effects, and other small adjustments without worrying about changing any other layer.
Tips and Tricks for Using Reference Layers
When using the Reference Layer option, there are some things to take into account:
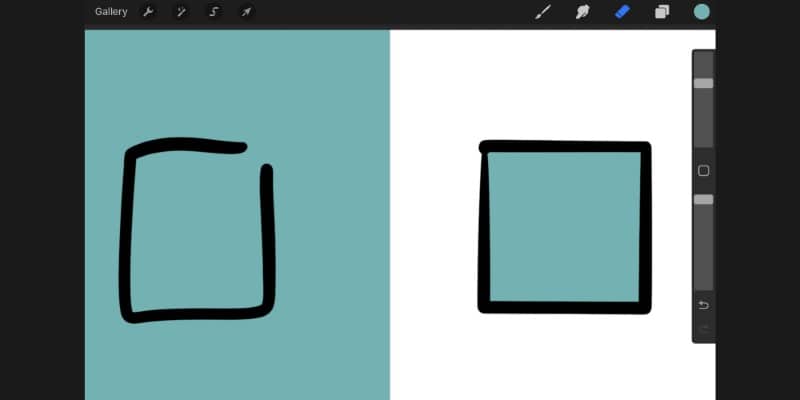
Be Sure There Are No Gaps In Your Line Art
The ColorDrop option will only work properly if there are no gaps in your line art.
When dragging and dropping a color inside a shape, even if Procreate refers to another layer, it will fill the whole canvas if there are any gaps in your line-work.
So, when drawing the line art, first, be sure that every line is properly connected.
Another thing to remember is that the ColorDrop feature won’t work with some textured brushes.
The texture of the brushes makes it so there are gaps throughout the line.
It all depends on how the brush was created and how it behaves on the canvas.
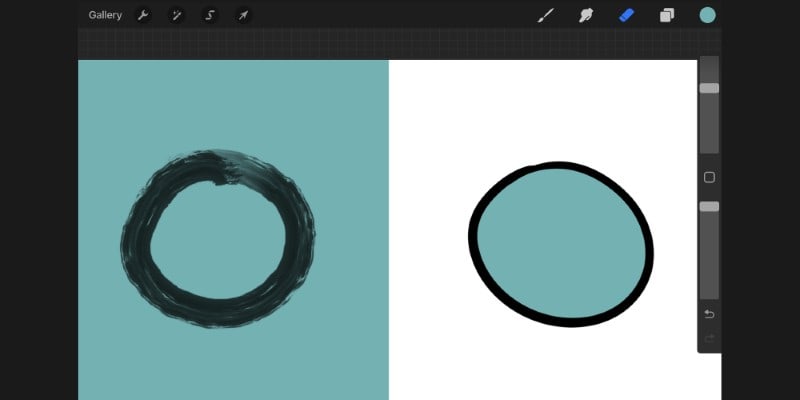
But, generally, a fully opaque brush ensures no gaps in the line unless you create them!
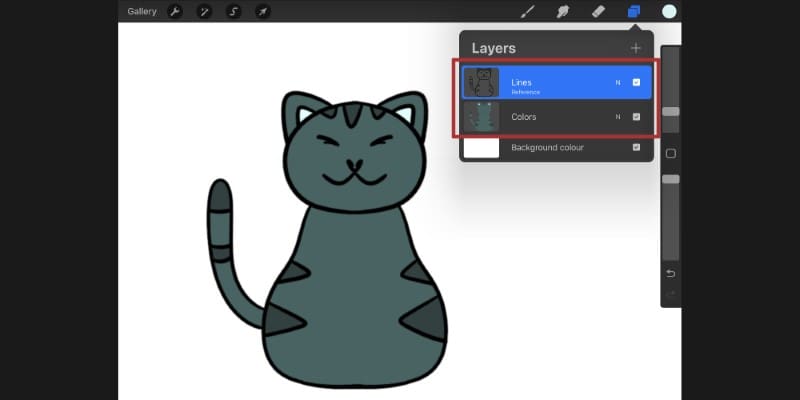
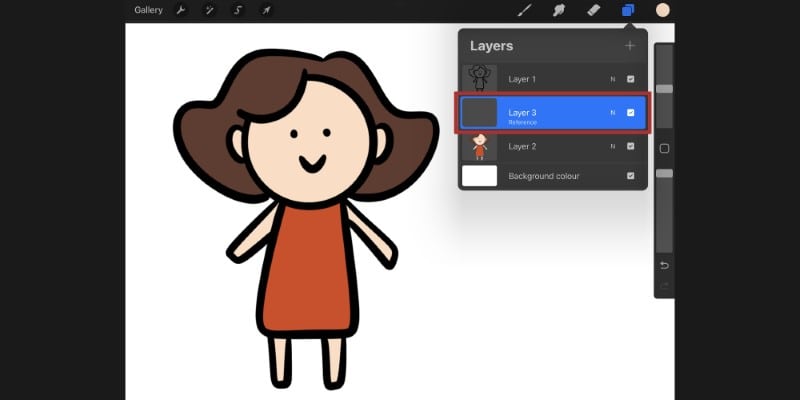
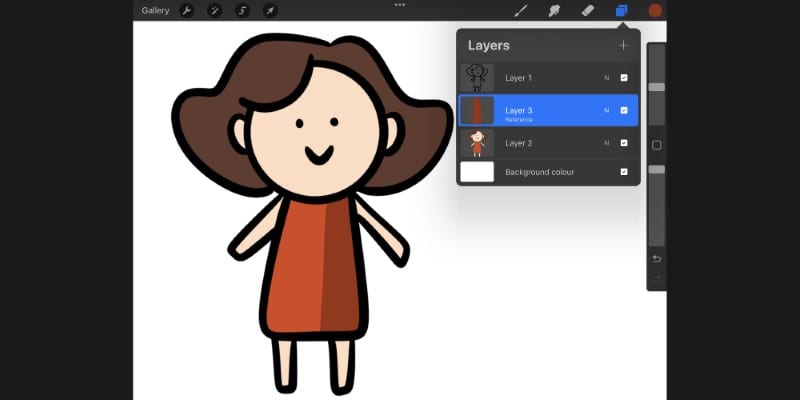
Keep Your Line Art In One Layer And Colors In Another
As mentioned before, the Reference Layer option is great for coloring line art.
First, draw the lines of your illustration. Then, set that layer as Reference.
Now, create a new layer below the line art, pick a color, and start coloring your artwork.
Just drag and drop the color inside the area you want!
Using this method, you can easily and very quickly color your artwork.
By doing this, you can also change your lines’ color or make other adjustments, which won’t change any other color in your work!
Color Any Area Quickly By Drawing And Using The ColorDrop Feature
You can still draw and color in the same layer.
Just create a layer and then set it as a Reference Layer.
Next, you must draw something, ensure no gaps in the line, and then ColorDrop inside that shape.
You can continue doing this until the illustration is finished!
If you have a very geometric style, this option could be very useful for you.
You can also use the Reference Layer option to create shading in your artwork.
First, create a new layer above the base colors. Then, set it as a Reference Layer.
Pick a darker color than the base and draw the area you want to shade.

Now ColorDrop that color into the shape you drew.
This way, you can also add shadows very quickly, especially if there are big areas to fill!
Conclusion
Procreate’s Reference Layer option is a very handy feature to learn. It will allow you to quicken the whole coloring process.
With it, you can easily ColorDrop an illustration while keeping line art and colors separated!
To use this option:
- Tap the desired layer to open the Layer Options;
- Tap ‘Reference’;
- The layer will now be referenced when filling another layer with color!
And that’s it!
If you’d like to know how to make a Perfect Circle In Procreate click here!
And if you’re trying to improve at procreate…
Here are 6 Procreate Drawing Exercises that will make you a pro!
Patricia Caldeira is the main writer here at Don Corgi. She's an art teacher with over 20.000 happy students across many platforms and courses!
Enjoy your stay and as always:
Keep on drawing!

")

")