
Drawing a nose from the front can be quite challenging, especially for beginners.
Just like with any other subject, time and practice will allow you to create a realistic nose in no time.
And this process can be simplified by breaking the nose into simpler shapes!
In this article, we’ll walk you through the step-by-step process and provide images to help guide you.
Following this tutorial, you’ll learn how to draw a nose more confidently and quickly. Let’s start!
Table Of Contents
- 1 Positioning The Nose On The Face Using Reference
- 2 How To Draw A Nose From The Front View
- 2.1 Step 1 – Start By Drawing A Triangle
- 2.2 Step 2 – Add A Trapezium Shape
- 2.3 Step 3 – Draw One Circle For The Tip Of The Nose
- 2.4 Step 4 – Add Two Smaller Circles For The Nostrils
- 2.5 Step 5 – Outline The Basic Shapes To Draw The Tip Of The Nose And Nostrils
- 2.6 Step 6 – Add A Few Lines For The Bridge Of The Nose
- 2.7 Step 7 – Clean Your Sketch
- 2.8 Step 8 – Add Shading To Give Depth To The Nose
- 3 Use Reference Images To Understand Better How To Draw A Nose
- 4 Why Is Drawing A Nose So Hard?
- 5 Related Questions
Positioning The Nose On The Face Using Reference
Before learning how to draw a nose, first, we need to find the nose in the face.
Finding a reference and drawing a few guidelines can be pretty helpful.
You can use these websites for great portrait reference photos!
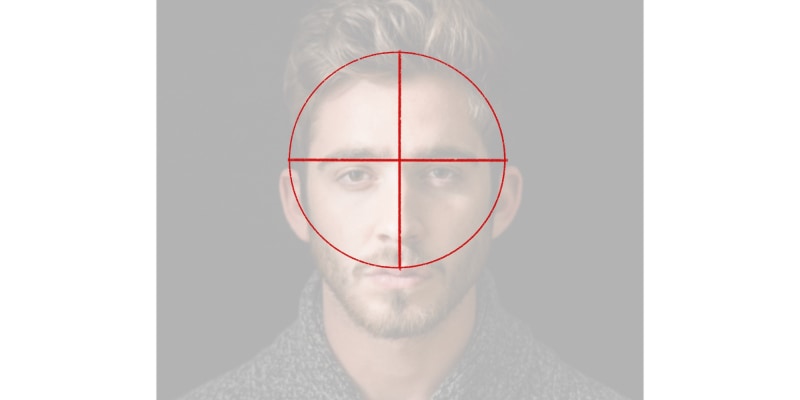
Start by drawing a circle for the upper part of the head. Then find the center of that circle with one horizontal line and a vertical line.
Now lengthen the vertical line until it reaches the chin. Using two slanted lines on each side of the face, you can connect all the shapes together.
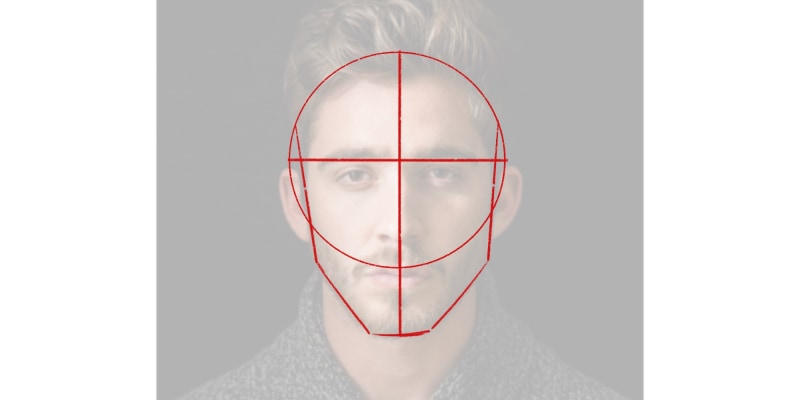
All you have to do now is draw a line on the nose area!
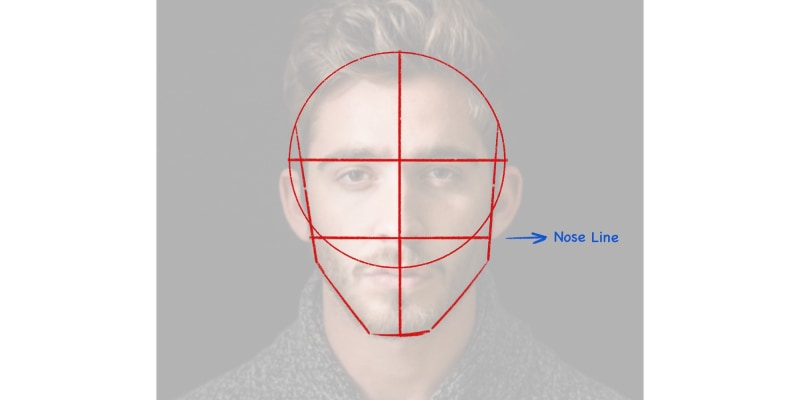
With very few lines and shapes, you know the location of the nose in the face. It’s a good idea to practice these face drawings a few times to create muscle memory.
You can add more guidelines for other facial features, such as the mouth and eyes. This way, you can practice the whole structure of the face.
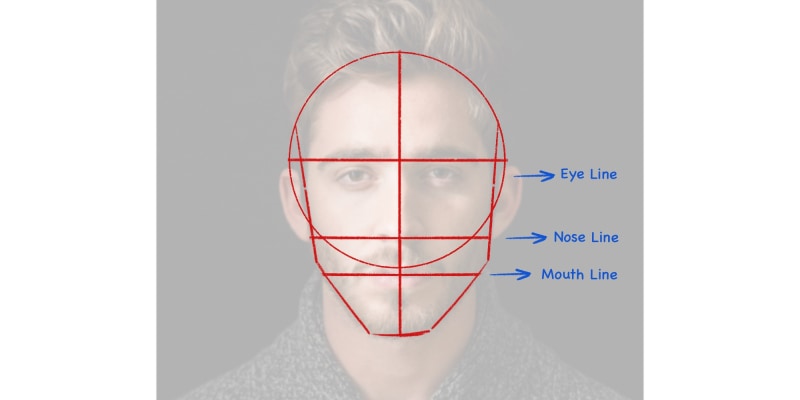
You can read our Easy Guide On How To Draw Faces if you want a more detailed tutorial on drawing faces.
Once you feel confident, it’s time to start drawing noses.
How To Draw A Nose From The Front View
Drawing noses from the front view can seem challenging since a lot of the depth and dimensionality is hard to convey.
However, by simplifying your shapes and lines, you can very easily draw a realistic nose.
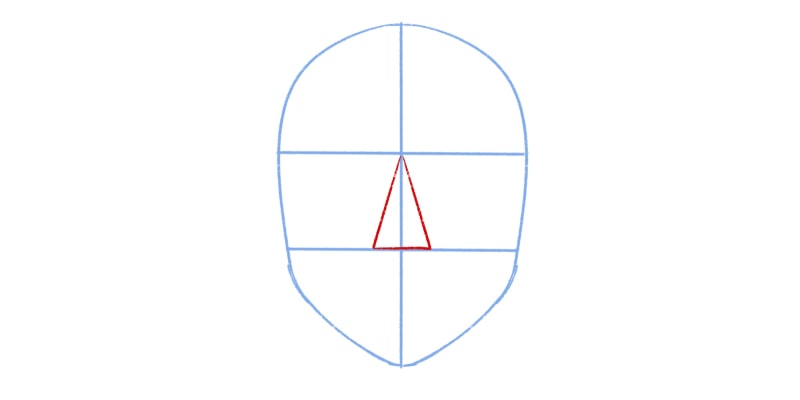
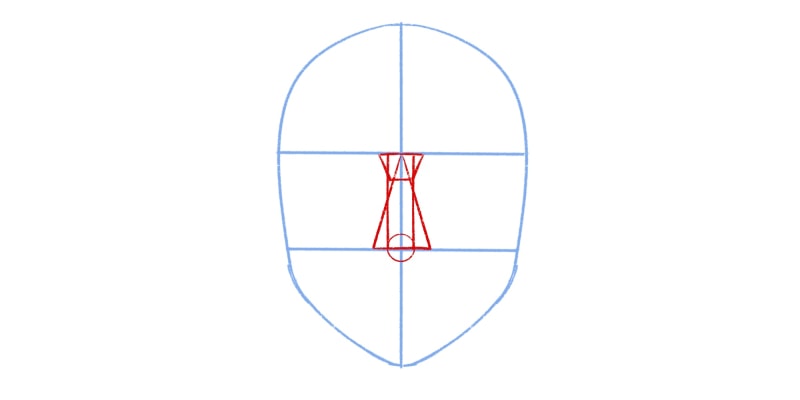
Step 1 – Start By Drawing A Triangle
Previously, we could find where the nose sits on the face. Using that knowledge, we can start our nose drawing.
Start by drawing a triangle. This triangle should start on the brow line, and its flat base should sit on the nose line.
If you look again at a reference image, we can discern how wide the nose should be.
By drawing a vertical line from the inner corner of the eyes to the nose line, you now know how wide your triangle should be!
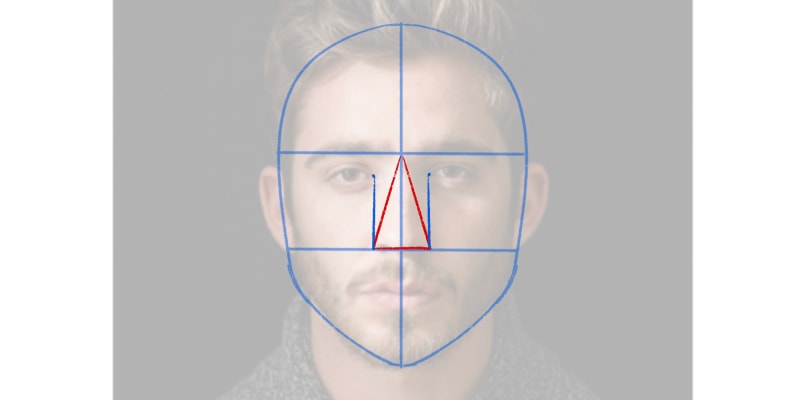
However, this measurement doesn’t need to be 100% exact, depending on the style or preferences.
People are different from each other, so it’s worth playing with different nose proportions throughout this process.
Step 2 – Add A Trapezium Shape
As the nose bridge ends, it connects to our brows. This is very subtle and can be drawn very quickly.
So we don’t forget about it, draw a trapezium shape on the brow area, the top guideline of our drawing.
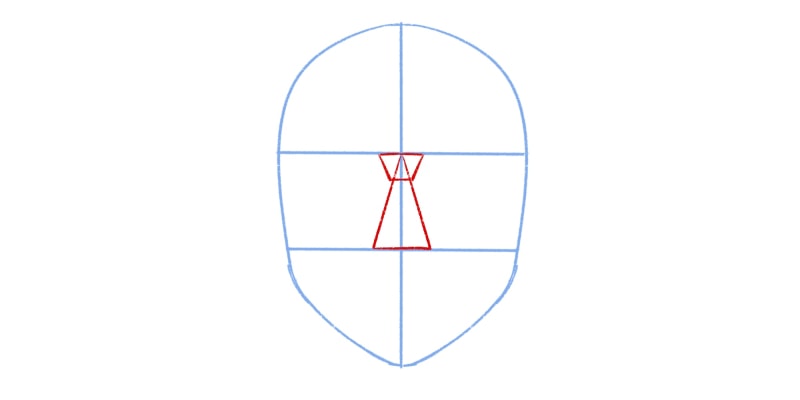
With two very simple shapes, you already have something that resembles a nose drawing. It’s very crude right now, but it’s there!
This is the nose shape you can use for any of your drawings. You can practice these first before adding more details.
Step 3 – Draw One Circle For The Tip Of The Nose
It’s time to refine our nose drawing.
Add a circle at the center of the nose line.
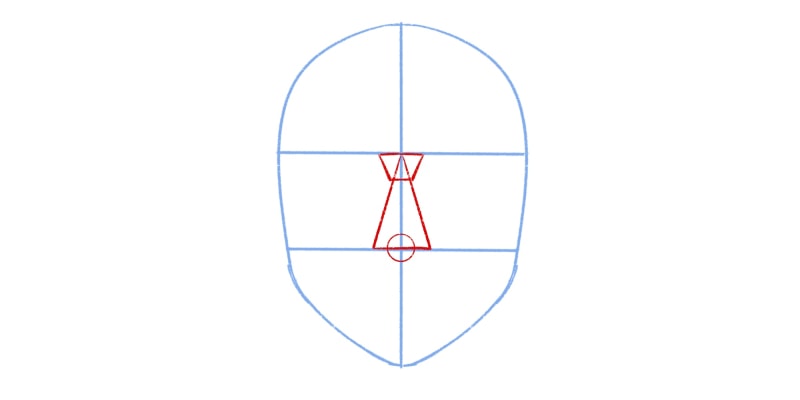
This is where the tip of the nose is going to be.
One thing you can experiment with is moving this circle up and down. The tip of the nose can be higher or lower.
Again, everyone is different, and you can make your characters or portraits more unique by playing with their nose’s proportions.
Another thing we can do here is drawing two vertical lines, one on each side of the circle. The space between those lines is where the nose bridge is.
Our nose structure is almost finished.
Step 4 – Add Two Smaller Circles For The Nostrils
All we are missing in our sketch is the nostrils. For them, draw two circles.
One on the left side and another on the right side of the tip of the nose.
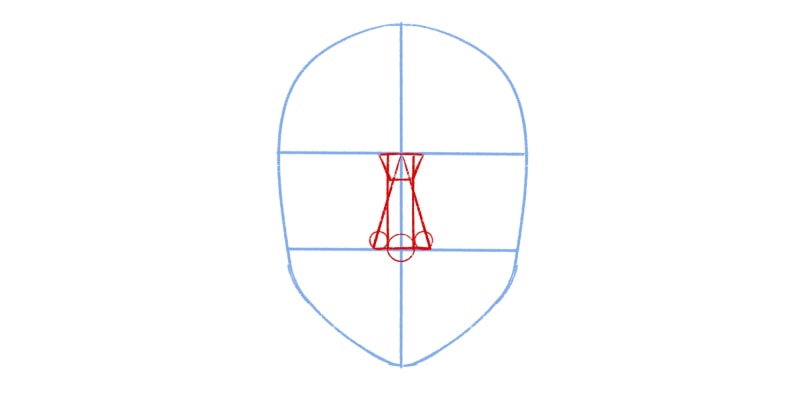
These circles should be slightly smaller than the one before.
With that done, we have all the necessary shapes and lines to know how to draw a nose!
Step 5 – Outline The Basic Shapes To Draw The Tip Of The Nose And Nostrils
When drawing a nose from the front, we don’t need to show much of it.
Sometimes outlining only the tip and nostrils is more than enough, even when drawing realistic noses!
So let’s do that: go over the circles and outline the bottom.
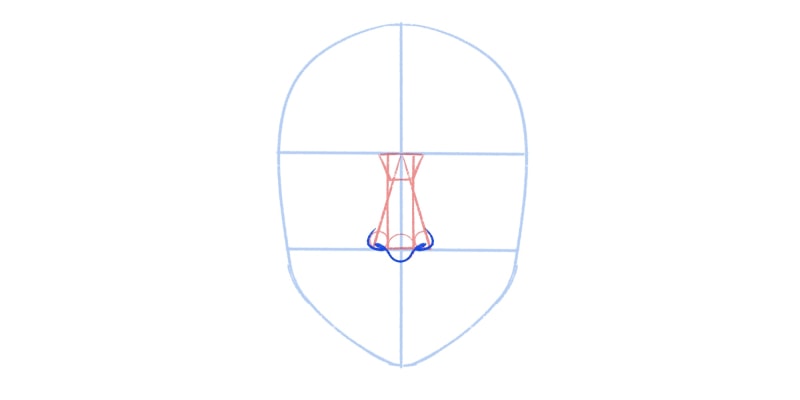
One thing to remember is that the tip of the nose is in front of the nostrils. That means the tip will slightly overlap the nostrils when drawing the nose from the front.
Step 6 – Add A Few Lines For The Bridge Of The Nose
Using the trapezium shape as our guide, we can now add a few lines for the nose bridge, along with the brow.
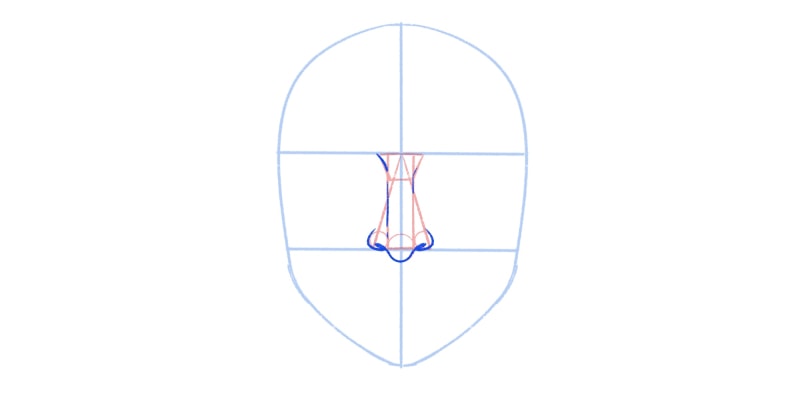
These can be very simple and short if you want. It all depends on the detail you want in your nose drawing.
Step 7 – Clean Your Sketch
We have all the basic planes and shapes we need, so it’s time to clean our sketch with new and smooth strokes.
You can use a pencil or pen for this if drawing on paper. On the other hand, if you’re drawing digitally with a software, choose another brush and go over all your lines.

If you prefer a simpler drawing in a simpler style, you can leave the nose as it is. However, if you prefer a more finished drawing with more detail, there’s one final step in this tutorial.
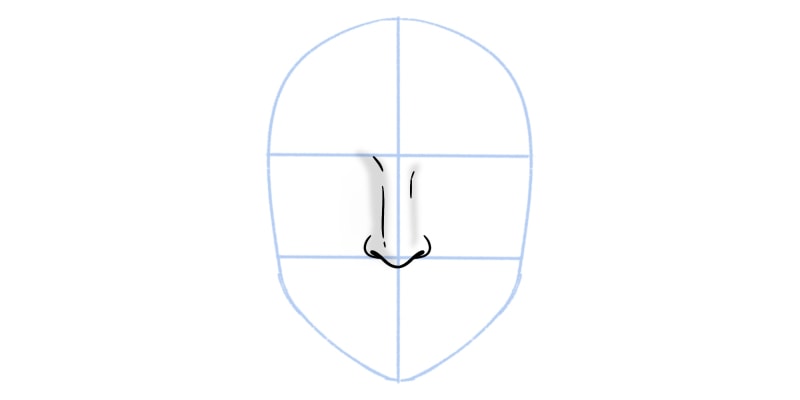
Step 8 – Add Shading To Give Depth To The Nose
Our last step in this nose tutorial is to add shading to the nose.
By doing this, your nose drawing will have more depth and some dimensionality. This can be done very simply and by using light values.
Above the nostrils, apply a bit of shading on each side of the nose.
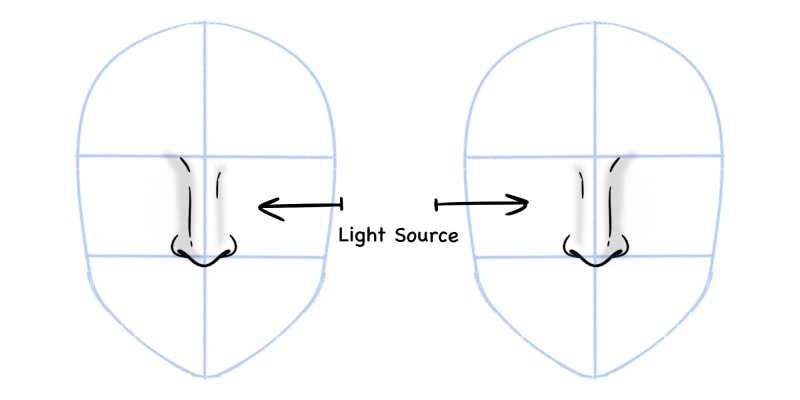
One thing to remember is that one side of the nose will have more shading than the other, depending on where the light is coming from.
For example, if the light comes from the right, then the left side of the nose will be more in the shade.
On the other hand, if the light is coming from the left, then the right nostril and bridge need more shading.
Finally, you can add details to the nose, such as freckles, beauty marks, moles, or even a scar. It’s all up to you and what you want for your character or portrait.
If you want to keep your nose simple, leave it as it is.
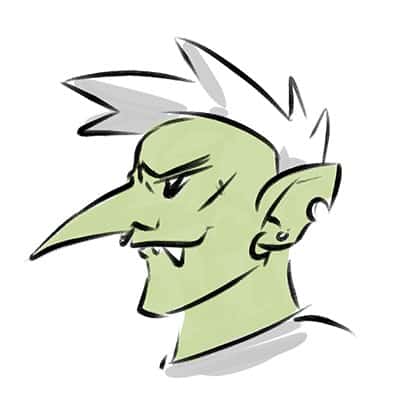
Now that you know how to draw a nose, you can play with its shape and have fun with different styles of noses!
Use Reference Images To Understand Better How To Draw A Nose
To better understand how to draw a nose, it’s a good idea to use a few reference images.
As we did at the beginning, you can draw on top of those images. And no, this isn’t cheating.
However, break it down into basic shapes instead of outlining the nose.
Use the same basic shapes we did throughout this tutorial, or find your own! You can use more or fewer forms and lines.
You can draw a nose in several ways, so find the right one for you.


")

