You might’ve heard about Contour Drawing before. In fact, you’ve probably already done it without knowing!
It is a very simple exercise, that includes several different techniques, such as blind contour, cross contour, and even gesture drawing!
What is Contour Drawing? Contour Drawing is an exercise where the artist focuses on drawing the outline of a subject or object. The objective of this kind of exercise is to focus on the shape of the subject instead of its details.
Depending on what you want to improve, there are specific contour exercises that you can do. Gesture drawing helped me a lot when starting to learn to draw people and characters for example!
There are many different types of contour drawings you can do, as well as different approaches to them.
I’m going to go all over them, including how to practice contour drawing and some examples to understand it better.
But most importantly, this is a very fun exercise that will definitely help you improve your lines and style!
Table Of Contents
The Importance Of Contour Drawing

Contour drawing is something we’ve been doing all our lives, even though we probably don’t even notice it!
Kids often draw the contour of their hands. This is a normal exercise to do at school when starting to experiment with art. But it’s also something a kid will do naturally.
We’re looking at art for the first time. We’re not sure what to do with these pencils and paper yet. So, intuitively we use what we have to try and draw lines around it. Being it hands, pencils, scissors and any other object around us.
This is how we start learning how to draw and what drawing is.
A contour drawing is basically drawing the outline of things. You can do this with any subject or object. It is a very simple exercise and very important for beginners.
Especially since it makes you focus on the simpler shapes of the reference you’re drawing.
And this is why Contour Drawing is so important. It makes us look at the object we want to draw and breaking it down to its
Contour drawing, and it’s different types, makes you look very closely at the contour of your reference.
You give more emphasis to render mass and volume of the subject while drawing the contour.

Kimon Nicolaïdes was said to make popular contour drawing with their The Natural Way to Draw book.
In fact, this is a very famous book that is especially useful and encouraged reading by figure drawing students in art schools around the world.
Types Of Contour Drawing
There’s more than one way to practice contour drawings! They’re all fun and perfect to help you relax and gain confidence in your lines.
When we’re starting to learn how to draw, it’s more than normal that our lines aren’t perfect. We improve our linework over time and with practice.
Contour Drawing, along with other exercises, is perfect to improve our lines and drawings in general.
Remember that the objective of contour drawing isn’t just drawing lines.
It’s drawing the shapes and contours of an object or subject. That means there’s no need to shade anything right now.
For now, let’s see what types of contour drawing there are.
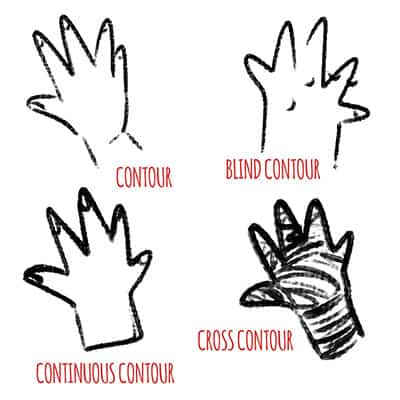
Freehand Contour Drawing
Freehand contour drawing is an artistic technique that focuses on capturing the outlines and edges of a subject with minimal or no use of shading and details.
This type of contour drawing relies on the artist’s direct observation of the subject, as well as their ability to translate what they see onto the page using a freehand approach.
The term “freehand” refers to the process wherein the artist uses no tools or aids, such as rulers or templates, to guide their drawing.
Instead, the artist trusts their own hand-eye coordination and spatial awareness to accurately depict the contours of their chosen subject.
The primary goal of freehand contour drawing is to train the artist’s eye to see and recognize the basic shapes and lines that make up an image and to develop a better understanding of the subject’s form.
This can be very helpful for beginner artists!
This drawing technique allows the artist carefully observe and study its curves, angles, and proportions.
Freehand contour drawing is often considered a foundational skill in art education, as it lays the groundwork for developing more advanced techniques such as cross-hatching, shading, and highlighting.
By practicing freehand contour drawing, artists not only improve their observational skills but also sharpen their hand-eye coordination, and fine-tune their overall drawing abilities.
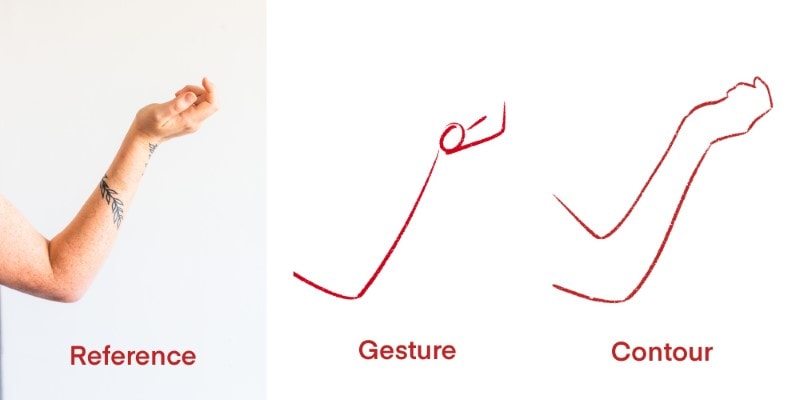
Gesture drawing is usually considered a type of freehand contour drawing. But it isn’t the same!
Here are the differences between gesture and contour drawing.
Blind Contour Drawing
Blind contour involves sketching the outline, and possibly some extra details, of an object without looking at what you’re drawing.
You can only see the finished work once you’re done. There are several ways to approach this task!
You could have the object in front of you and concentrate on it while drawing simultaneously or attempt to draw the object from memory. The latter may be more challenging, but it’s enjoyable to see the results.
This activity is perfect for group settings, with friends, family, or individuals of any age.
Having everyone draw the same object will yield a variety of unique outcomes.
Pictionary, the popular board game, also incorporates a blind drawing element, making it a fun way to spend time with family while honing your drawing abilities.
Continuous Line Contour Drawing
Very similar to the blind contour, the continuous line contour drawing involves the artist not lifting the pen or pencil from the paper!
Once you put the pencil down, you must draw the object in one continuous line.
This is a very interesting exercise because it will teach us to draw an object in the most simple and clear way.
Again, this can be fun in a group since everyone will have different ways of resolving the same problem.
That means everyone will have different results! It is always important to learn not only from yourself but from others as well.
Cross Contour Drawing
Cross contour drawing is an artistic technique used by artists to create a sense of three-dimensionality and depth in their drawings.
In this style of contour drawing, the artist emphasizes the contours of the three-dimensional objects, giving a more lifelike and believable representation of the subject matter.
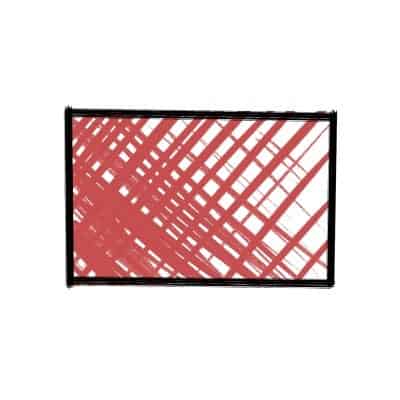
The key to cross-contour drawing is understanding the concept of ‘cross contour lines,’ which are lines that contour or follow the form of the object being drawn, illustrating the object’s shape, and creating an illusion of depth.
The primary purpose of cross contour lines is to denote how the curves and surfaces of the object wrap around its shape and how these parts relate to one another.
This allows the artist to capture the surface and texture of objects, adding richness and detail to the depiction.
Unlike traditional contour lines that largely focus on the edges and boundaries of an object, cross-contour lines delve into the interior of the object, allowing the artist to showcase the varying angles and perspectives of its structure.
Contour Drawing Examples
We’ve talked about different types of contour drawings, but let’s see some examples as well.
Contour drawings don’t need to be simple exercises only, they can actually be part of your art style. There are a lot of artists that actually implemented it to their style and it results in fantastic pieces of art!
Check out
If you also want to see continuous contour drawings in action, check this video on Instagram!
Peggy Dean works a lot with lettering and their contour drawings inspired by plants are very beautiful and even calming to look at. I really recommend giving them a follow.
Peggy Dean is actually a fellow teacher on Skillshare, so if you’re interested in drawing plants and practicing your contour drawings, I really recommend checking out this Line Drawing: Cactus & Succulent Edition class!
As I mentioned, if you’re interested in creating your own characters, I highly recommend practicing Gesture Drawing.
Not only when you’re starting to learn anatomy, but also when you’re already a veteran at drawing. Gesture Drawing is a very good warm-up exercise!
I always like to see and learn with Griz and Norm’s work! They’re animation artists at Walt Disney Animation Studios and they post very often on their Instagram page. Not only gesture drawing exercises, but also a lot of character design and even some tutorials on how to create characters, draw poses and others, so I really recommend taking a look.
As you can see Gesture Drawing can have very simple and basic lines, but it can also be more complex and detailed. It all depends on how long you have to capture the pose and its movement!
These are just a few examples of contour drawings.
Just practice as much as you can and above all, have fun with it! You’ll notice that what all these artists have in common is how much they like to do what they’re doing, and the love really shows!
How To Practice Contour Drawing
Depending on the type of contour drawing you want to do, it will work a bit differently, but the way you start is always the same. I recommend doing contour drawing via traditional art. It’s easier to learn and gain control of your lines that way.
1) Choose your tools
You’ll notice that even by practicing with pencils and paper, what you learn with it, will be applied to digital drawing later on. So do you need to start practicing contour drawing?
- A piece of paper or even a sketchbook. I really like Canson products and as such, I always recommend them. Their paper is really good and suitable to use with any kind of material. Plus you can easily detach a single sheet of paper from most of their pads/sketchbooks. If you prefer to work with a single piece of paper instead of the whole pad, then you can do so!
- Pencils, Pens, or other tools that you like. This one really comes down to your preference or what do you want to experiment with. I recommend always to try different tools. But if you’re just starting, I’d recommend using graphite pencils. If you’re feeling bold, try using pens instead of pencils. Using an inking pen means you can’t erase small mistakes you did. This way you focus more on drawing than on the things you might have gotten wrong. Improve and learn from your mistakes! I really like the Sakura Pigma Micron for inking and I use them all the time in my sketchbook.
This is it. This is all you need to start practicing contour drawing.
Avoid erasers, you don’t need them! As I said, mistakes are common and we learn from them. If you noticed a mistake in a drawing, repeat the drawing and fix that mistake there.
This way, you have visual progress to look at how you improved!
Be bold with your materials. Here’s a list of art materials to try.
You don’t need to limit yourself with pencils and pens nor black and white.
Try using charcoal, pastel. Even paint! Experiment with different colored paper as well and even with textures. As long as you’re having fun and learning something with the practice, it’s not wasted time.
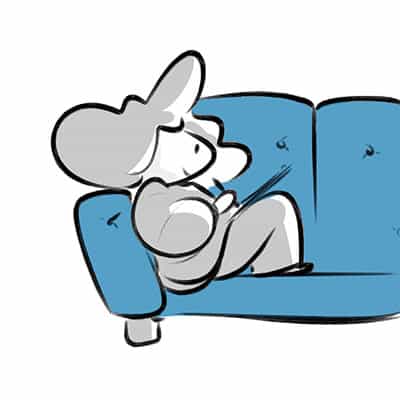
2) Choose a time and place
Now the next part, choose an object and a place to work. It can be anywhere. From your own office, on a desk or from the sofa. You can even go outside, pick different objects and buildings a draw them! What’s important is that you feel comfortable.
Start with simple objects. A flower, a chair, a bottle, a mug. Whatever you want.
There are lots of simple household objects that you can pick, just pick one and start. You can even make a session with several objects!
Spend 5 minutes with a mug and then pass on to the next object you have selected.
We reach the next step of our contour drawing practice: Pick a time.
Choose a time of the day where you can relax. You also don’t need to practice contour drawing for long. From 30 minutes to 1 hour or more. Don’t force the exercise.
We want you to enjoy this time and that won’t happen if you’re forcing yourself to sit and draw for an hour.
3) Pick a contour drawing exercise
Finally, pick the kind of contour you want to practice!
Let’s say you want to practice Blind Contour. Set your pencil on your paper. Now set your eyes on the object your drawing and start moving the pencil.
The only rule here is that you can’t look at your paper!
Practice this exercise with the same object several times. Each time you finish a drawing, look at it. You’ll notice that as you repeat, the drawings will improve significantly!
If you’re feeling like practicing Continous Line Contour, again, set your pencil on your paper.
The rule here is once you start drawing, you can’t lift the pencil from the page.
Observe the object and what you’re doing, and only lift the pencil when you’re done. Again this is the kind of exercise where you’ll notice differences with each repetition of the same object you do.
As for Gesture Drawing. I recommend trying both classes with a moving model and using Gesture Drawing websites like Line of Action.
Going to a class means you can’t change your times. Time will be set and once that minute is over, the model will move whether you want them to or not.
This way, you can focus on what’s really important on the pose and which lines are important to capture it.
Alternatively, you can do it at home. Set a time for when the photos change and draw each pose that will appear on the screen of your computer.
Remember that there is no right or wrong way for these exercises.
The results you get are your own. You can be as messy or clean as you want with your lines. You’ll see that with time and practice, you’ll improve your drawing a lot!
Additional Questions
What is a Modified Contour Drawing?
A Modified contour drawing allows you to use more than one line. You can also look at your paper, instead of doing it blindly like in the blind contour drawing type.
Although it is still advisable to look for long to the object you’re drawing than the paper.
What is Mass Gesture?
It is very similar to gesture drawing. In this kind of exercise, the artist focuses on capturing the pose via masses of tone and color instead of using lines.
If you’re curious how to do gesture drawing, do check out my complete guide here.
Any Drawing Tips For Beginners Starting With Contour Drawing?
Yes! For beginners starting contour drawing, focus on building confidence and trust in your hand-eye coordination.
Start with simple subjects, and don’t worry too much about accuracy at first. Emphasize observing your subject and cultivating a good understanding of form and shape. Keep practicing regularly, and remember that improvement comes with time and dedication.
Contour drawing can help improve hand-eye coordination, line control, and observational skills, which are essential for any artist, so don’t give up!
You can also use contour drawing for quick sketches and warm-up exercises since it trains the right side of your brain.
For more exercises, check out these super helpful Anatomy Drawing Exercises!
Patricia Caldeira is the main writer here at Don Corgi. She's an art teacher with over 20.000 happy students across many platforms and courses!
Enjoy your stay and as always:
Keep on drawing!
Patricia’s courses have enrolled 22 000+ students around the world, in platforms such as Udemy, Skillshare, Gumroad and more.
")

")
