Drawing a face from a 3/4 view is quite challenging since perspective plays an important role here.
However, breaking down every feature into simpler steps will help you understand and draw the face better.
If you’d like to draw a face from a 3/4 view, this tutorial will help you achieve that by following a few easy steps. Let’s go over them one by one!
Table Of Contents
- 1 Start By Drawing The Head Structure
- 1.1 Step 1 – Draw A Circle
- 1.2 Step 2 – Add Some Guidelines To The Circle
- 1.3 Step 3 – To One Side, Draw An Oval Shape
- 1.4 Step 4 – Draw The Eyebrow And Mouth Guideline
- 1.5 Step 5 – Find The Nose Guideline
- 1.6 Step 6 – Draw A Vertical Line And Find The Chin
- 1.7 Step 7 – Find The Hairline
- 1.8 Step 8 – Connect Everything
- 2 Add The Facial Features, One By One
Start By Drawing The Head Structure
Before starting your face drawing from a 3/4 view, you must first learn how to draw the head structure.
This structure will be the base for our drawing, but will also give us all the guidelines we need if you want to draw the face from a 3/4 view!
Step 1 – Draw A Circle
Start drawing the head with a circle. This circle doesn’t need to be perfect, just something that resembles a circle.
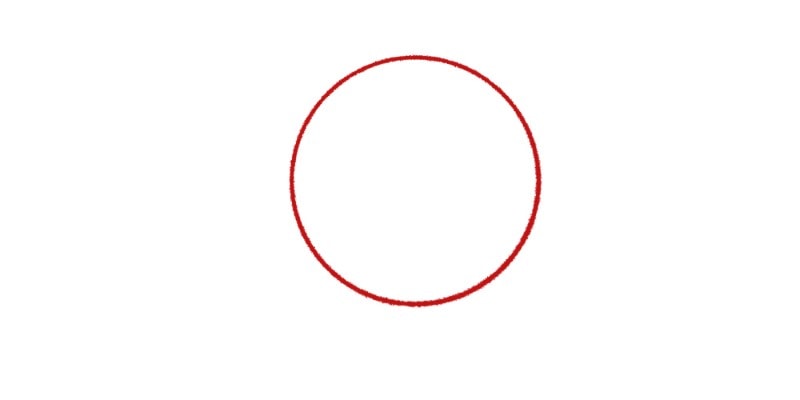
Using this circle, we will find all the measurements and guidelines you need to draw a head from a 3/4 view.
Step 2 – Add Some Guidelines To The Circle
Go into the circle and draw two curved lines crossing it: horizontal and vertical.
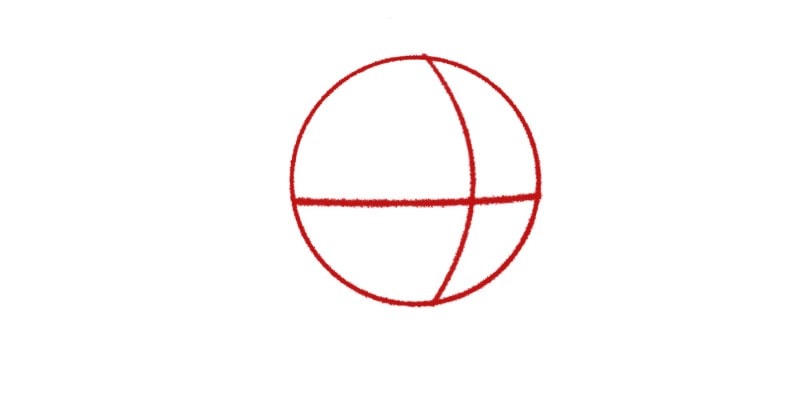
This will make the circle look more like a sphere and add some more depth to our face drawing.
Step 3 – To One Side, Draw An Oval Shape
To one side of the head, in our case, the left side of the circle, draw an oval shape.

This shape should follow the line of your circle and go slightly above the horizontal guideline.
If it helps you, you can draw two oval shapes that slice off the sides of the circle instead of just one.
It’s all up to you, and what’s more helpful to visualize the head from a 3/4 view better.
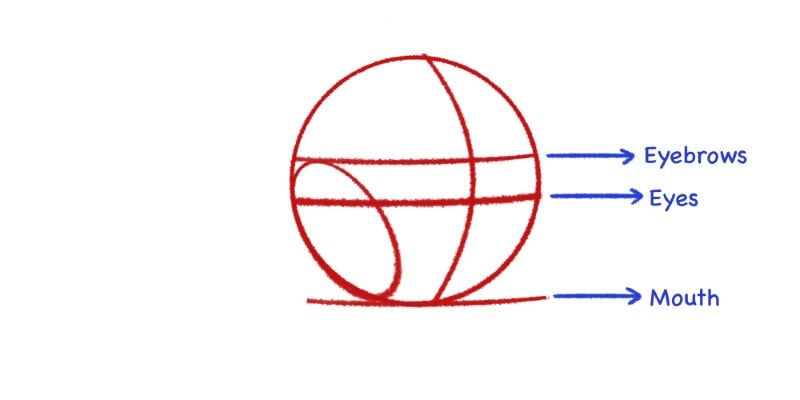
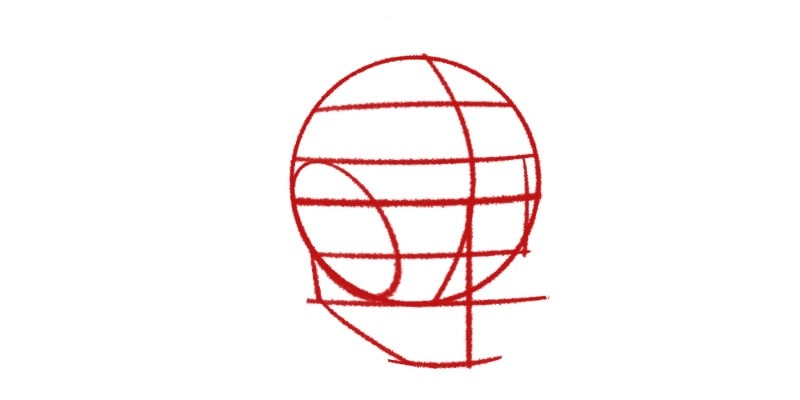
Step 4 – Draw The Eyebrow And Mouth Guideline
With the oval shape done, we can now find two important guidelines.
Draw another curved line above that shape, passing through the circle.
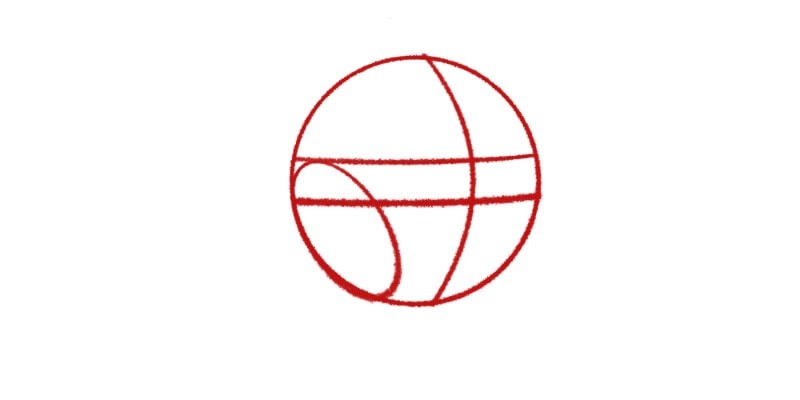
Underneath the entire circle, draw another similar line.

We now have three main guidelines for the facial features: the eyebrows, eyes, and mouth lines!
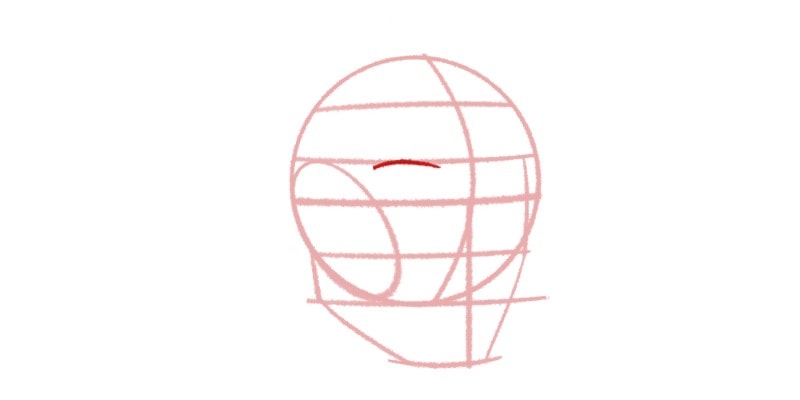
Step 5 – Find The Nose Guideline
To find the nose, roughly measure the distance between the eyes and mouth lines.
Now, find the middle inside that distance. That’s where your nose guideline will be, so draw it just like you did before, with a curved line.

All we are missing now is the bottom of the chin.
Step 6 – Draw A Vertical Line And Find The Chin
For the chin, draw a vertical line, continuing the vertical guideline you drew at the beginning.
Then, again, check the distance between the eyes and the nose. You can check the same distance between the nose and mouth.
You will use that same measurement to find the chin. Once you do, draw another guideline!
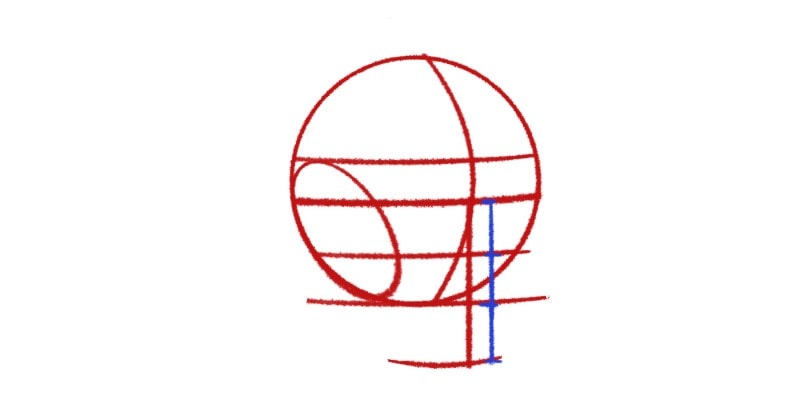
As you can see, everything between the eyes and the chin is at the same distance from each other.
This is a good face drawing tip to remember where everything goes and be sure your face proportions are right!
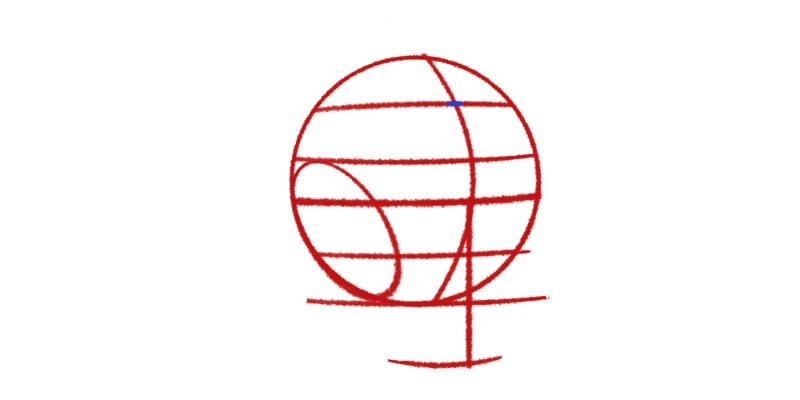
Step 7 – Find The Hairline
To finish the top of the head, let’s draw the hairline.
To find it, roughly find the center that goes from the eyebrows to the top of the head.
That’s where the hairline is going to be.
Step 8 – Connect Everything
All we have to do now is connect everything, so the rest of the head is finished.
Draw a line, starting on the edge of the head, where the oval shape is, from the nose line to the mouth line.
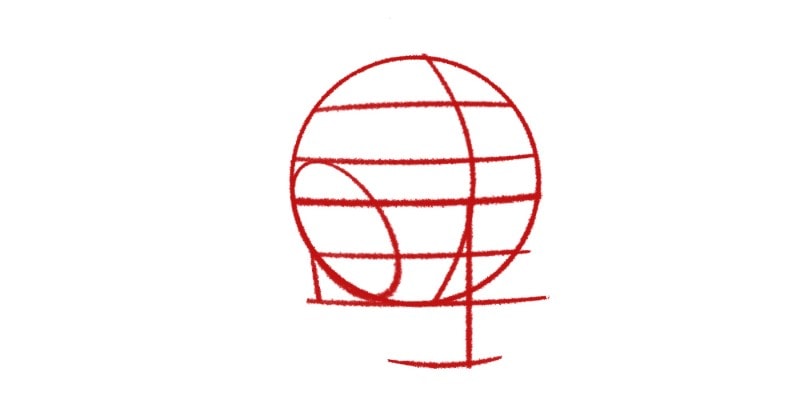
From there, draw another line that connects to the chin.
Draw a vertical line on the other side, from the eyebrow line to the nose line.
Finally, draw a slanted line that connects with the chin line!
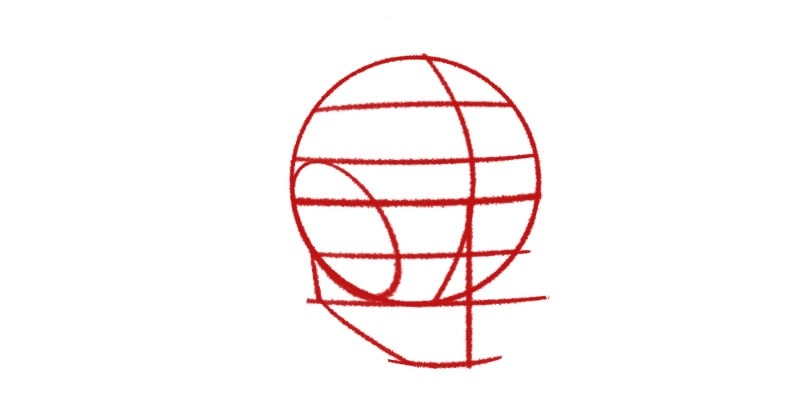
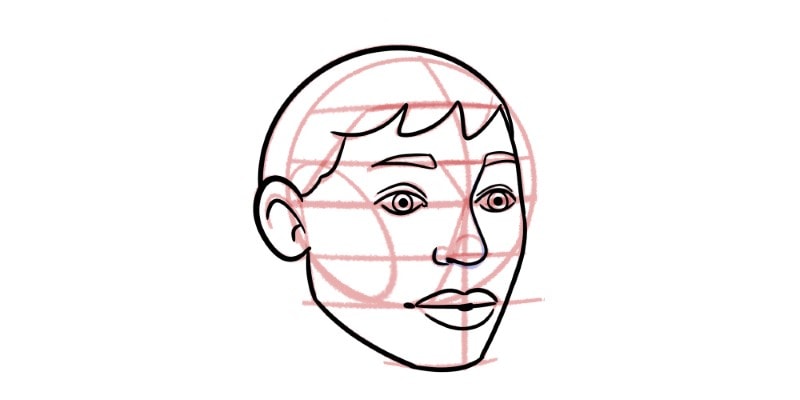
With that done, the head structure is finished, and we can now start drawing the facial features.
Add The Facial Features, One By One
It’s time to start our tutorial on how to draw the face from a 3/4 view.
When drawing facial features, most artists tend to have a preference for where to start.
Some start from the center of the face, where the nose is, while others start from top to bottom, for example.
Here, we will start from the top, with the eyebrows.
One thing that makes drawing the face from a 3/4 view more challenging is its perspective.
While from the front view, everything is well centered, in this view, some facial features are a bit hidden.
But we will go through everything, using simple and easy shapes for each part of the face!
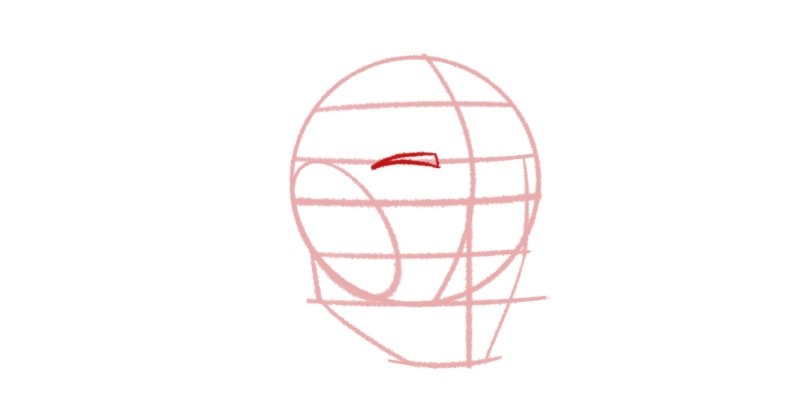
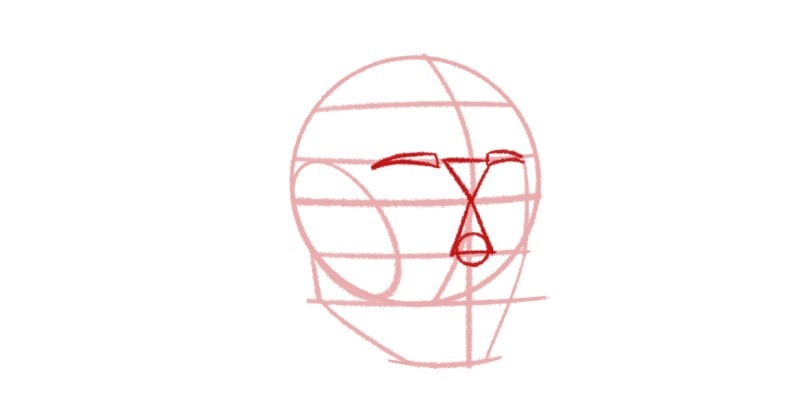
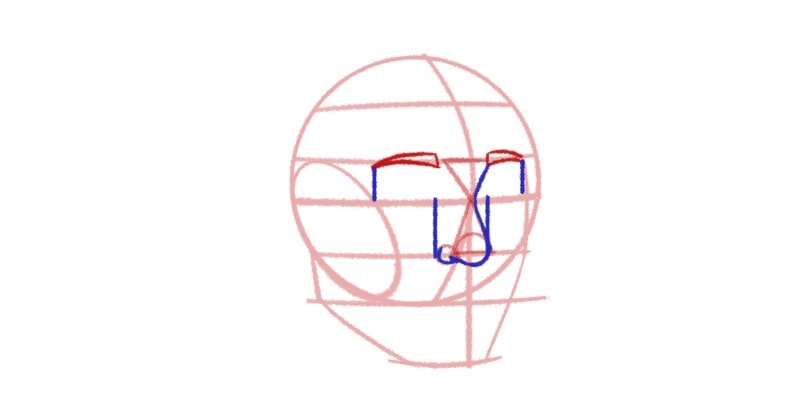
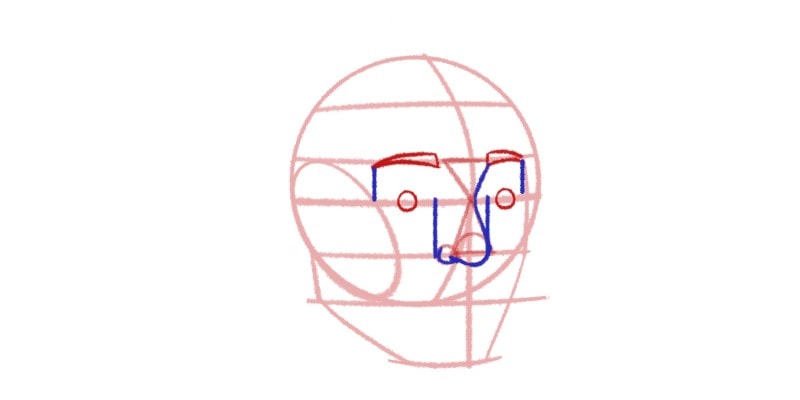
Step 1 – Drawing The Eyebrows
Go into the eyebrow lines. Start with one side of the face, the one that is more visible is the easiest one to start.
In our case, we’re starting with the left eyebrow.
Draw a curved line.
Then, starting from the line you just drew, draw a vertical line going upwards on the inside side of the face.
Now, connect everything by drawing another curved line. Like this:
Let’s go to the other side of the face and draw the other eyebrow.
Since the face is slightly turned, you can’t see the whole eyebrow, but the process is mostly the same.
Starting from the inside side of the face, draw a curved line until it reaches the edge of the face.
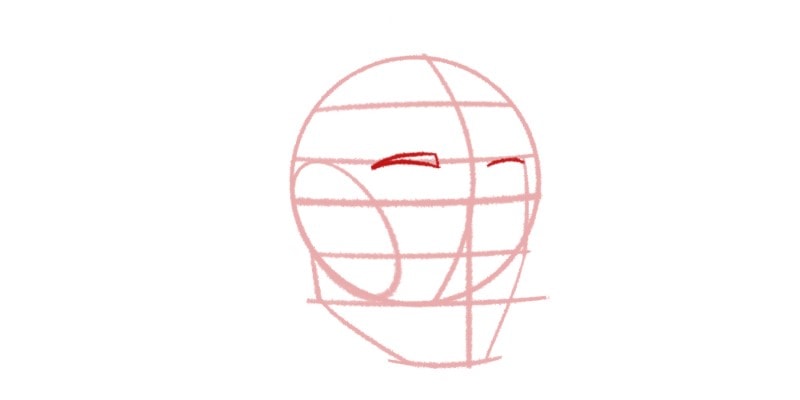
Again, draw a small, vertical line going up and then another curved line to connect everything.
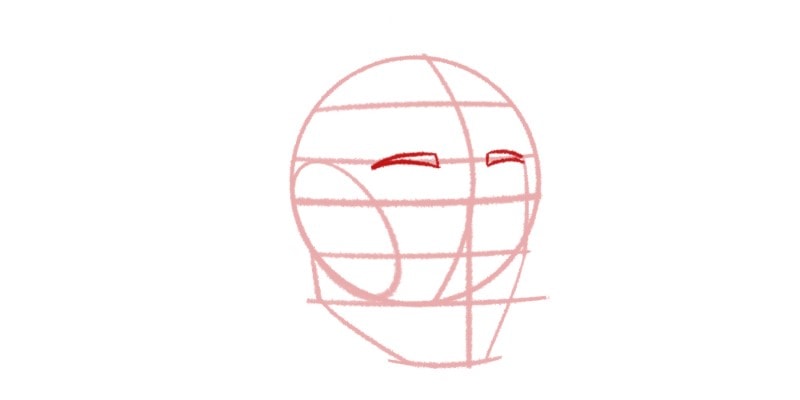
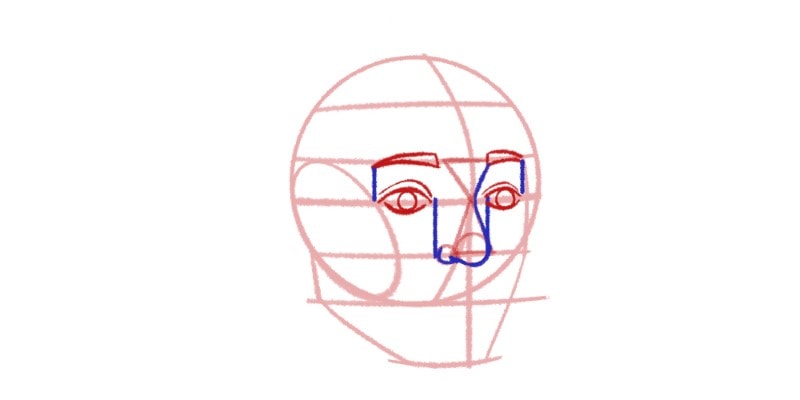
The eyebrows are done. We can now go to the next step: drawing the nose.
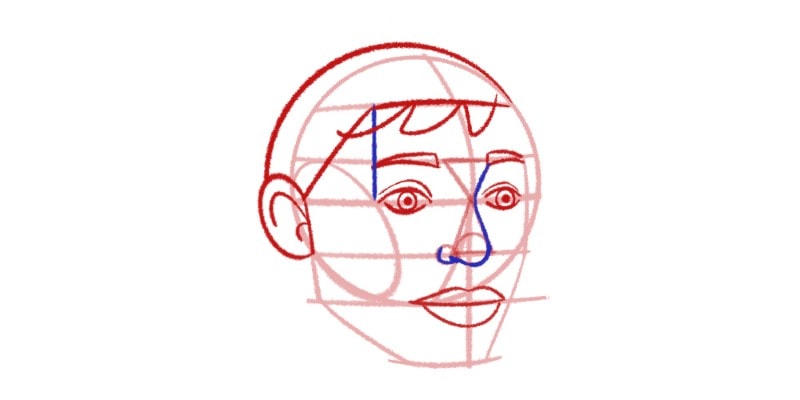
Step 2 – Adding The Nose
Drawing the nose before the eyes can be helpful since it will be slightly in front of one of the eyes.
By drawing the nose first, you’ll then better understand where to draw the eye.
For the nose, start by drawing a triangle for the bridge of the nose. This triangle starts at the eye line and ends at the nose line.
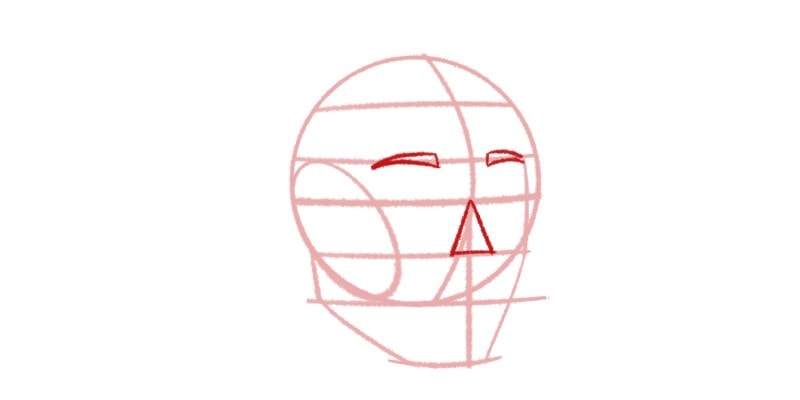
Now, above it, draw an upside-down triangle, touching the eyebrows.

Draw one circle at the base of the nose line. This circle should be centered on the base of the triangle.
Finally, draw a smaller circle, to the left, for the nostril.
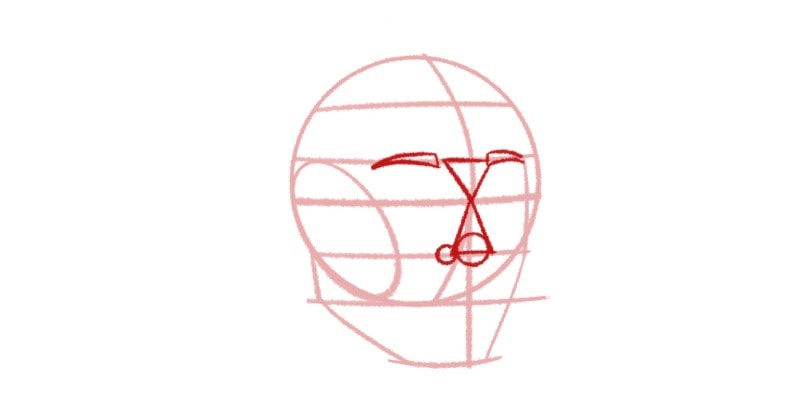
As you can see, the nose covers one of the nostrils. You might see part of it or none at all, depending on the angle.
You have all the lines you need, so all you have to do now is outline the shape of the nose!

Step 3 – Drawing the Eyes
It’s time to draw the eyes, which are generally the most challenging facial feature.
This is especially true when drawing them from a 3/4 perspective.
To make things easier, it’s a good idea to draw both eyes simultaneously. Draw one line on one side and the same line on the other.
This way, it’s easier to rely on muscle memory!
As for their position, they sit on the eye guideline, and as a rule of thumb, the inner corner of the eye is vertically in the same line as the nostrils.
The nostril on the right side is covered by the nose, so we use the tip of the nose as a point of reference.
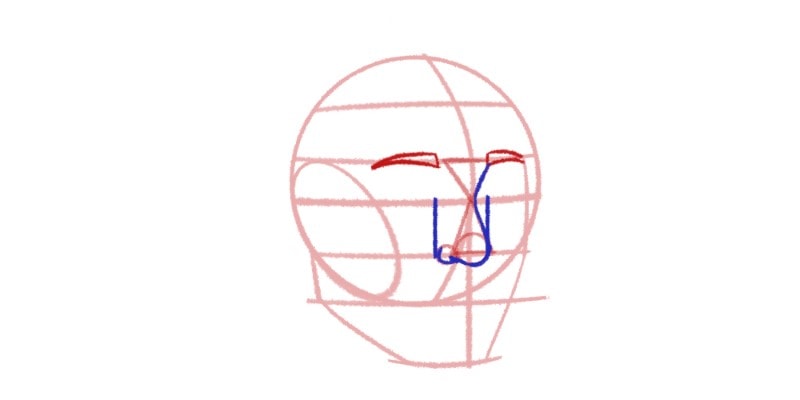
As you can see, it’s really close to the nose, but you can still properly see it. Depending on the angle of the head, the nose might start covering the eye.
As for the outer corner of the eye, it usually goes as far as the eyebrow.
Let’s draw our eyes. Between the guidelines, we just created, find their center. This is where the iris of the eye is going to be.
Draw one circle on each side of the face.
This is in case we’re drawing a person looking straight. If you want the portrait you’re drawing looking up, down, or to one side, the iris can be drawn somewhere else along this line.
Now, draw two curved lines: one for the upper eyelid and another for the lower one.
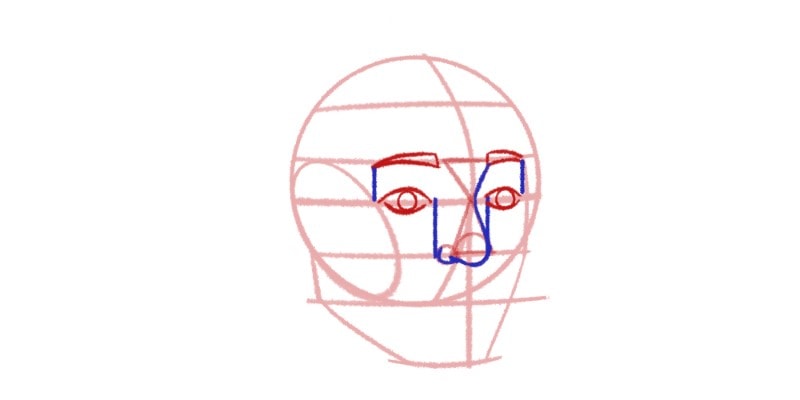
Slightly above the upper eyelid, let’s draw another curved line for the double eyelid.
Finally, let’s add a smaller circle, inside the iris, for the pupil of the eyes.

In this tutorial, we’ll leave the eyes very simple, but you can add more details to them!
Take a look at our other drawing tutorials, such as our Step-By-Step Guide On How To Draw Eyes.
Step 4 – Drawing The Mouth
For the lips, again, some guidelines will be helpful. From the center of the eyes, draw a vertical line going down until it reaches the mouth line.
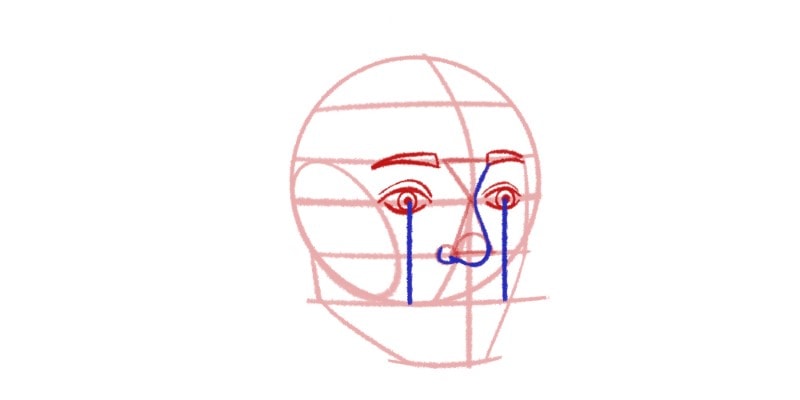
Now we know how far the corners of the mouth go!
In this perspective, depending on how thick you draw the lips, they can cover the right corner of the mouth.
Let’s start by drawing a horizontal line along this distance. This is the center line of the mouth.
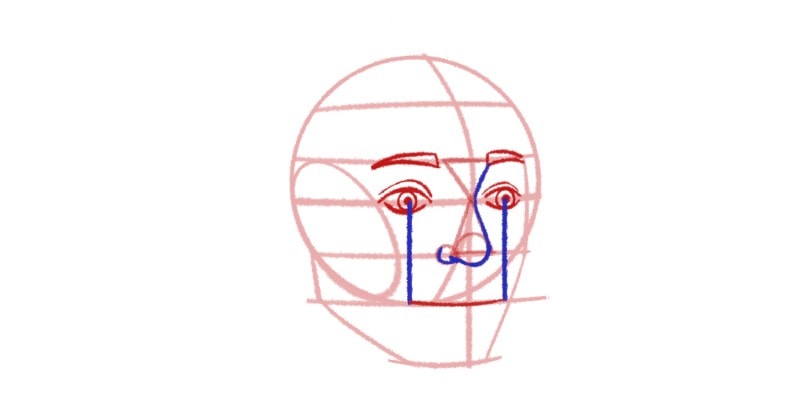
For the upper lip, draw a wavy line starting on the vertical line until it reaches the corner of the mouth.
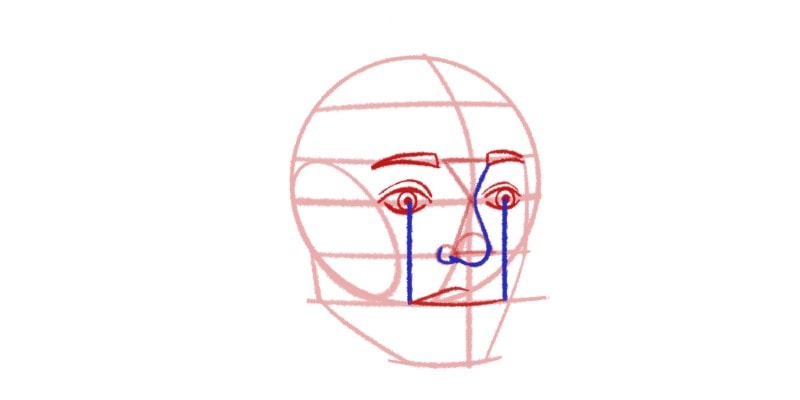
Repeat the same for the other side.
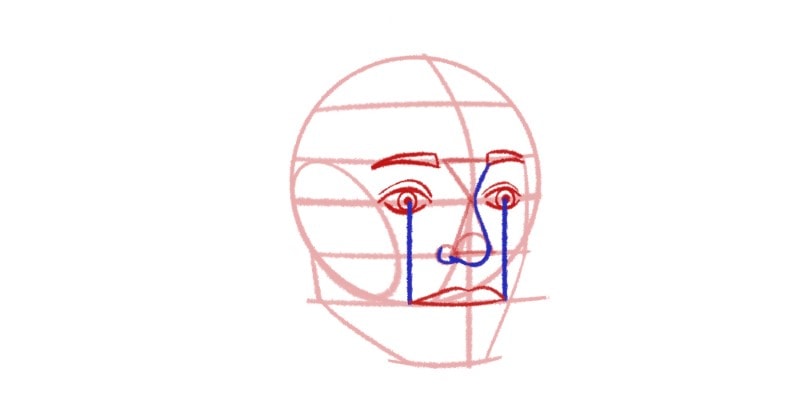
For the lower lip, draw an arched line from one corner of the mouth to the other.
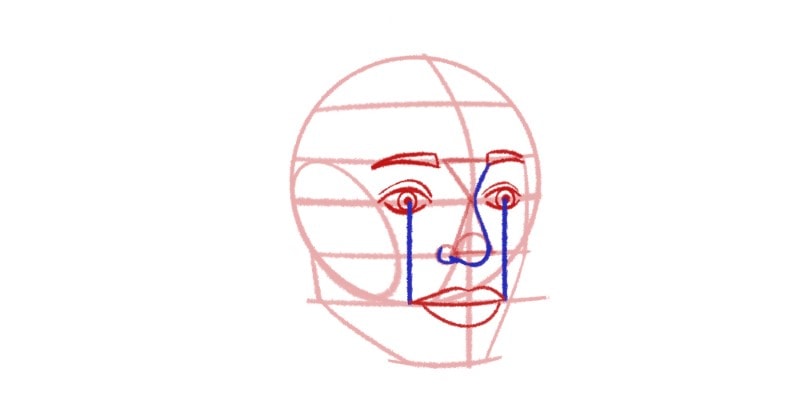
These shapes can be as big or small as you want, depending on the style of the lips you want to draw!
Again, we’re keeping our lips very simple here, but you can see our Lips Drawing Tutorial for a more in-depth guide.
Step 5 – Adding An Ear
Finally, all we are missing is the ear when it comes to the placement of the facial features.
The ear is placed on the edge of the head and goes slightly beyond it.
As for how tall it is, the ears generally are as tall as the eyebrow guideline and won’t go below the nose line.
Again, this is just a general rule, and it all depends on the person you’re drawing, imaginary or not!
So inside those lines, let’s draw a half-heart shape. The curved side is turned to the left side.
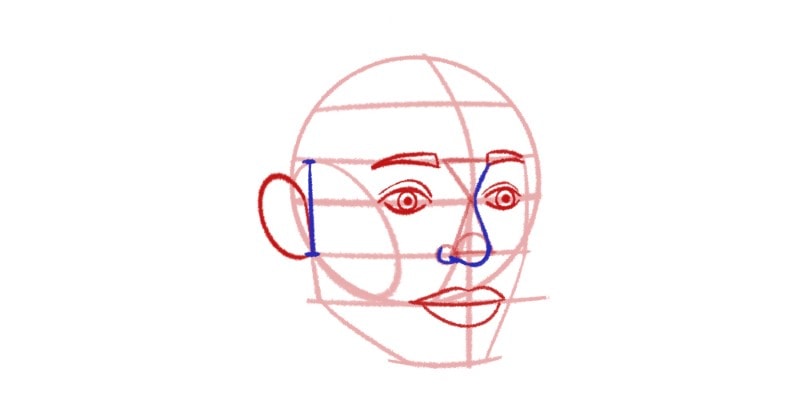
Now starting from the straight line, draw an arched line for the rim of the ear.
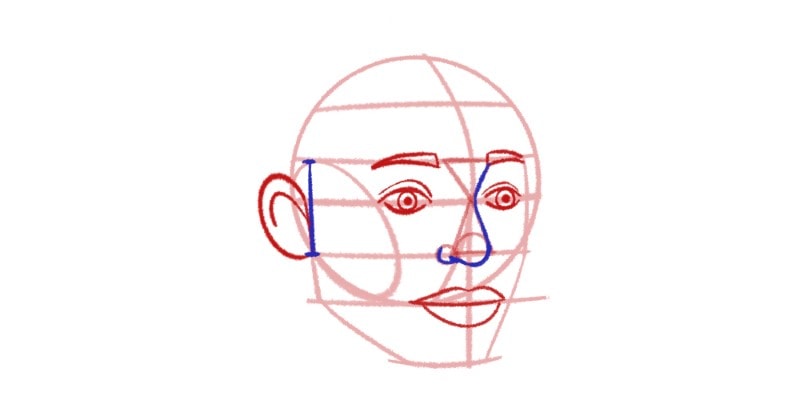
To finish, draw another round line for the tragus of the ear. This line starts in the same place as the previous line.

If you want to draw the ear in a more detailed way, take a look at our Step-By-Step Ear Tutorial.
Bonus: Click here to learn to draw an Elf Ear!
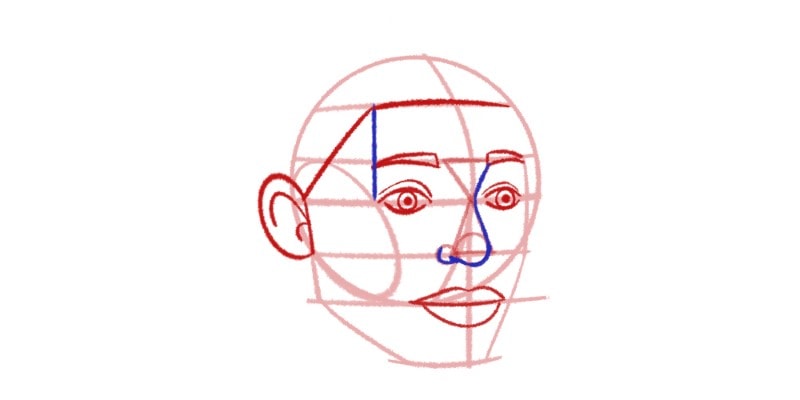
Step 6 – Drawing The Hair
This is mostly a bonus, but you can now draw the hair if you want.
There are many different hairstyles you can draw. Not only that, but drawing hair can be quite challenging.
So, let’s keep it simple!
We already have the hairline. Let’s first finish drawing the hair area, so we know where it starts and where it ends.
Elongate the vertical line we drew for the outer corner of the eyes until it reaches the hairline.
From there, draw a slanted line that connects with the ear.
Alright, now we can draw a simple hairstyle. So it doesn’t overlap too much with the face, let’s keep it short.
A bit above the top of the head, draw a big, arched line around it.
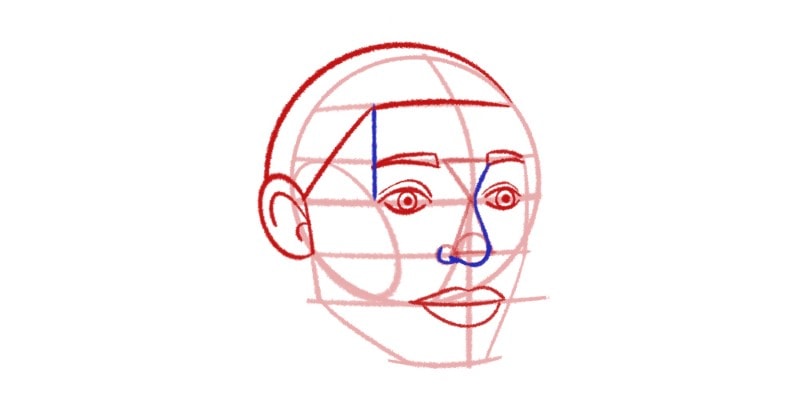
Now, along the brow, draw some wavy lines for the fringe.
Draw just one more wavy line for the side part of the hair, and you’re done!
Your sketch is finished. Remember that depending on the angle you’re going for, the view of the face might be different.
However, the method is the same!
Following all these steps, you can easily draw faces from 3/4 views. All you need is some practice.
You can keep it as a sketch and practice all these steps until you feel confident about your studies.
Or, you can go to the next step and finish your drawing!
Step 7 – Clean Your Sketch
Now that everything is placed in its right places, it’s time to clean your sketch.
Go over all your lines and outline everything, minus the extra guidelines you don’t need.
Take your time and experiment with different tools in this step.
This is also a good opportunity to fix anything you feel needs fixing. Repeat each line as many times as you need until you get the hang of it.
Whenever you’re happy with your drawing, you can start again and practice more.
And that’s how you draw a 3/4 view face step by step! If you’re looking to draw the face from other angles, check out my article:
And as always:
Keep on drawing!
Patricia Caldeira is the main writer here at Don Corgi. She's an art teacher with over 20.000 happy students across many platforms and courses!
Enjoy your stay and as always:
Keep on drawing!
")
")

