A good thing about drawing eyes from the side view is that you only need to draw one of them.
However, the shapes we use to draw them are quite different due to their perspective.
In this tutorial, we will simplify the whole process by breaking it down into simple and basic shapes so you can easily draw an eye from the side view!
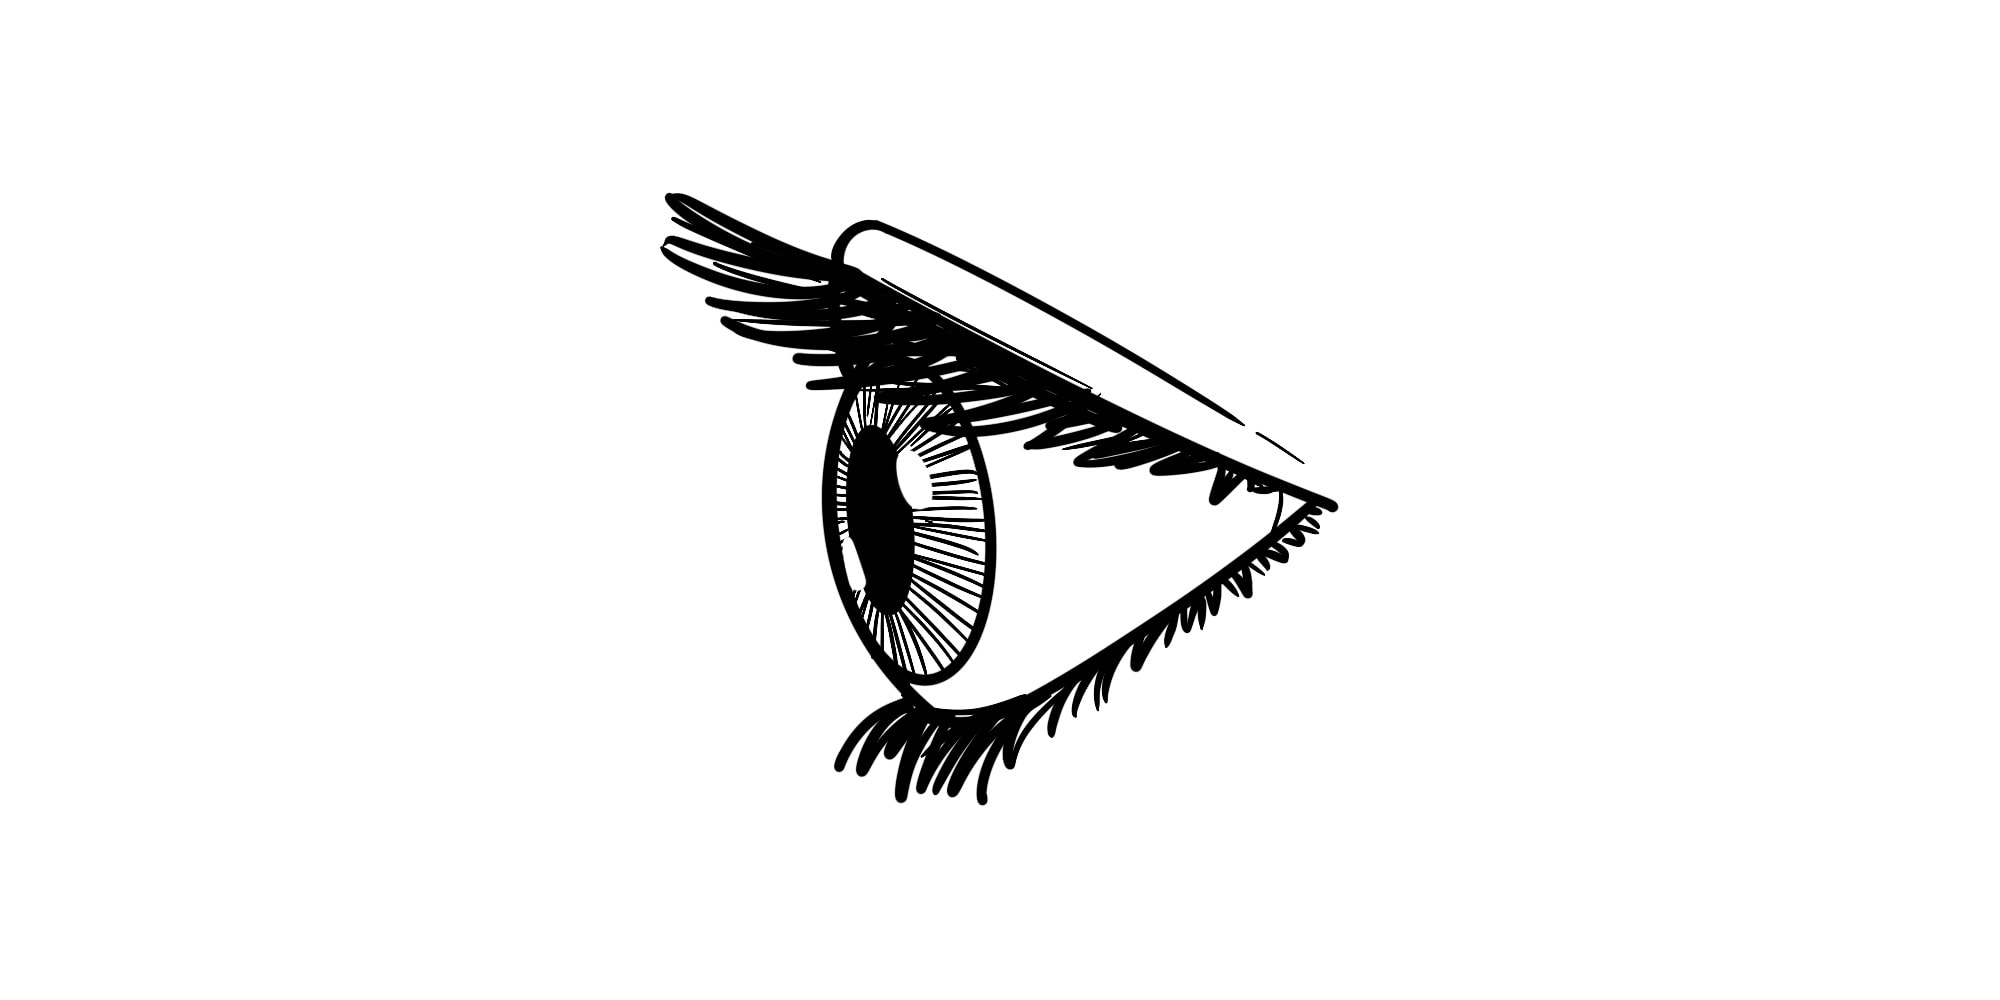
Table Of Contents
- 1 Step 1 – Start By Drawing A Circle
- 2 Step 2 – Draw Two Slanted Lines For The Eyelids
- 3 Step 3 – Add A Small Circle For The Iris
- 4 Step 4- Inside The Iris, Draw Another Circle For The Pupil
- 5 Step 5 – Draw The Double Eyelid
- 6 Step 6 – Add Eyelashes
- 7 Step 7 – Clean Your Sketch With New Lines
- 8 Positioning The Eye In The Head From A Side View
Step 1 – Start By Drawing A Circle
The first step when drawing an eye in any position is to start with a circle for the eyeball.
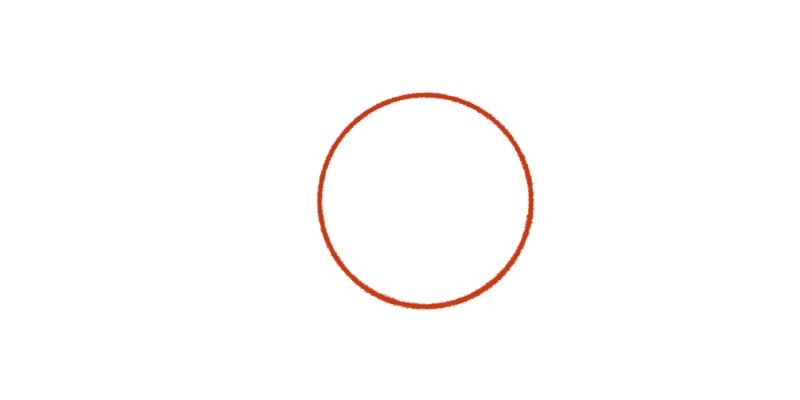
This is your base for drawing an eye, and it can be as big as you want, depending on your canvas.
However, suppose you’re just starting to practice drawing realistic eyes.
In that case, I recommend drawing the eye, with no other facial feature and big enough to fit every detail without becoming confusing.
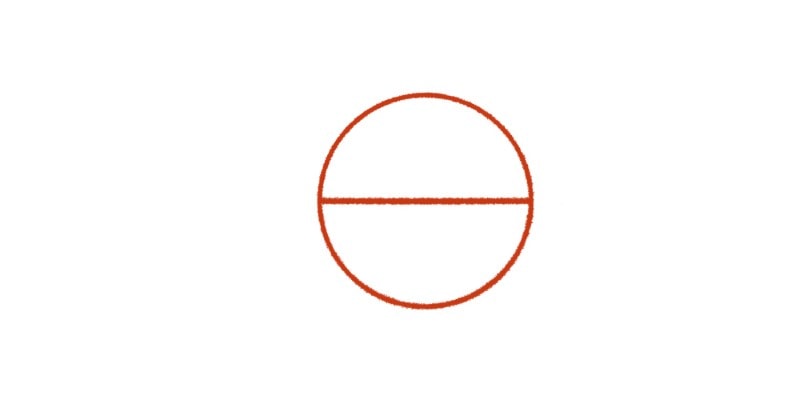
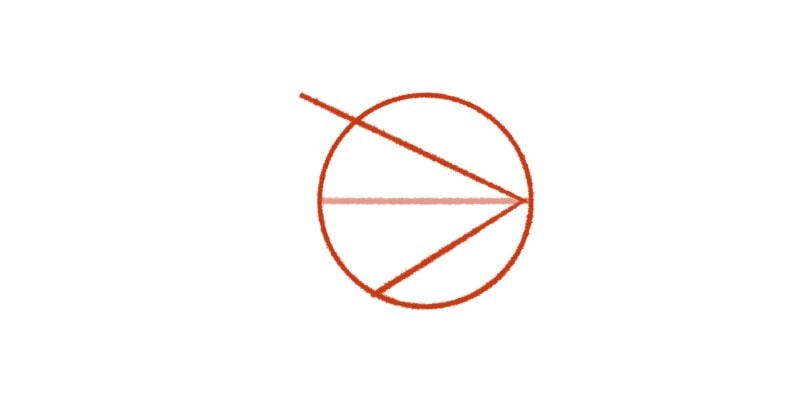
Step 2 – Draw Two Slanted Lines For The Eyelids
Roughly find the center of your circle and draw a horizontal line.
This line doesn’t need to be perfectly centered but will serve as a guideline.
Now, starting on the right side of that line, draw two slanted lines on the edge of the circle.
One goes down until it reaches the left edge of the circle, while the other goes upward and slightly beyond the circle area.
Step 3 – Add A Small Circle For The Iris
On the edge of the right side of your circle, draw another one, but smaller.
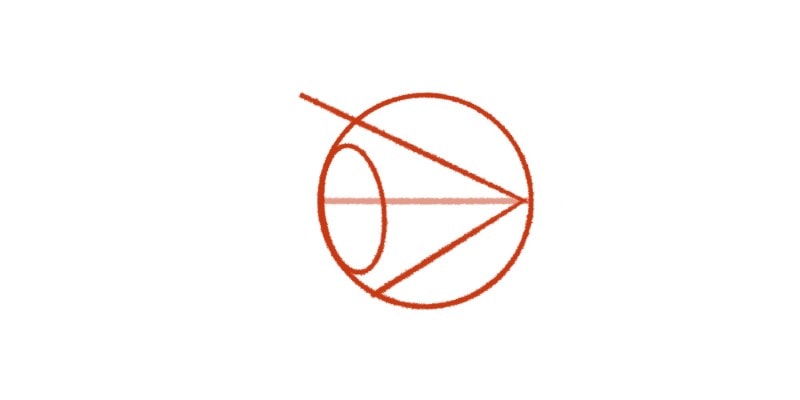
This is your iris. However, as you can see, it’s not a perfect circle, as you would draw in a front view.
When seeing the eye from the side, you’ll notice that the iris appears slightly squashed and oval.
Another thing to consider is where the eye is looking. If the eye is looking to the front, this is where you draw the iris.
But you can move the iris to the side as if it’s looking directly at us!
The basic shapes are all the same. The only thing that changes is the position of the iris in the eye.
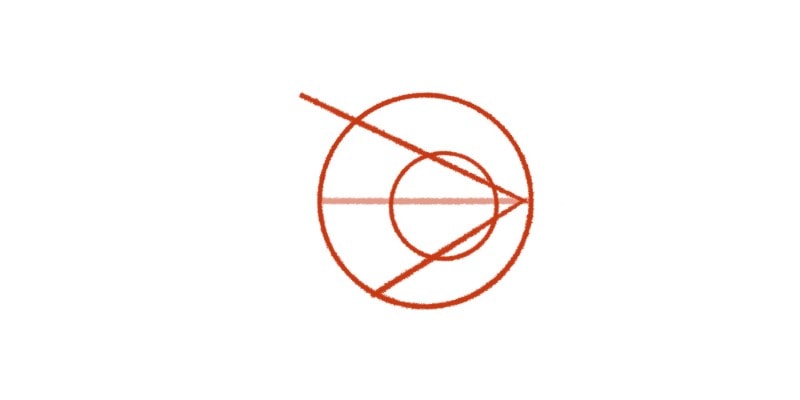
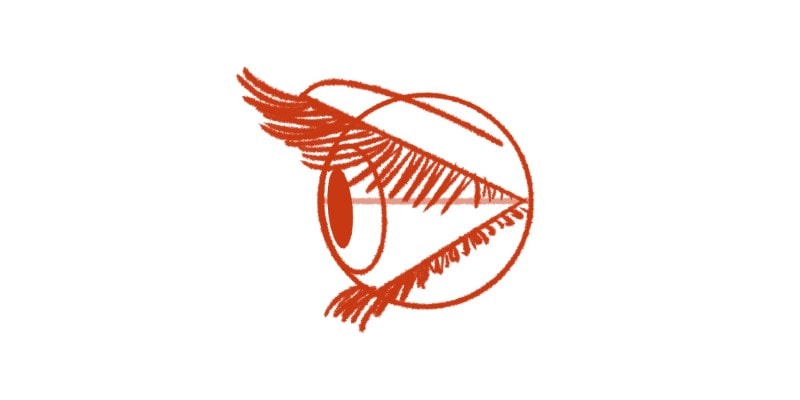
Step 4- Inside The Iris, Draw Another Circle For The Pupil
Inside the iris, draw another, smaller oval shape for the pupil. If you want, you can fill it with a dark shade!
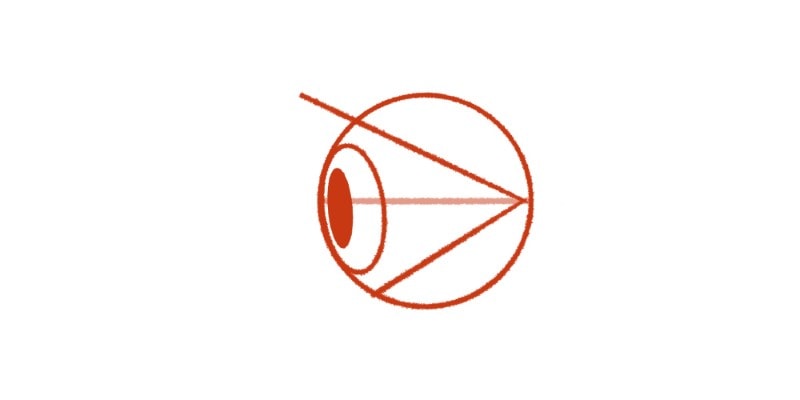
The main shapes needed to draw the eye from the side view are done. Now, all you need is to add some details.
Step 5 – Draw The Double Eyelid
For the double eyelid, draw a curved line above the upper eyelid.
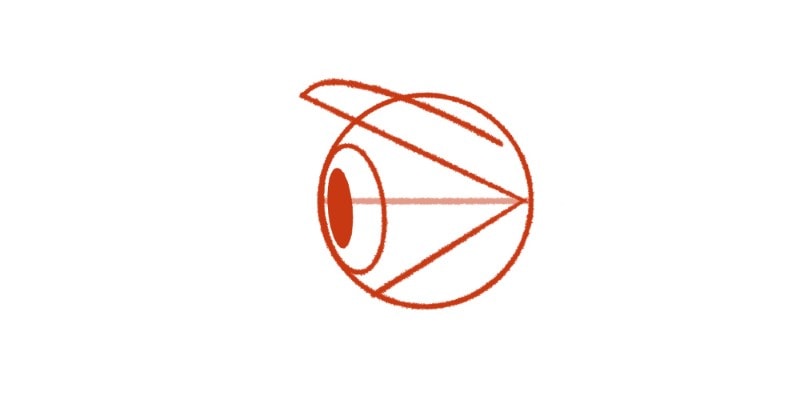
Although it gives more depth to the eye, you can skip this step if you’re going for a very minimal and cartoony style.
To gain knowledge and learning, I still recommend you follow this tutorial’s steps until you feel you get the hang of it.
Then, you can start experimenting!
Step 6 – Add Eyelashes
Start in the upper eyelid and draw short, quick strokes along that line for the eyelashes.
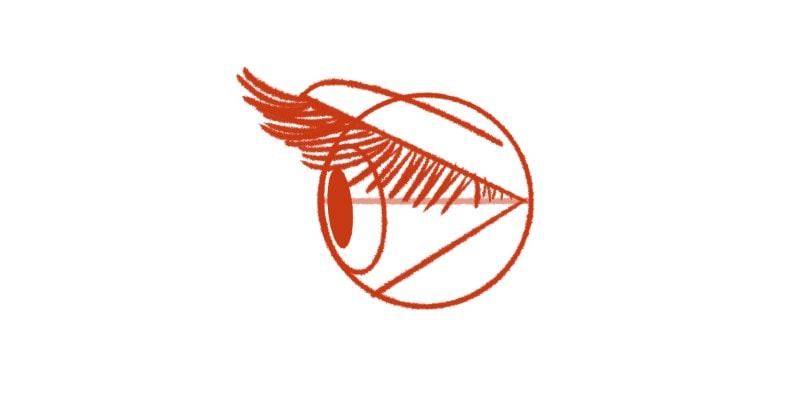
These are somewhat curved, especially at the front.
You can draw fewer and shorter strokes for the bottom eyelid since the bottom eyelashes are very small.
With that done, your sketch of an eye in the side view is finished!
Remember that you can simplify most of these strokes. This usually makes the character’s eye look cuter!
You can also try drawing different eyelash styles.
Step 7 – Clean Your Sketch With New Lines
You can now clean your sketch so your eye looks more realistic.
Go over all your lines, fix anything you feel needs fixing, and render it as you want.

You can leave your drawing with simple line art or blend in some shadow and value.
It’s totally up to you!
If you’re still not confident in your sketch, you can follow this tutorial repeatedly and practice the sketch phase as much as needed.
Once you’re happy with the results, you can clean your sketch!
Positioning The Eye In The Head From A Side View
Now that you know how to draw the eye from a side view, you’ll need to learn where to draw it in the face.
Generally speaking, the eye is drawn almost on the edge of the face, right below the eyebrow.
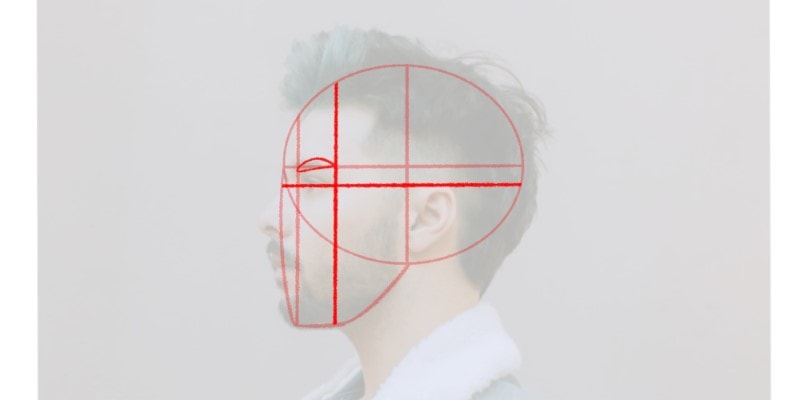
Drawing the side view of a portrait requires a few more steps, but breaking it down into simpler and smaller shapes makes things easier!
Now, you can either keep practicing your eyes or check out other drawing tutorials, such as Drawing The Face From The Side View!
Or learn How To Draw Eyes From The Front View.
Keep drawing and have fun!
Patricia Caldeira is the main writer here at Don Corgi. She's an art teacher with over 20.000 happy students across many platforms and courses!
Enjoy your stay and as always:
Keep on drawing!


")
