When drawing eyes, the eyelashes can be the most challenging feature to draw.
The eyelashes look like they’re all over the place, so it can be hard to get them right.
This drawing tutorial will follow a step-by-step format filled with images so you can easily follow each step and become a pro at drawing eyelashes!
Table Of Contents
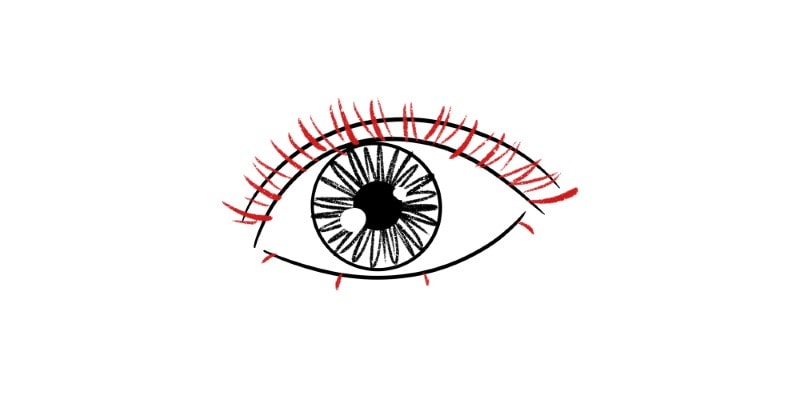
Step 1 – Add A Few Strokes Along The Eyelids
When drawing eyelashes, it’s good to break them down into smaller steps instead of drawing small and random strokes along the eyelid.
Therefore, I like to divide the eyelid into 4 or 5 parts first. We do this by drawing about four strokes along the upper eyelid.
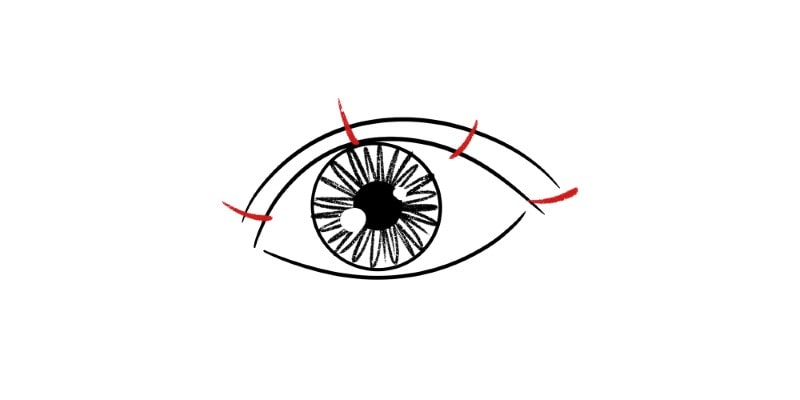
These strokes should curve according to the eyelashes’ direction. If you look at a portrait photo or your own eyelashes, you’ll see that their direction changes along the eyelid.
So we do the same with the shape of the lash in our drawing!
Afterward, we can do the same thing for the lower lashes.
Although, the strokes should be shorter this time than the upper eyelashes.
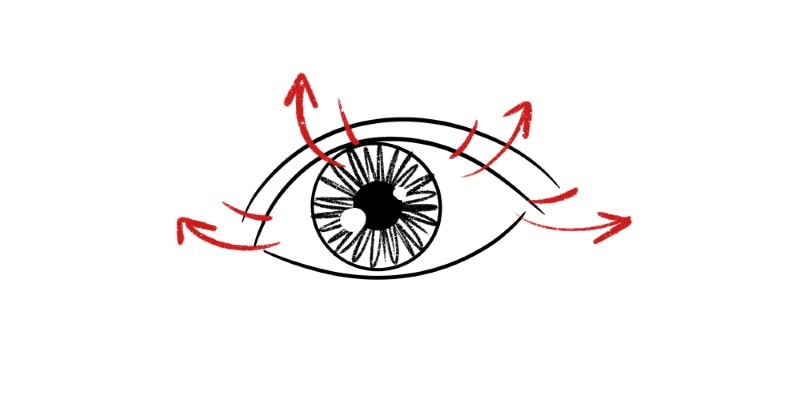
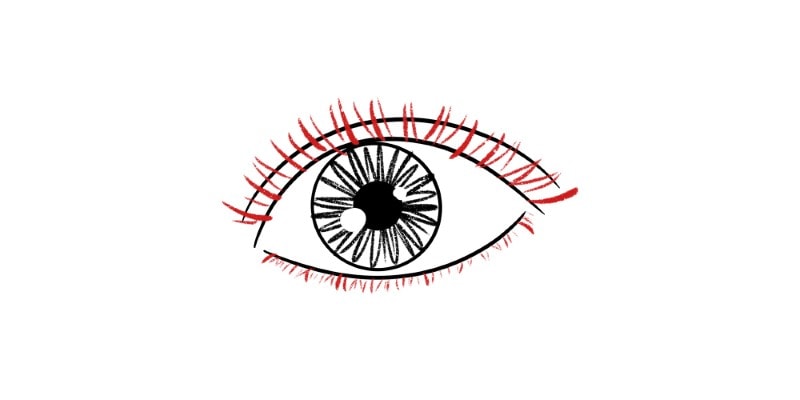
Step 2 – Fill In The Gaps With Quick Strokes
Now that our eyelids are divided into smaller sections, it’s time to fill each part with more lashes.
Following the planned direction, fill each section with several quick, long lines.
Very the size and even spacing of each stroke, so it appears more organic.
This is also the time to decide how long the eyelashes should be. Some people have long lashes, while others have them shorter.
So draw them according to your preferences!
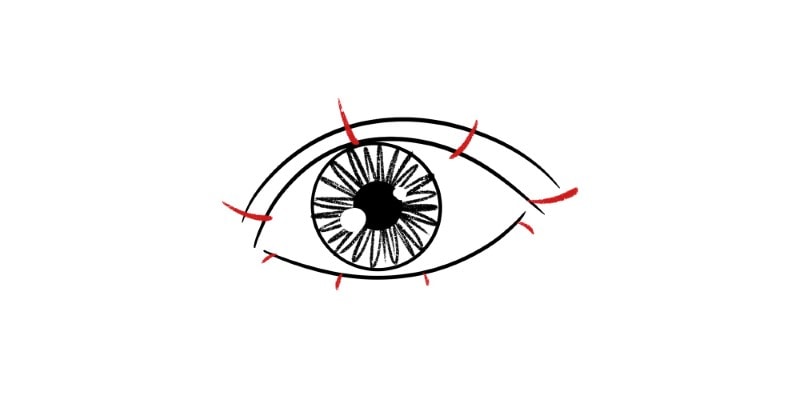
Step 3 – Add A Few Unique Strokes
Even though we varied our lashes size and spacing, we still need more variety to them.
So go ahead a draw a few unique lashes. You can even connect these with some of the lines you drew previously.
Very often, eyelashes are intertwined, making them look like they’re glued together.
You don’t need to overdo this step, but adding a few of these lashes creates some uniqueness to your eyelashes drawing a feels less mechanic.
With that done, you can now repeat the same steps for the lower eyelashes along the bottom eyelid.
Just don’t forget that these tend to appear shorter and maybe even fewer in number!
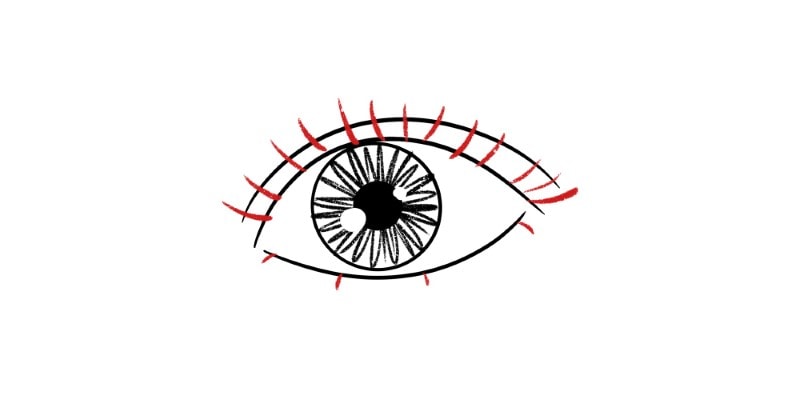
Step 4 – Clean Your Sketch With New Line Art
Our sketch is finished, so it’s a good time to review all your lines.
Just go over your previous lines by drawing eyelashes with single strokes.
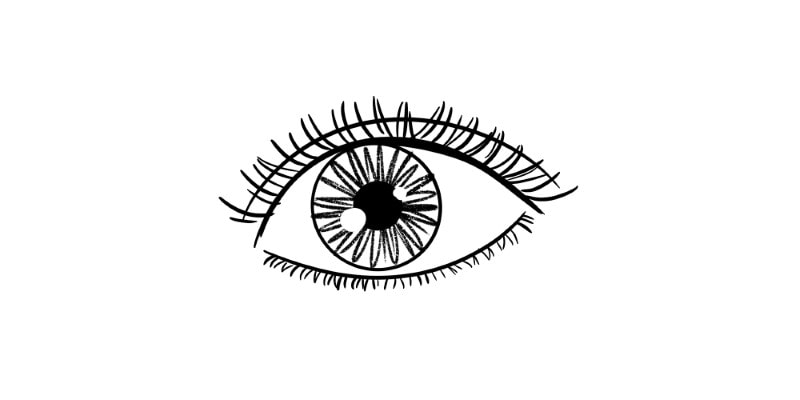
We’re just cleaning our sketch here, but this is also a good time to check for anything that might need fixing.
If you notice that some lines have a weird perspective, redraw them until they feel right.
Instead of cleaning your sketch, you can also continue practicing your eyelash drawing. Go over every step we have done so far until you feel confident in your sketches!
Once you’re ready, you can clean your lines with new and finished line art!
And if you’re looking for a complete guide on drawing the Eyes, click here.
Eyelashes Direction And Perspective
As mentioned before, eyelashes are set in different directions.
The eyes have dimensionality. The eyeball is made from a sphere instead of a circle.
Therefore, we need to consider that 3D shape when drawing the lashes.
If you look in a mirror, you’ll notice the eyelashes change direction along the eyelid. For example, when drawing the eye from the side, the eyelashes shape will change a lot.
So, when drawing them, instead of drawing them in random curves or straight lines, think of their direction.
It starts from the inner corner of the eye, passes through the middle where their curvature is almost imperceptible, and ends in longer, arched lines.
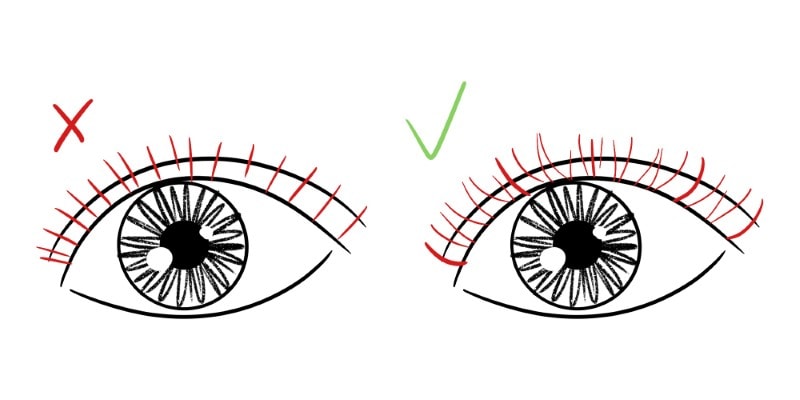
Depending on the eye’s perspective, the eyelashes change directions as well!
For example, if you’re drawing an eye from the side, the eyelashes’ direction will also change due to the perspective.
One thing you can do, to better understand how eyelashes work is to find a good picture of the eyes. You can even take a picture of your eyes, so it’s easier to have the exact perspective you want.
Lower the photo’s opacity on your computer or any other device.
Finally, draw the eyelashes on top of that picture. Follow and draw the lashes according to what you see on your reference image.
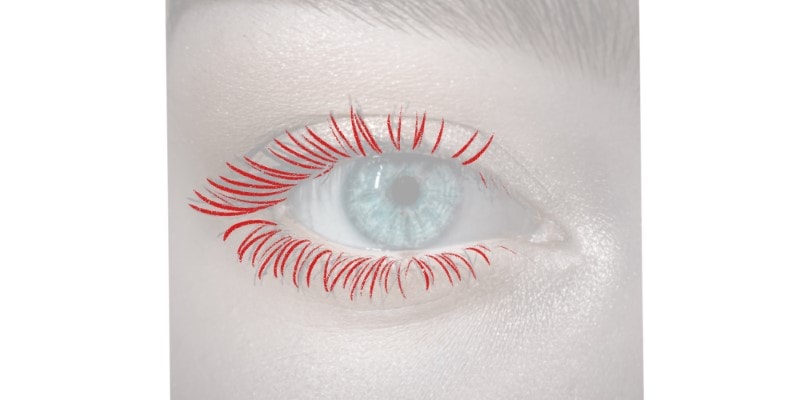
This way, you’ll be able to understand the eyelashes’ movement and direction better and gain some muscle memory on how to draw them!
Drawing Different Styles Of Eyelashes
There are many ways you can draw lashes.
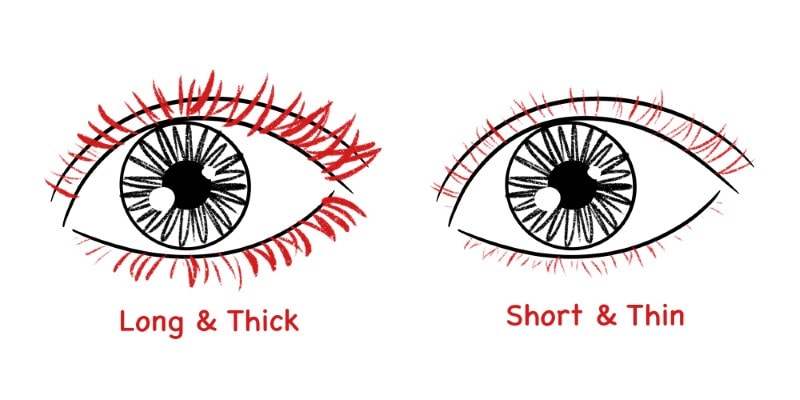
You can choose a more realistic approach but choose between drawing them long or short.
People are different from each other, including their eyelashes. Plus, by using make-up, one can elongate their eyelashes as well!
Drawing Eyelashes Of Different Sizes
Practice drawing eyelashes of different dimensions. Another option is drawing to make it look like mascara has been applied to the eyelashes.
In this case, they’d appear even more elongated and thicker!
Another option is to try a simpler style, where the eyelashes are drawn in one stroke.
Starting thin in the inner corner of the eye, following its direction, and ending with a thicker curved line!
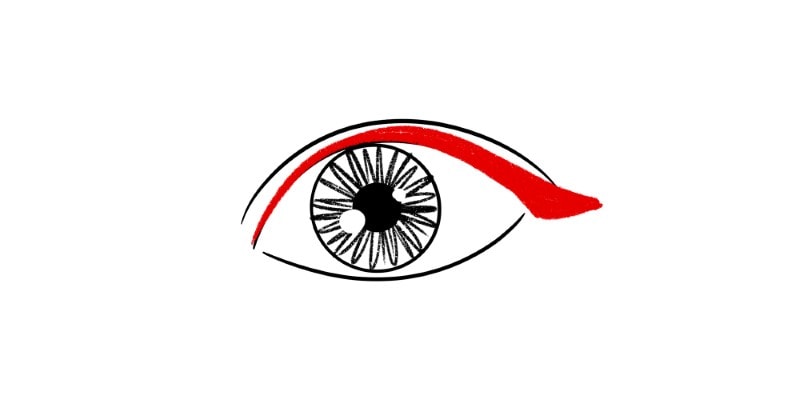
This minimal and simplistic approach would work well in a particularly feminine character/portrait.
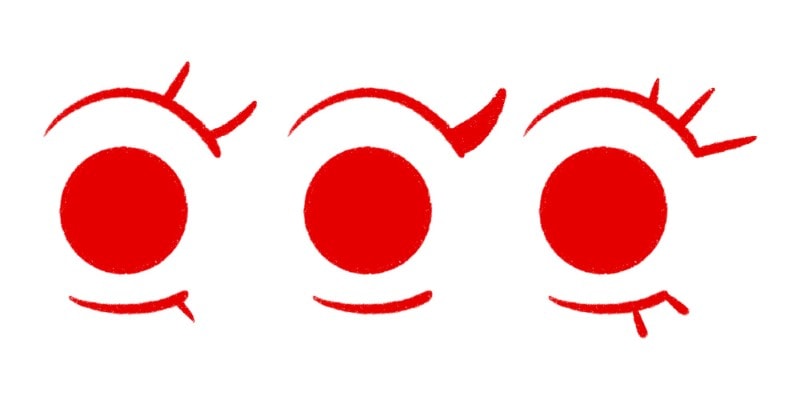
Drawing Cartoony Eyelashes
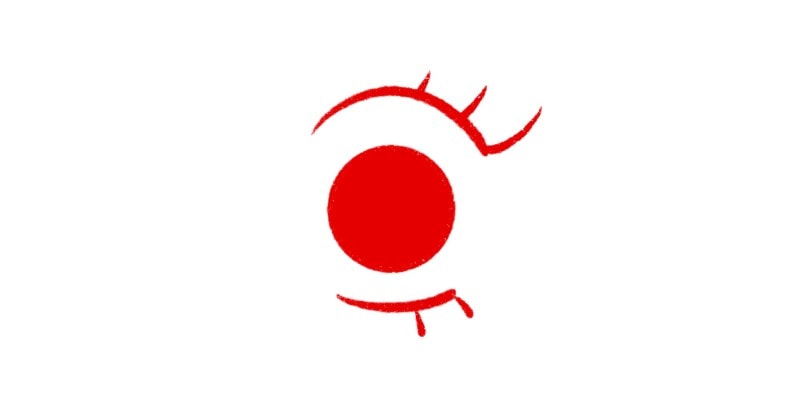
Finally, you might want to draw cartoony or cute eyelashes. Here, you can keep them very simple using very few strokes.
Start by drawing the eyes with a simple circle.
Now, above the circle, draw a curved line. Draw another similar line below the circle.

You can find a complete guide on drawing Cute Cartoony Eyes here.
As for the eyelashes, you can now add 2 or 3 slightly curved lines to the lines you drew.
How many eyelashes you add is up to you and your preferences, so have fun!
Experiment with the eyelashes’ thickness, height, and even their shape. Try different things and see what you like best.
You can draw someone’s eyelashes in many ways, and it’s possible to be creative with them, so take your time discovering new ways of drawing them!
And if you want to get better at drawing the whole face, check out my guide on Drawing Faces!
Patricia Caldeira is the main writer here at Don Corgi. She's an art teacher with over 20.000 happy students across many platforms and courses!
Enjoy your stay and as always:
Keep on drawing!
")


