Lines are harder to draw than they look like. But if you find yourself with varying line quality in your drawings, it’s time to fix that problem!
So if you want to make your lines to make sense, you’ve come to the right place.
It did take me some time to figure out how to draw lines with good quality though. It all comes down to loosening up and having confidence in your lines.
Here are the best tricks and tips on improving your line quality, but before that…
Table Of Contents
- 1 Line Quality Definition
- 2 Exercises to Improve Your Line Quality
- 3 Tips To Improve Your Line Quality
- 4 2. Quick Strokes Are Better Than Slow Lines
- 5 3. Start With Light Lines, Refine Later
- 6 4. Redraw All Your Lines As Many Times As You Need
- 7 5. Messy Lines Can Work
- 8 6. Use the Right Paper
- 9 Summing it Up
Line Quality Definition
Line is one of the visual elements of art. And line quality basically means how good those lines looks and if they have a good structure.
Very simply put, a line is a path left by a moving point. You put your pencil down and move it all the way to the other side of the page.
The point you initially made on your paper, then you moved it, and now you have a line!
Now, there are many ways you can use lines: to create the outline of a shape, to create texture, movement or patterns and even to create shade, like hatching and crosshatching!
Your lines don’t need to appear as actual lines at all.
You can make lines through drawing the eyes in a specific direction, for example. By drawing them in a specific direction, you’re creating an invisible line, that the viewer can sense and follow.
The line quality can influence the emotion of your painting and this can be done through the line weight (whether they’re thick or thin), their direction and movement (horizontal, vertical, curved, angular, straight, etc).
So how to do all of these things? Continue reading!
Exercises to Improve Your Line Quality
There are many exercises to improve the quality of your lines.
Here are 4 of my favorites, that I highly recommend.
They are fairly easy, quick and fun to do, so let’s start:
1 – Draw Straight Lines
I know this might sound very obvious.
But to help you relax your hands and to make smoother lines, this is a good way to do it. If you’re just starting to draw, I’d say to start with a simple exercise like this one.
To start, pick up your sketchbook or a piece of paper and start drawing horizontal lines.
Fill up a page with these.
For the next page, let’s try vertical lines. Now, all we are missing are some diagonal lines.

Once you’re done with all of these, fill up a page or two with a mix of horizontal, vertical and diagonal lines.
When you feel more confident in your lines, you can even start to play with the pressure you apply to your lines.
Draw thicker lines, uniform lines, thinner lines, just draw a whole bunch of different types!
This might sound pretty straightforward, but the truth is that it isn’t that easy to draw straight lines.
Once you get used to drawing and after some practicing, this will come very naturally for you.
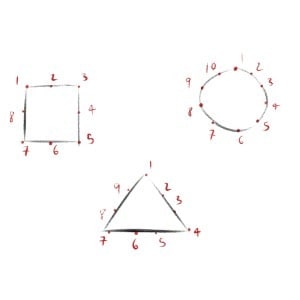
2- Connect The Dots
I’m sure as a kid you’ve done this and if you love doing this as much as I did, I have good news for you: there are connect the dots books for adults!
You can either get one or you can pick up a sheet of paper, draw some dots on it and connect them.
This is basically a variant of the exercise above, but here you can control better your speed and accuracy.
You can start with two dots only, very close to each other, then start to make those dots farther from each other as you practice.
Next, you can start doing simple shapes, like squares, triangles and even circles.
As for books, I got this one: “Ultimate Dot to Dot: Extreme Puzzle Challenge” (check it on Amazon) a while ago and I loved it. It has quite some complexity, you can use different colors and it’s so relaxing!
Perfect for you to improve your lines and to help you loosen up while drawing.
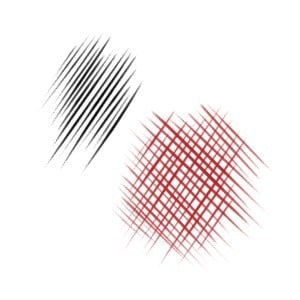
3 – Line Shading
This is also a very simple exercise to improve your line quality.
And it’s mostly an exercise to control your line weight.
In a sheet of paper, draw a rectangle or any basic shape.
Now fill it with parallel lines. Apply more pressure and make the lines darker on one side and lighten it up as you move.
Think of different light sources and apply the shades accordingly.
Try different speeds as you get more used and confident of your lines.
4 – Gesture Drawing Exercises
This is the perfect line quality exercise if you find all the above too repetitive and dull.
Even though I find these exercises interesting and important, I understand they’re not for everyone nor the type of exercise I’d like to spend more than 10-15 minutes on.
Gesture drawing is a series of very fast sketches you do while observing a subject, usually with people.
Someone will pose for 1 to 2 minutes, and you have to draw that pose in a short time. I have created a complete guide on Gesture Drawing that you can check out here!
You can either look for drawing classes near you or places online where you can practice gesture drawing. I usually use Sketch Daily for this.
You can choose if you prefer to draw male, female or both figures, what kind of poses and the time.

If you’re interested, my Figure Drawing Course starts with some gesture drawing and I talk about it more over there.
So join me, add your own projects and if you have any doubt, I always try to get back at my students as fast as possible!
This is a great exercise for you to loosen up your lines.
You have to be quick and not focus on perfection. It’s not supposed to be perfect. Your objective here is to be able to capture the movement and the main shapes.
I highly recommend this exercise, if you need a boost of confidence in your lines!
Tips To Improve Your Line Quality
Now lets go over the exact tips to improve your line quality fast.
1. Loosen Up To Improve Your Line Quality
I’ve mentioned this quite a few times here and this is the most important tip I have to give you.
As you get more confident with your drawings and lines, you’ll notice that you’ll be more relaxed while doing them. You’ll also notice that the more relaxed you are, the smoother your lines will be.
Don’t think too much about how perfect your lines are going or need to be.
This will have the opposite effect you want. The more you think, the harder your lines will look. This will leave you frustrated with your own art and we don’t want that.

That is why I really like gesture drawing.
You sit down, clean your mind and just draw quick, simple shapes or lines. There’s no need to even draw a whole shape!
You can just draw simple line of actions, that translates the movement you’re seeing in the pose.
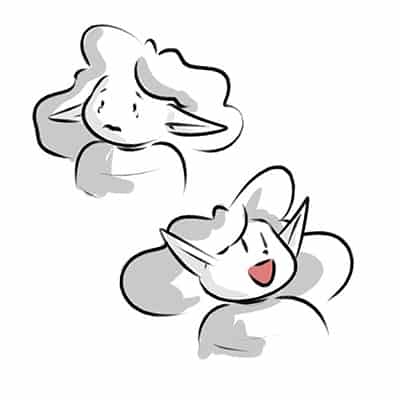
Start with and where you feel more comfortable with.
Be it with very simple straight lines, mindless doodles or even drawings that are inside your comfort zone. Even if it’s a simple smiley face or a stickman!
Practice until you feel that you and your lines are loose and confident.
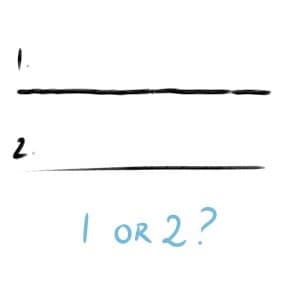
2. Quick Strokes Are Better Than Slow Lines
You can try this yourself: draw a line, very slowly.
Just a straight horizontal line, from one edge of your paper to the other.
Done?
Alright, now do the same, but very quickly and smoothly.
The first thing you might notice is how darker and rigid the first line will look and how dynamic and even with a subtle weight difference the second looks.
Aside from that, the first will probably look a bit trembly and the latter very straight.
Which one do you prefer?
At times, doing slower lines might be necessary, for more control and accuracy.
But remember, that for the most part, you’ll want to draw faster and smoother lines. This will give your drawings more movement and dynamic.
They’ll look more natural and less rigid and forced.
Once again, this all comes down to you relaxing and loosening up. So practice a lot of fast lines, to help you be more comfortable with drawing them.
Remember that picking up your pencil too hard and being too rigid while drawing is not good for your body.
You don’t want to be in pain, so do take care of yourself and take breaks often!
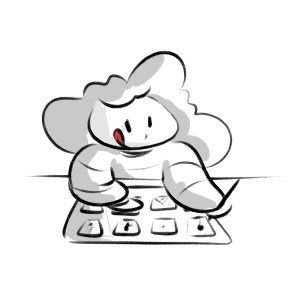
3. Start With Light Lines, Refine Later
Before going for your final piece, you usually start with sketching.
Sometimes several, small sketches, called Thumbnails. Then you choose one of them, draw a bigger sketch and then you prepare for the final version.
When you’re sketching, details are secondary.
You want the overall feeling and emotion, the composition and the proportions.
Start with light and soft lines.
You don’t need to do very clear and refined lines right now. And if you work with quick, soft lines, it will be easier to fix and erase mistakes you might want to change.
Once you got your sketch done, you can start painting or drawing on top of it.
The sketch lines won’t be too visible to cause confusion while working, but visible enough for you to trace them.
When you’re finished with your drawing, you can very easily erase them, if needed!
4. Redraw All Your Lines As Many Times As You Need
When trying to improve your line quality, you need to practice a lot.
It’s all about practice.
If you don’t like how your lines are looking, erase them and start again.
This is mostly something you do when drawing digitally. You can erase and redo a hundred times that same line that isn’t going as you want it to go.
This starts happening less and less as you practice and get used to how you like to draw your lines.

But until then, you might have a lot of trial and error to do.
Your line quality won’t be perfect at the start.
It’s normal for this to happen.
If I’m having a bad drawing day, this will be especially frustrating! Be patient and practice a lot. Lineart can require a lot of patience on your part, but it’s all part of the process and it’s worth it at the end!
As for drawing digitally, one bonus tip I can give you is to turn the stabilization of your pen brushes on!
This will help you a lot at the beginning.
The stabilization works almost as a cane for your lines. It will help soften your lines, so they don’t look too trembly.
“But doesn’t it count as cheating?”, you say.
Absolutely not! It’s a tool.
And what are tools?
A device to assist us, to make certain actions easier.
So, if a tool exists and it helps you, use it!
5. Messy Lines Can Work
People have different art styles.
All of them are valid and can work. Don’t worry if your lines are too messy. You can use that to your advantage!
Work with what you have and improve from there.
If I look at some of my art from 2 years ago, I had a very clean style. My lines would be very polished and perfect.
Now, there’s a bit of chaos in them.
This can be good. I feel that the way my lines look now, give more emotion to the paintings.
The way you work your lines can transmit different emotions and ideas.
Don’t worry too much about perfection. That’s not how art works.
Art isn’t perfect. It’s emotion, color, and movement.
Do what you like and what makes you happy. Be it a very clean style or a messy one. One isn’t better than the other; they’re just different.
Above all, have fun with your style and lines!
This will help your line quality much more than anything else.
6. Use the Right Paper
Depending on the medium you’re using, you might need different paper.
For example, watercolors need very thick paper. Most markers as well.
But if you’re drawing with inking pens or colored pencils, then something with about 90-100gsm is enough.
If you don’t use the right paper, your lines and drawings might not look the best. For example, if you like to work with watercolors, and use a paper too thin, it will start to wrinkle.
You might make a hole in it even! You won’t want that.
Your lines might be also more difficult to control if the paper itself won’t behave properly with the medium you’re using.
So if you’re using wet mediums, go for very sturdy surfaces, let’s say 300gsm paper. This way you can draw freely and make your lines more easily.
This also comes down to taste.
I always prefer to use thicker paper. I rarely use something with less than 110gsm.
I like the attrition I feel while drawing and if I need to erase something, there’s fewer chances of the paper wrinkling or tearing.

Try out different kinds of paper, different textures, and sizes.
See what works best for what and what you prefer to use. If you need some recommendations about sketchbooks or paper pads, do check out my recommended tools!
Hint: I’m a huge Canson fan!
Summing it Up
Don’t rush it. You’ll have varying line quality in your drawings, but your line quality will eventually improve.
Be patient and practice a lot. Start with very simple and basic exercises.
This might seem to you like a waste of time, but I can vouch for them by 100%!
I did these exercises, I’ve been through them and after that, I’ve seen the huge progress I made.
The goal of these exercises is not only to improve your line quality.
It’s to improve your confidence as well!
As you practice and as you get used to drawing your lines, you get more relaxed.
You will feel more confident and your lines will show that. They’ll look more determined and smooth.
Take your time, don’t think about perfection already.
Start small, take baby steps and improve little by little until you reach the perfection you’ve been aiming for!
If you’d like to know the ONE exercise I use to improve line quality, check out the video below!

And if you’re looking for more drawing exercises to improve your artistic skills, here are the Best Anatomy Drawing Exercises to do right now!
Patricia Caldeira is the main writer here at Don Corgi. She's an art teacher with over 20.000 happy students across many platforms and courses!
Enjoy your stay and as always:
Keep on drawing!


")