Editing your text in Clip Studio Paint is fairly different than other drawing software. When I first started to use Clip Studio this was one of the first things I noticed.
How can you edit your text in Clip Studio Paint? For editing your text in Clip Studio Paint, simply press the “T” button on your keyboard or go to the toolbar and select the tool that shows an uppercase “A”. This will open the text window and will let you create text layers and edit them.
But there’s so much more to editing text than what shows!
Changing colors, rotating, curving and bending text is something you can do in Clip Studio, and you need a few more steps.
For that reason, I wrote this guide to help you out: from simple editing of text to more complex transformations you can do to it.
Table Of Contents
Editing Text In Clip Studio Paint
Clip Studio Paint has very basic text editing. On the positive side, it is very simple to use.
On the other hand, it doesn’t have a lot of editing options. From a quick glance, it has very simple and basic options like changing colors, sizes of font, and, of course, fonts (like these free fonts right here).
It is worth mentioning that Clip Studio is mostly for illustration or to create your own comics/manga.
For this reason, text options will appear very different than they do in other software.
You can still do a lot of creative things with your text though! Just need to roam a bit deeper into the tools and options.
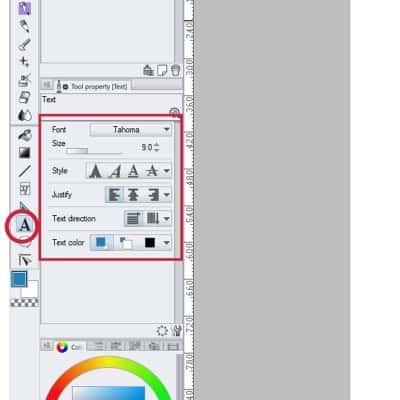
First things first: Simple editing of your text! When you pick the text tool, by pushing the “T” button on your keyboard or clicking the button with an “A” on the toolbar on the left, some options will appear right away.
You can choose the font of your choice, change the font size, and others.
If you need to change a bit of text in your textbox, it’s very simple. Like in any other software, simply hover the mouse on the letter you want to change and click on it.
Now you just need to re-input the text as you want.
You can also select specific parts of the text by holding the left button of the mouse and moving it until the text you want to change is selected.
This is very simple editing. You can select different parts of your text and give it different sizes. One box of text can have words with different fonts, sizes, styles, and even colors.

It can be very useful to use when you want to pull more attention to certain words.
This way, you also won’t need to make several boxes of text for each word.
Among other options, you can also choose the style for your text.
Let’s say your fonts don’t have bolded or italic options. (you might want a better font, like the free fonts I’ve mentioned in this article, but that’s beside the point!)
Well, Clip Studio can simulate these styles for you!
Right below the font size you have different style options like Bold, Italic, Underline and Strike Out.
Again, you can choose to apply these styles to just one word on your text box, or a specific letter. Simple select the bits you want to apply the style to and click on the option you desire!
How To Move Text In Clip Studio Paint
Moving your text in Clip Studio Paint is fairly simple as well.
Select the layer of text you want to move.
Now press the “K” button or click the button with a black arrow on the top of your toolbar. This is the tool you want to have active when moving anything on your opened file.
Now you can move your text to wherever you want.
This is not the only way to move your text though! While having the text tool active you can also move your text around while you edit it.
If you hover your mouse over the text box, you’ll notice a small black arrow appearing. Simply press the left button of your mouse when this symbol appears and you can move the textbox around!
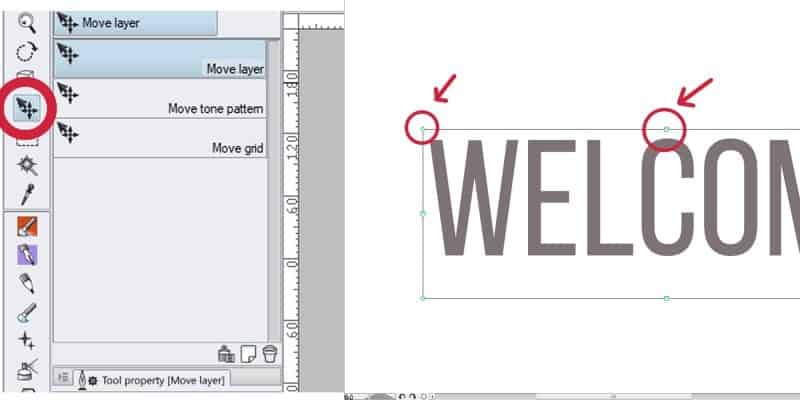
Another thing I want to mention here, very quickly is that you can also change the size of your text through the text box.
Notice the small blue squares and circles around the box?
You can use those to scale up or down your text.
This is another way of resizing your text. Personally, I prefer to just change the font size on the editing toolbar. But both ways work and you can just do what feels better for you!
Back to the issue at hand, it’s worth to mention that you can also justify the text on different sizes and even in which direction your text is.
Just like in any other software, you can align your text to the left, center or right.
Below the justify buttons, you can also choose if you want your text to appear horizontally or vertically.
These options are very useful when moving and presenting your text in the most pleasing and organized way for your work!
How To Rotate Text In Clip Studio Paint
You can rotate the canvas of Clip Studio Paint, as I’ve mentioned in this article here.
But unlike other software, you can’t rotate a text layer in Clip Studio.
This is rather unfortunate since rotating text is something we end up doing quite often.
I do, at least, and I don’t work a lot with text.
With that said, don’t feel defeated though! There are still ways to rotate your text!
Actually, there are 3 ways to go about it.
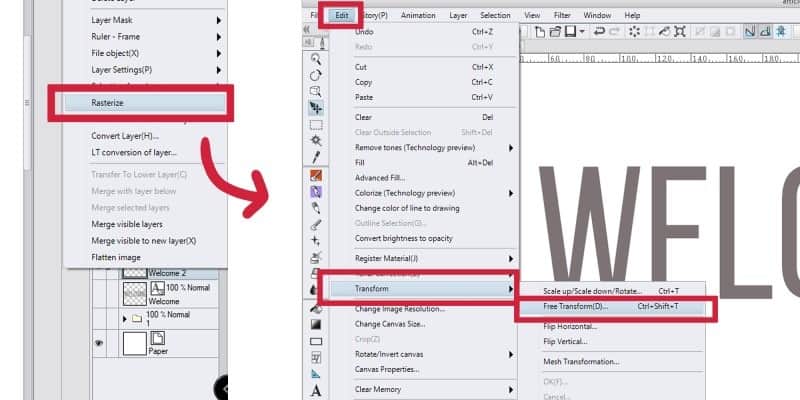
The first one is very simple: Select the text layer, right click on it and pick the “Rasterize” option.
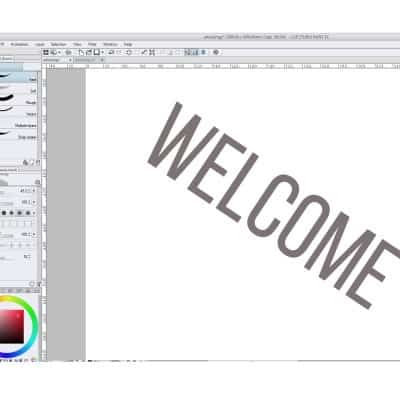
Now you can simply press Ctrl+T or go to Edit -> Transform -> Free Transform and you are free to rotate your text at will.
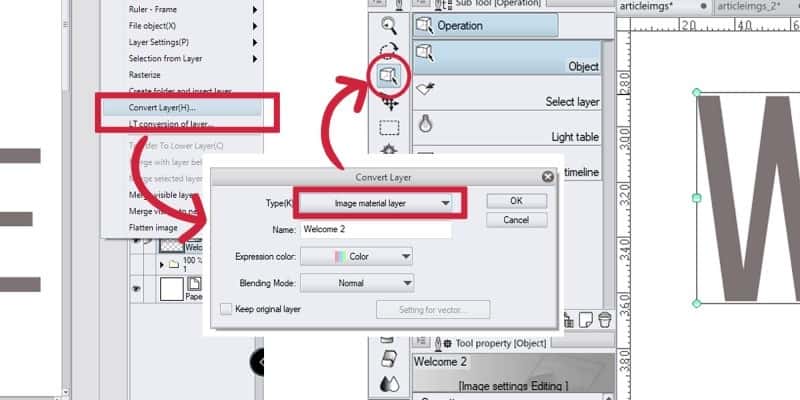
Another way to do it is to convert your layer. This second option is fairly similar to the later. Again, select the text layer you want to rotate, right click on it and choose the “Convert Layer” option. This will open a small window. Change the type to “image material layer”. Now choose the object tool and you can rotate your text.
The only difference between the first option and the second is that you don’t need to Free transform it every time you want to rotate your text differently.
You can just pick the object tool and rotate it. Both work and it’s up to which do you prefer. In a way, the second option is a bit less consuming if you’re going to be rotating your text many times.
There is a problem with using both these methods: you can’t edit your text layer anymore. That layer is gone.
Your text is now an image and you can’t change it’s font anymore nor resize it. By resizing this image, you’ll start losing its quality.
In short, these are options you take if you’re 100% sure your text is looking as you want and you won’t change it anymore.
Fret not, though.
For there is a third option that will allow it to edit your text.
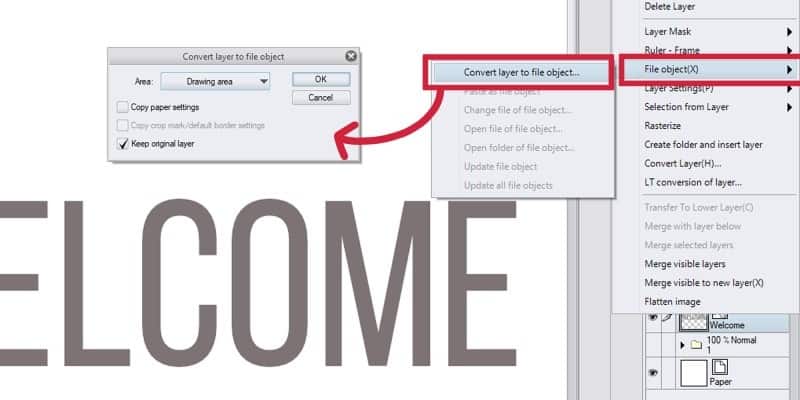
Again, right-click the layer text. Go to File Object and then click convert layer to file object. Save it with a name and in a place where it’s easy to find.
Now you can use your object tool and rotate your text freely.
If you do need to edit your text, open the file you just saved, change what needs to be changed and save it. When you go back to your main file, you’ll notice the text changed accordingly!
Clip Studio has weird ways to work with text, but once you know its ways, it gets very simple and automatic to you.
How To Curve And Bend Text In Clip Studio Paint
Now let’s go through 2 important parts of editing text in Clip Studio Paint:
- How to Curve Text In Clip Studio Paint
- How to Bend Tet In Clip Studio Paint
Again, sadly this is something you can’t easily do in Clip Studio Paint.
With rotating, you can still go your way around it and do it easily.
With curving and bending, not so much.
There is still a way to go about it though. It’s not the most optimized way to bend text, but with some time and patience, you can add a nice bending effect to your text.
For that, you need to rasterize your layer.
As we’ve seen before, you just need to right-click the text layer and select Rasterize.
Now go to Edit -> Transform -> Mesh Transformation. A box with several points will appear around your image.
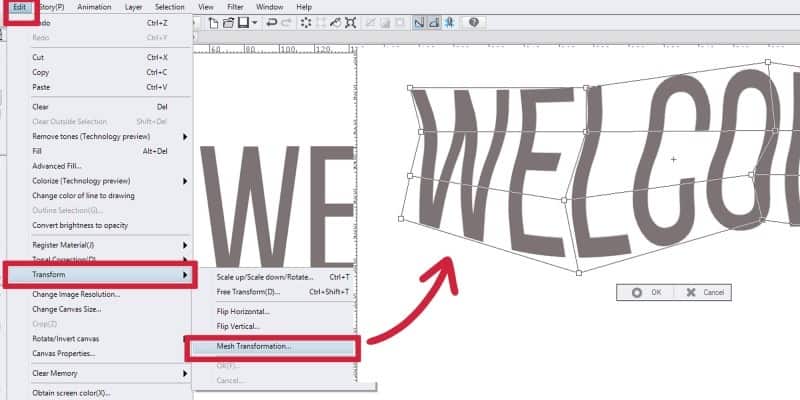
You can edit each of these points as you wish.
I have a complete guide on using Mesh Transform in Clip Studio Paint here!
It is not the easiest way to do it, but you’ll be able to manage some curve and bending on your text!
Another way to do this is by using another software to create the bended text and then import it over to Clip Studio Paint!
You can use Powerpoint or Photopea (which is a free online photo editor), curve the text, and export the file as PSD.
Then you just need to import it to your file where you want to curve text in clip studio paint!
How To Outline Text In Clip Studio Paint
Now let’s go over how to outline text in Clip Studio Paint.
Ok, so remember when I said that Clip Studio has very weird ways to deal with text?
This is another example.
If you use other software with detailed text editing, you know how intuitive it can be.
Again, Clip Studio isn’t made to work extensively with text.
So it’s normal that we see the text being treated like it’s an image.
With that said, it is possible to add an outline or border to your text in Clip Studio Paint and here’s how.
On the left, above your layer window, you’ll probably see another window called “Layer Property”. If it isn’t showing, simply go to Window ->Layer Property.
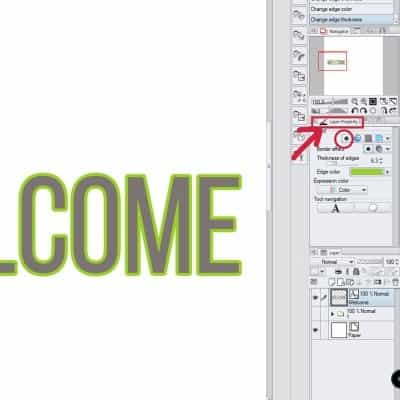
On this small window, you have several visual options that you can choose from. With your text layer select, click on the first icon, the one with a circle and a white outline around it.
Some options for your outline will appear, including how thick you want the outline to be and the color.
Play out with the thickness and pick different colors until you’re satisfied with the outline.
As you edit it, the changes will appear right away on your document.
Creating an outline to your drawings or text is fairly easy on Clip Studio and even fun.
It’s just a matter of finding these tools since they’re not as explicit right away!
How To Change Text Color In Clip Studio Paint
Changing Text Color in Clip Studio Paint is fairly easy, and don’t worry, there’s no need to rasterize layers and go through a lot of steps for it!
With the text tool selected, you can select the whole text or even segments of it and change it to any color you want using the color wheel or bar below it.
I mainly use the color wheel, but you can use and see the colors however you prefer.
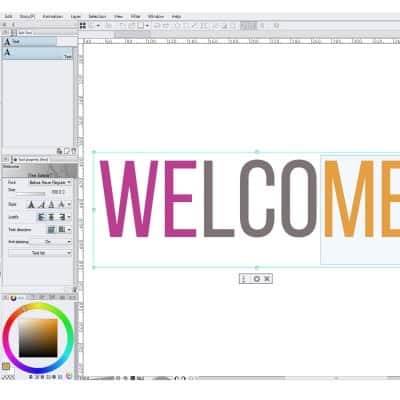
Clip Studio has different ways to show and pick colors and it all comes down to preference.
This is one way to change text color and the one you have the most control over since you can choose to add different colors to different letters or words in one textbox.
Another way to change color is by going to Layer Property, select the last option, the icon with a blue square on top of a white square.
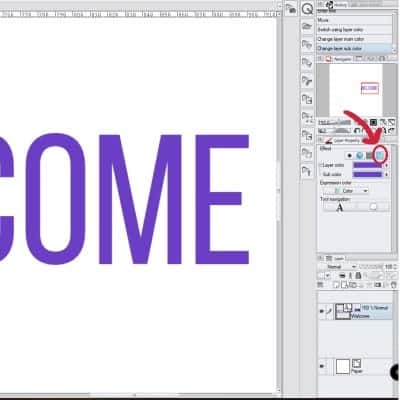
Now you can pick any color you want. The disadvantage of this method is that you’ll change the color of the whole layer.
If you want to change the color of the whole layer and have the whole text with the same color, the second method is faster.
However if you wish to have more control and want to have your text in different colors, the first method is preferable!
And if you want to level up your art, read this article and master color theory (for artists)!
Or check out some other Clip Studio Paint Tutorials here!
Patricia Caldeira is the main writer here at Don Corgi. She's an art teacher with over 20.000 happy students across many platforms and courses!
Enjoy your stay and as always:
Keep on drawing!

")

